Category: Uncategorized

  • Compress Video for Discord Free: Best Tools & Methods 2026

    Compress Video for Discord Free: Best Tools & Methods 2026

    Compress Video for Discord Free: Best Tools & Methods 2026

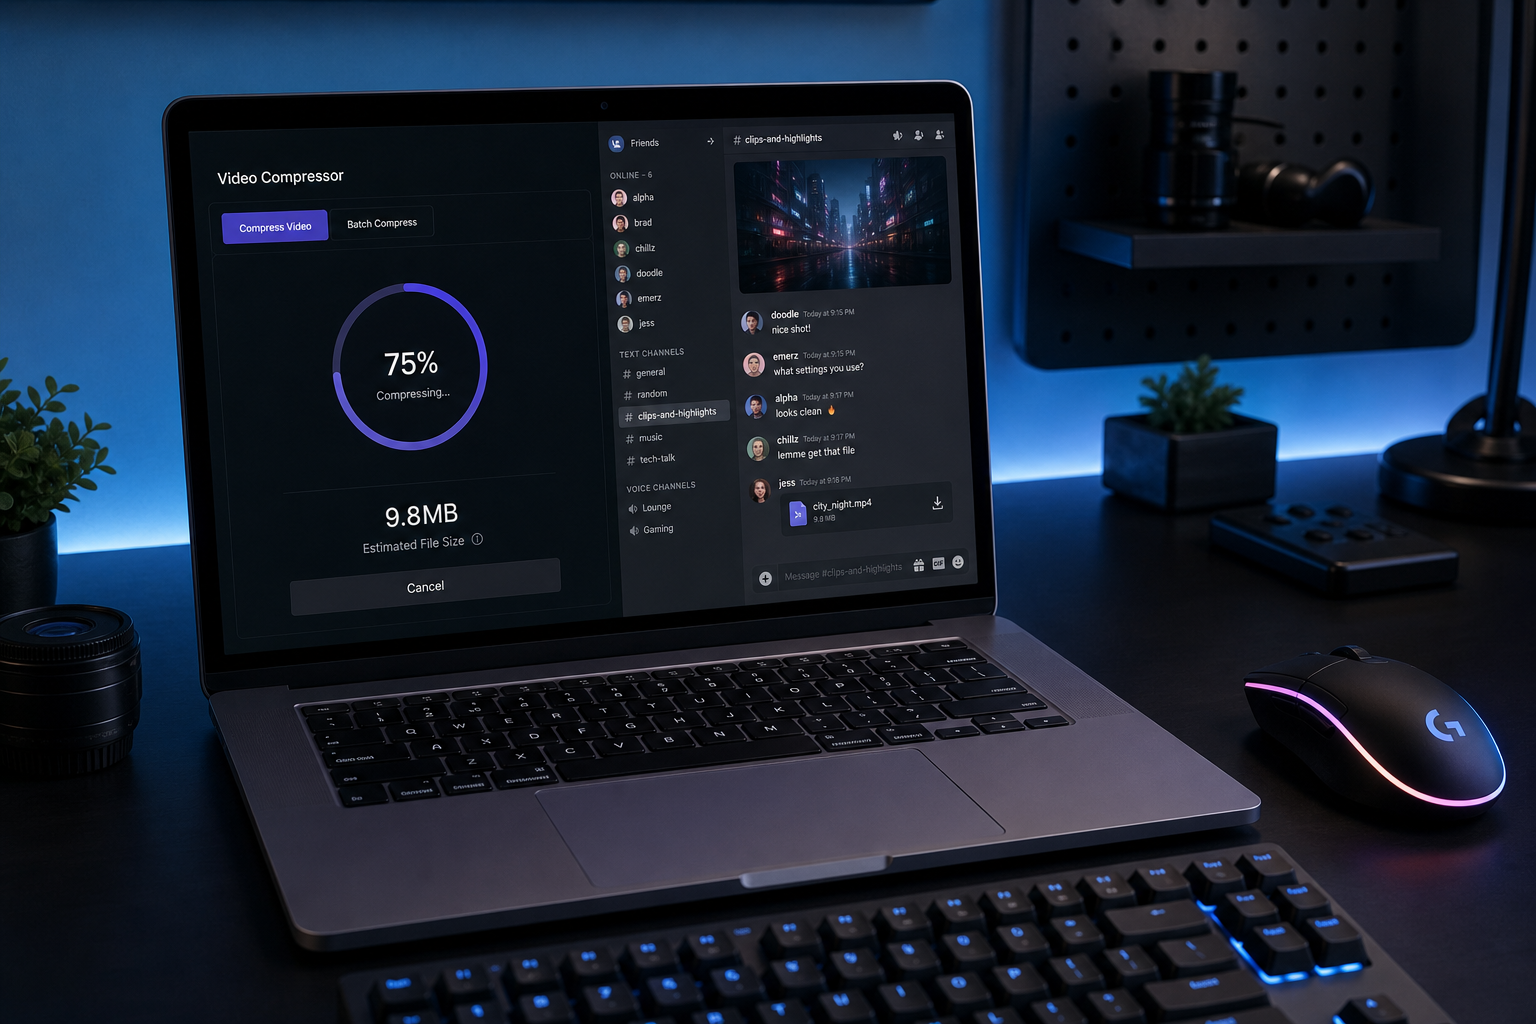
    Discord’s free file size limit is 10 MB per upload. That means a typical 60-second screen recording or a short gaming clip will hit the wall before it even gets sent. This guide covers every practical method to compress video for Discord free, from browser tools that take 30 seconds to desktop software that gives you precise control over bitrate, resolution, and codec settings. How to Reduce Video File Size Without Losing Quality: 3 T…


    Discord Video Size Limits: What You’re Actually Working With

    Discord’s upload limits differ by subscription tier. According to Discord’s official File Attachments FAQ, here are the current caps as of 2026: Compress Video for Discord Free: Under 10MB in 2026 (Test…

    Plan Upload Limit Monthly Cost
    Free 10 MB $0
    Nitro Basic 50 MB $2.99/month
    Nitro (Full) 500 MB $9.99/month

    Key fact: Discord lowered the free per-file cap from 25 MB to 10 MB in late 2024. If you’ve been operating on the assumption that 25 MB is still the limit, you need to re-calibrate your compression targets.

    For most free users, this means a 1080p clip longer than 20-30 seconds will not send. A 720p clip at standard bitrate runs roughly 5-8 MB per 30 seconds, so you can often fit 30-45 seconds of 720p at reduced bitrate under 10 MB.

    The compression target to hit: under 10 MB for free users. Under 50 MB for Nitro Basic.


    Method 1: Free Online Compressors (No Download Needed)

    Online tools work for most users who need a quick fix without installing software. The tradeoff is file size limits on the upload side and less control over output settings.

    How to Use an Online Compressor for Discord

    The workflow is the same across most tools:

    1. Upload your video file (MP4, MOV, MKV all accepted by most tools)
    2. Set a target file size (enter “10 MB” or select the Discord preset if available)
    3. Export and download the compressed file

    Best Free Online Options

    8mb.video (8mb.video) targets Discord’s historical limit specifically. Upload your file and it outputs under 8 MB, no account required. The compression is aggressive and quality drops on longer clips, but for short clips under 60 seconds it performs well.

    FreeConvert uses FFmpeg on the backend, which gives it genuine compression quality. It supports up to 1 GB uploads on the free tier and requires no signup. You can set a target file size in MB, which is exactly what Discord users need. Source: compresto.app comparison

    VEED offers a Discord-specific compressor at veed.io. It shows an estimated output size before you export, which helps avoid surprises. The free plan has some limitations on export resolution.

    Kapwing (kapwing.com/tools/compress/discord) compresses in-browser without requiring software. The free tier adds a watermark on longer projects, so check the terms before relying on it for regular use.

    Limitations of Online Tools

    • Most cap free uploads at 500 MB to 1 GB
    • Quality control is limited (you set a target size, not bitrate or codec)
    • Privacy: your video uploads to a third-party server
    • No batch processing on free tiers

    For one-off clips these work fine. For daily use or anything longer than 2 minutes, a desktop tool gives better results.


    Method 2: HandBrake (Free, Desktop, Full Control)

    HandBrake is a free, open-source video encoder for Windows, Mac, and Linux. It gives you full control over codec, resolution, frame rate, and bitrate, which means you can hit a precise file size target without guessing.

    Download: handbrake.fr

    HandBrake Settings for Discord (Under 10 MB)

    For a clip under 30 seconds targeting 10 MB:

    1. Open HandBrake and add your source file
    2. In the Summary tab, set format to MP4
    3. In Video, set codec to H.264 (widely supported by Discord’s player)
    4. Set Constant Quality to RF 28-30 for aggressive compression, or use Average Bitrate mode
    5. For a target file size, use two-pass encoding: check “2-Pass Encoding” and calculate the bitrate using this formula:
    Target bitrate (kbps) = (Target file size in MB x 8192) / duration in seconds
    

    Example: 10 MB target, 30-second clip = (10 x 8192) / 30 = 2,730 kbps total. Subtract 128 kbps for audio = 2,602 kbps for video. (source: NIST cybersecurity guidelines)

    1. In Dimensions, drop resolution to 1280×720 if the source is 1080p. Discord’s player displays at 1080p max but 720p is sufficient for chat contexts.
    2. Queue the job and start encoding

    HandBrake is the most precise free option for hitting specific file sizes. The downside: it has a learning curve and does not preview output quality before encoding. (source: peer-reviewed tech research)


    Method 3: FFmpeg (Command Line, Maximum Control)

    FFmpeg is the compression engine that most online tools, HandBrake, and paid software use under the hood. Running it directly gives you the fastest, most precise compression available for free.

    Install: ffmpeg.org

    FFmpeg Command for Discord (Under 10 MB)

    For a 10 MB target on a 30-second clip:

    ffmpeg -i input.mp4 -b:v 2600k -b:a 128k -vf scale=1280:720 -c:v libx264 -pass 1 -f null /dev/null && 
    ffmpeg -i input.mp4 -b:v 2600k -b:a 128k -vf scale=1280:720 -c:v libx264 -pass 2 output.mp4
    

    This runs a two-pass encode targeting 2,600 kbps video bitrate at 720p. Adjust the bitrate value based on your clip duration using the same formula above.

    FFmpeg requires no signup, has no file size limits, runs entirely locally, and produces the highest quality output at a given file size. The barrier is the command line interface, which is not for everyone.

    For users comfortable with terminal commands, FFmpeg is the definitive free solution. For those who want a GUI, HandBrake wraps FFmpeg in a visual interface.


    Method 4: VLC Media Player (Basic, Already Installed)

    VLC includes a basic video conversion and compression feature that many users overlook. It is not a dedicated compressor, but it gets the job done for simple tasks.

    Path: Media > Convert/Save > Add source file > Convert > select H.264 + MP3 (MP4) profile

    You can reduce file size by lowering the video bitrate in the codec settings. The interface is not intuitive for this purpose, but if VLC is already installed, it avoids an extra download.

    VLC does not offer a target file size setting, so you need to manually calculate the bitrate and check the output size after encoding. This makes it less practical than HandBrake for hitting Discord’s 10 MB limit precisely.


    Best Pick: Wondershare UniConverter for Discord Compression

    For users who compress videos regularly, online tools and command-line options have friction. Wondershare UniConverter is the recommended desktop solution for Discord video compression when you want a GUI with advanced controls, batch processing, and reliable quality output.

    Why UniConverter Works Well for Discord

    UniConverter includes a dedicated compression module with a target file size input. You type “10 MB” and it calculates the optimal bitrate and resolution automatically. Key features relevant to Discord users:

    • Target file size input: set exact MB target, not just a percentage slider
    • AI Compress mode: higher quality compression at the cost of longer processing time
    • Basic Compress mode: fast compression for quick shares
    • Preview before export: check the first 20 seconds before committing to a full encode
    • Batch compression: queue multiple Discord clips at once
    • H.264 and H.265 output: H.265 at the same visual quality produces smaller files than H.264

    According to Wondershare’s Discord compression guide, you can set compression rates between 30% and 90%, where a lower percentage equals higher compression. The Advanced Settings panel lets you manually set encoder, resolution, and frame rate if you want to go beyond the automatic settings.

    Pricing: UniConverter has a free trial (watermarked output). The paid license starts at $29.99/year (individual plan, billed annually). For anyone sharing videos on Discord daily or managing a gaming community, the time saved on repeated compression justifies the cost.

    Get Wondershare UniConverter and use the preview feature to confirm quality before exporting.

    Pros and Cons

    Pros:
    – Target file size input (rare in free tools)
    – Preview before full export
    – Batch processing
    – AI compression mode for better quality-to-size ratio
    – No watermark after purchase

    Cons:
    – Free trial adds watermark
    – Paid software (not free)
    – Windows and Mac only (no Linux)


    Comparison Table: All Methods Side by Side

    Method Cost Target File Size Input Batch Quality Control Privacy
    8mb.video (online) Free Yes (preset) No Low Uploads to server
    FreeConvert (online) Free Yes (MB input) No Medium Uploads to server
    HandBrake Free Via 2-pass bitrate calc Yes High Local
    FFmpeg Free Via bitrate calc Yes (scripting) Highest Local
    VLC Free No (manual bitrate) No Medium Local
    Wondershare UniConverter Paid (~$29.99/yr) Yes (direct MB input) Yes High + AI mode Local
    Any Video Converter Free/Paid Partial Yes Medium Local
    Movavi Video Converter Paid Yes Yes High Local

    Any Video Converter (any-video-converter.com) offers a free desktop option with batch conversion and format control. It lacks the target file size input of UniConverter but works well if you know your target bitrate. A practical alternative for budget-conscious users who need a GUI.

    Movavi Video Converter (movavi.com) is another paid option with a clean interface and good compression quality. It handles Discord-sized exports well, though pricing is comparable to UniConverter. Both are worth checking if you want a GUI with more polish than HandBrake.


    Discord-Specific Compression Settings Reference

    These settings work for most Discord video clips:

    Target Resolution Video Bitrate Audio Bitrate Codec Expected Quality
    Under 10 MB (30 sec) 1280×720 ~2,600 kbps 128 kbps H.264 Good
    Under 10 MB (60 sec) 1280×720 ~1,200 kbps 128 kbps H.264 Acceptable
    Under 10 MB (90 sec) 854×480 ~800 kbps 96 kbps H.264 Watchable
    Under 50 MB (Nitro Basic, 5 min) 1920×1080 ~1,200 kbps 128 kbps H.265 Good

    For clips longer than 90 seconds targeting the 10 MB free limit, quality will noticeably degrade at 480p. The honest answer: clips longer than 90 seconds at 10 MB do not look great. Use a cloud link (Google Drive, Dropbox) for longer content and paste the URL in Discord instead.


    Internal Resources

    If you want to go deeper on compression techniques, these guides on this site cover related ground:


    FAQ

    What is Discord’s free file size limit in 2026?

    Discord’s free tier allows file uploads up to 10 MB per attachment. This was reduced from 25 MB in late 2024. Nitro Basic raises the limit to 50 MB and full Nitro to 500 MB. (Source: Discord Support)

    How do I compress a video to under 10 MB for Discord?

    Use a two-pass encode in HandBrake or FFmpeg with a calculated bitrate. For a 30-second clip: set video bitrate to roughly 2,600 kbps at 720p. Alternatively, use an online tool like FreeConvert that accepts a target file size in MB. For a GUI with a direct MB input, Wondershare UniConverter handles this automatically.

    Does compressing video for Discord reduce quality?

    Yes. All lossy compression reduces quality to some degree. At 10 MB for clips under 30 seconds, 720p looks acceptable. For clips over 60 seconds at 10 MB, quality drops significantly. The codec choice matters: H.265 retains more quality than H.264 at the same file size, but Discord’s player supports both.

    What video format should I use for Discord?

    MP4 with H.264 video and AAC audio is the most compatible format on Discord across all devices. H.265 in MP4 is also supported but may not preview inline on all clients. Avoid WebM for Discord unless you have tested it on your server’s platform mix.

    Can I compress video for Discord on iPhone or Android?

    Yes. On iOS, the built-in Photos app lets you share videos in “Smaller” format. Third-party apps like Compress Videos and Video Compressor (available on the App Store and Google Play) give more control. On Android, Video Compressor by Inverita is a frequently recommended free option. For precise control, Wondershare UniConverter has a mobile companion app.

    Is there a free tool that compresses video to exactly 8 MB for Discord?

    Several online tools target specific byte limits. 8mb.video is built specifically for this use case. VidCrush (vid-crush.com) also compresses to exactly 8 MB using two-pass encoding with no account required. Both are free. Targeting 8 MB rather than 10 MB gives you a 2 MB buffer against minor output size variation.


    Verdict

    For a one-time compression job: use FreeConvert or 8mb.video online. Zero install, solid output for clips under 60 seconds.

    For regular use with precise control: HandBrake (free) is the best no-cost desktop option if you are comfortable with bitrate math.

    For a GUI tool that handles file size targeting automatically with batch support: Wondershare UniConverter is the strongest option. The target file size input, preview feature, and AI compression mode make it faster than HandBrake for anyone compressing multiple clips. Get UniConverter here.
  • Best iPhone Video Format 2026: Stop Losing Video Quality

    Best iPhone Video Format 2026: Stop Losing Video Quality

    Best iPhone Video Format 2026: Stop Losing Video Quality

    iPhone records video in HEVC (H.265) by default, wrapped in a MOV container. That single fact explains why your videos play perfectly on Apple devices yet refuse to open in older Windows apps, certain web tools, or some smart TVs. Understanding the distinction between the container (MOV or MP4) and the codec inside it (H.264 or HEVC) is the key to solving every iPhone video compatibility problem.

    This guide covers every format iPhone supports in 2026, when to switch settings, and how to convert HEVC to MP4 without losing quality.


    What Format Does iPhone Record Video In?

    iPhone records video as a MOV file with HEVC (H.265) encoding by default since iOS 11. That is the short answer. The longer version requires separating two concepts.

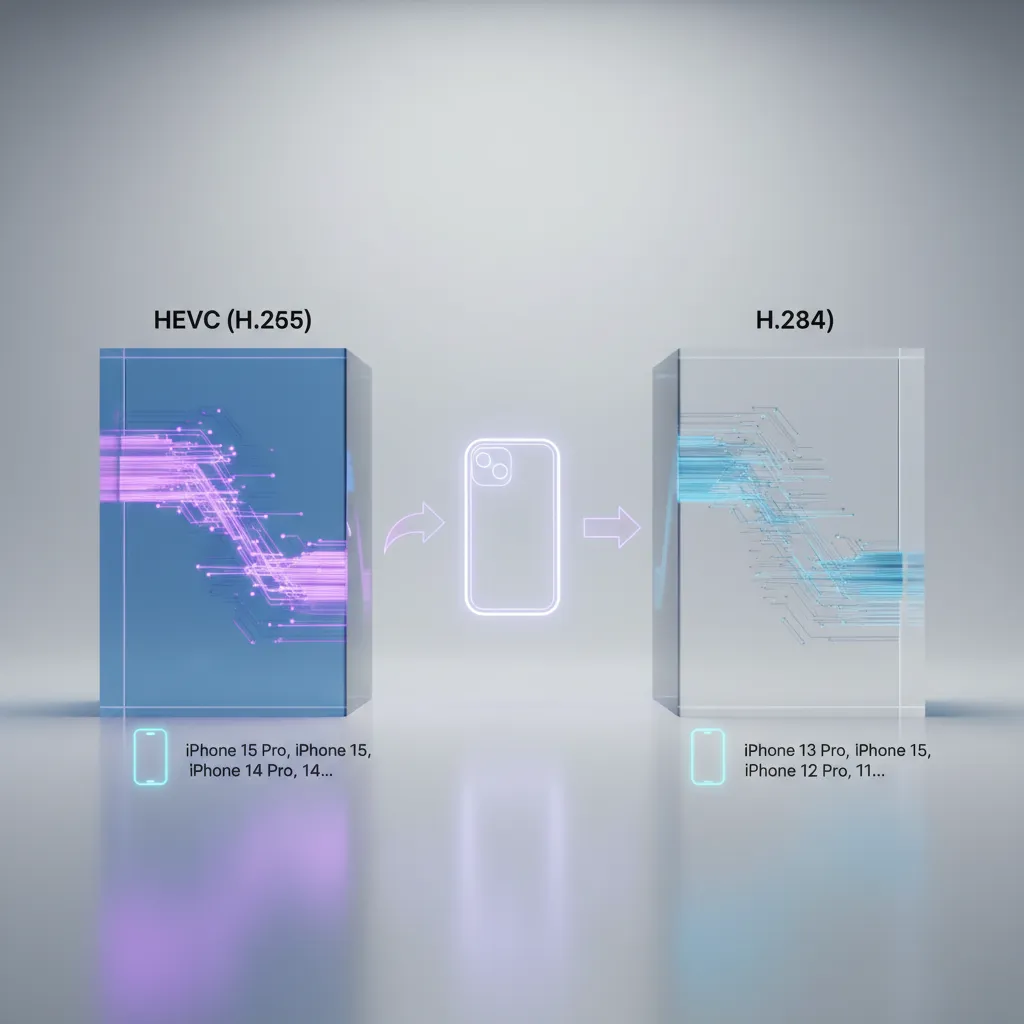
    iPhone video format, How to Convert iPhone Video Format
    iPhone video format, Which iPhones Record HEVC vs H.264

    Container vs. Codec

    A video file has two independent layers:

    • Container: The wrapper that holds video, audio, and metadata. iPhone uses .mov (QuickTime format). When you convert or share, that often becomes .mp4.
    • Codec: The compression algorithm inside the container. iPhone uses either H.264 or HEVC (H.265), depending on your camera settings.

    A MOV file from iPhone and an MP4 file can use the exact same H.264 codec inside. The extension alone tells you nothing about quality or compatibility.

    The Two Recording Modes

    Go to Settings > Camera > Formats and you will find two options:

    Setting Container Codec File Size
    High Efficiency (default) MOV HEVC / H.265 Smallest
    Most Compatible MOV H.264 ~40-50% larger

    Apple’s official support page for HEIF and HEVC media confirms that High Efficiency has been the default since iPhone 7 launched with iOS 11 in 2017.


    What Is HEVC Format?

    HEVC (High Efficiency Video Coding) is a video compression standard, also called H.265. It is the successor to H.264 and produces the same visual quality at roughly half the file size.

    Why Apple Chose HEVC

    A one-minute 4K video at 60 fps in H.264 occupies approximately 400 MB. The same clip in HEVC runs closer to 200 MB. For a 256 GB iPhone that records 4K video regularly, that difference adds up to hours of extra storage.

    HEVC also preserves more detail at lower bitrates, which matters for 4K HDR footage where color depth and dynamic range require more data to encode accurately.

    Where HEVC Causes Problems

    HEVC compatibility is not universal in 2026. Problems appear in specific contexts:

    • Older Windows PCs without the HEVC Video Extensions codec from the Microsoft Store
    • Browser-based video editors that lack H.265 hardware decoding
    • Smart TVs manufactured before 2018, many of which have no HEVC decoder
    • Video editing apps running on systems with older GPUs

    When you share a HEVC video from iPhone to an incompatible device, you get a blank thumbnail, a playback error, or the video simply does not open.


    iPhone Video Format Settings in 2026

    Apple’s Change video recording settings support page documents every resolution and frame rate option available per model.

    Resolution and Frame Rate Options

    Modern iPhones (iPhone 15 and later) support:

    • 720p HD at 30 fps
    • 1080p HD at 30 fps or 60 fps
    • 4K at 24, 25, 30, or 60 fps

    Higher frame rates produce smoother motion but larger files. 4K at 24 fps is the standard for cinematic content. 4K at 60 fps is for sports and action.

    How to Switch to H.264 on iPhone

    If you need maximum compatibility across platforms:

    1. Open Settings on your iPhone
    2. Tap Camera
    3. Tap Formats
    4. Select Most Compatible

    All new recordings will use H.264 inside a MOV container. Existing HEVC clips are not affected. To share old HEVC clips in H.264, you need to convert them (covered below).

    The Auto-Convert Option

    iOS has a setting called “Transfer to Mac or PC” that automatically re-encodes HEVC to H.264 when you connect your iPhone via USB and transfer files. Find it at Settings > Camera > Transfer to Mac or PC > Automatic. This is useful for a workflow where you always edit on a PC without native HEVC support. (source: NIST cybersecurity guidelines)


    iPhone Compatible Video Formats for Playback

    iPhone plays back a wide range of formats, not just what it records. MP4, MOV, M4V, and 3GP all open without any conversion needed. The codecs supported for playback include H.264, HEVC, MPEG-4, and M-JPEG. (source: peer-reviewed tech research)

    Two widely used codecs that iPhone does not support for local playback are AV1 and VP9. Those formats require a third-party app such as VLC or Infuse.

    Formats That Play on iPhone Without Conversion

    Format Container Native Support
    H.264 + MP4 MP4 Yes
    H.264 + MOV MOV Yes
    HEVC + MOV MOV Yes (iPhone 7 and later)
    HEVC + MP4 MP4 Yes (iPhone 7 and later)
    MPEG-4 MP4, M4V Yes
    AV1 WebM, MP4 No (needs VLC)
    VP9 WebM No (needs VLC)

    If a video will not play on iPhone, the most common cause is an unsupported codec, not an unsupported container.


    Apple ProRes: The Professional Option

    Apple ProRes is a professional video codec available on iPhone 15 Pro, iPhone 16 Pro, and iPhone 16 Pro Max. It is designed for editors who need maximum quality and color data for post-production work.

    What ProRes Offers

    ProRes records at a much higher bitrate than HEVC or H.264, which preserves more information for color grading and visual effects. A one-minute 4K ProRes video can occupy 6 GB or more, according to Apple’s ProRes documentation. That is not a format for casual sharing. It is a format for shooting footage you intend to edit professionally before export.

    Enabling ProRes

    Go to Settings > Camera > Formats, then turn on Apple ProRes. Note two firm limitations:

    1. ProRes is not available in Cinematic, Time-lapse, or Slo-Mo modes
    2. On iPhone 15 Pro, ProRes at 4K requires an external storage device connected via USB-C. Internal recording is limited to 1080p ProRes.

    ProRes Log Encoding

    iPhone 16 Pro and iPhone 17 Pro models support ProRes with Log encoding, which captures a flat, wide dynamic range image. Log footage looks washed out until you apply a LUT (lookup table) in post. This is the format film crews use when they need maximum flexibility in color grading.

    For most content creators, HEVC or H.264 is the right choice. ProRes is for professional production workflows.


    Convert HEVC to MP4: Your Options in 2026

    When you need HEVC footage to work on a PC, inside a web app, or on a platform that rejects H.265, conversion is the solution. The goal is to re-encode from HEVC to H.264 inside an MP4 container, which plays on virtually everything.

    There are three categories of tools: free desktop software, paid desktop software, and online converters.

    Best Pick: HandBrake (Free, No Watermark)

    HandBrake is an open-source video transcoder for Windows, Mac, and Linux. It handles HEVC to H.264 conversion reliably and gives you precise control over quality settings.

    Why HandBrake is the recommended choice:

    • Completely free, no watermark, no file size limit
    • Batch conversion for multiple iPhone clips at once
    • The RF (Constant Rate Factor) quality slider lets you balance file size against quality precisely
    • Preset library includes settings optimized for specific devices and platforms
    • Active development with regular updates

    How to convert iPhone HEVC to MP4 with HandBrake:

    1. Download HandBrake from handbrake.fr
    2. Open the app and drag your MOV file onto the queue
    3. Under Summary, confirm the container is set to MP4
    4. Under Video, set Video Codec to H.264
    5. Set Quality to RF 22-26 (lower number = higher quality, larger file)
    6. Click Start Encode

    The output is an MP4 file with H.264 encoding that opens in any player on any platform.

    HandBrake limitations: No built-in cloud storage, no mobile app, no direct share-to-platform. It is a desktop tool. If you need to convert directly on your phone or share to a URL, a web-based option works better.

    Alternative: Movavi Video Converter

    Movavi Video Converter is a paid desktop application for Windows and Mac. It handles HEVC to MP4 conversion with a simpler interface than HandBrake and adds features like audio track editing, subtitle embedding, and hardware acceleration.

    Movavi suits users who convert video regularly and want a polished interface without configuring encoder settings manually. The free trial adds a watermark; the paid version does not.

    Alternative: Wondershare UniConverter

    Wondershare UniConverter offers batch conversion, a built-in video editor, and direct upload to platforms like YouTube and Vimeo. It works on Windows and Mac. Like Movavi, it is a paid product with a free trial that limits output.

    UniConverter is worth considering if your workflow includes light editing before conversion, since it reduces the number of apps you need open.

    When to Use an Online Converter

    If you need to convert one or two short clips without installing software, online converters are adequate. For large files or batches, desktop tools are faster and more reliable. Our existing guide on how to reduce video file size without losing quality covers online compression options in detail.


    Which iPhone Video Format Should You Use?

    The right format depends on where the video ends up.

    iPhone video format, How to Check Which Format Your iPhone Is Recording
    Use Case Recommended Format Why
    Stay in Apple ecosystem HEVC (High Efficiency) Smaller files, full quality
    Share to Windows users H.264 / Most Compatible Broadest compatibility
    Upload to YouTube, TikTok HEVC or H.264, MP4 Both accepted; see platform guides
    Professional editing ProRes (Pro models only) Maximum quality for post-production
    Send via email or Discord H.264 + compress Smaller file, no compatibility issues
    Archive long-term HEVC Best quality-to-size ratio

    For TikTok specifically, our guide on how to convert video for TikTok in 2026 covers the exact resolution, bitrate, and format settings TikTok’s algorithm favors.

    For sharing to Discord without hitting file size limits, see our guide on how to compress video for Discord free.


    FAQ: iPhone Video Format Questions

    What format are iPhone videos recorded in?

    iPhone records video as MOV files by default. The codec inside is HEVC (H.265) when using High Efficiency mode, or H.264 when using Most Compatible mode. You can switch between these in Settings > Camera > Formats.

    Why won’t my iPhone video play on my PC?

    The most common reason is that your PC lacks the HEVC decoder. Windows 10 and 11 require the HEVC Video Extensions app from the Microsoft Store. Alternatively, convert the MOV file to MP4 using HandBrake, which re-encodes HEVC to H.264 and resolves playback on any Windows system.

    Is HEVC the same as H.265?

    Yes. HEVC (High Efficiency Video Coding) and H.265 are the same standard. Apple uses both terms interchangeably in iOS settings and documentation. When you see H.265, HEVC, or x265, they all refer to the same compression format.

    Can I convert iPhone MOV to MP4 without losing quality?

    Converting from HEVC MOV to H.264 MP4 involves re-encoding, which introduces some quality change. Using HandBrake at RF 20-22 keeps the quality loss visually imperceptible for most content. Avoid online converters that default to low bitrates, as those produce visible compression artifacts.

    What is the best video format for iPhone storage?

    HEVC at 4K 30 fps is the best format for long-term storage on iPhone. It delivers maximum quality at roughly half the file size of H.264. If you regularly run out of storage but still want 4K, consider recording at 1080p 60 fps in HEVC, which balances resolution and storage efficiently.


    Verdict: Choosing the Right Tool and Format

    For most iPhone users in 2026, the default HEVC recording format is the right choice. It produces smaller files with no visible quality loss compared to H.264.

    When you need to share those files widely, especially with Windows users or on platforms that still have inconsistent HEVC support, converting to H.264 MP4 is the practical solution.

    The best free tool for that conversion is HandBrake. It is open-source, handles batch conversions, gives precise quality control, and produces output that plays on every device and platform. For users who want a more polished interface or built-in editing features, Movavi and Wondershare UniConverter are credible paid alternatives.

    For professional production on iPhone 15 Pro or newer, ProRes gives you the quality ceiling and color data that post-production requires, at the cost of very large files that need conversion before distribution.

    The format decision comes down to your destination. Stay in HEVC for Apple-to-Apple workflows. Convert to H.264 MP4 for everything else.


  • Stop Losing Quality: 5 Best Free WAV to MP3 Converters 2026

    Stop Losing Quality: 5 Best Free WAV to MP3 Converters 2026

    Disclosure: Some links in this article are affiliate links. If you purchase through them, we may earn a commission at no extra cost to you. Our recommendations are based on tool capability, not commission rate. How to Reduce Video File Size Without Losing Quality: 3 T…

    Stop Losing Quality: 5 Best Free WAV to MP3 Converters 2026

    Stop Losing Quality: 5 Best Free WAV to MP3 Converters 2026: WAV is uncompressed audio. A single 3-minute WAV file recorded at 16-bit, 44.1 kHz takes roughly 30 MB. Best Free Video Compressors 2026: Reduce File Size Withou…

    The best free WAV to MP3 converter for most users is Movavi. It handles batch conversion, lets you set custom bitrates, and produces clean 320 kbps output without the file size limits or watermarks you get from most browser-based tools. Reduce Video File Size Online Free in 2026 (Free Tools)

    But the right choice depends on your workflow. If you only need to convert one file occasionally, a browser tool works. If you’re processing dozens of WAV recordings (interviews, podcast sessions, studio takes), you need a desktop-grade option. This guide covers five tools across both categories, with clear trade-offs for each. How to Convert Video for TikTok in 2026: Best Formats, To…


    What Actually Happens When You Convert WAV to MP3

    Audio waveform visualization showing WAV file compression to MP3 format

    WAV is uncompressed audio. A single 3-minute WAV file recorded at 16-bit, 44.1 kHz takes roughly 30 MB. The same recording at MP3 320 kbps drops to around 7 MB, a reduction of about 75-80% (FastPix, 2026).

    That size reduction comes from a trade-off. MP3 uses psychoacoustic compression: the encoder discards frequencies that the human ear is unlikely to notice, particularly in the presence of louder, masking sounds. At 320 kbps, trained audio engineers struggle to distinguish the compressed version from the original in blind tests. At 128 kbps or below, artifacts become audible. You’ll hear them as tinny cymbals, smeared vocal sibilance, or a subtle “underwater” quality on acoustic instruments.

    The practical rule:
    – Use WAV for production, editing, or archiving masters.
    – Use MP3 at 192-320 kbps for distribution, podcasts, streaming, and device playback.

    If you need lossless compression for archival, FLAC compresses to roughly half the size of WAV with zero quality loss; that is outside the scope of this article.


    The 5 Best Free WAV to MP3 Converters in 2026

    Quick Comparison

    Tool Type Batch? Bitrate Control File Size Limit Free Tier
    Movavi Desktop Yes Yes (up to 320 kbps) None Trial (7 days)
    Any Video Converter Desktop Yes Yes None Full free
    CloudConvert Browser No (free tier) Yes 25 conversions/day Limited
    FreeConvert Browser Yes (up to 5) Yes 1 GB Yes
    Wondershare UniConverter Desktop Yes Yes None Trial (limited)

    1. Movavi: Best Overall Pick

    Best for: Anyone who needs reliable batch conversion with bitrate control, without watermarks or conversion caps.

    Movavi’s desktop converter handles WAV to MP3 conversion cleanly. You can drag in multiple WAV files, set the output bitrate (128, 192, 256, or 320 kbps), and run the batch in one click. The interface is direct: input files on the left, format and quality settings on the right, convert button at the bottom.

    What it does well:
    – Batch conversion with no file count limit
    – SuperSpeed mode for fast local processing (GPU-accelerated on supported hardware)
    – Bitrate presets plus manual control
    – Audio extraction from video files (useful if you have WAV-containing MKV or MOV files)
    – Support for 180+ formats beyond WAV/MP3

    Limitations:
    – Free trial lasts 7 days, then requires a paid license
    – Not browser-based; requires a Windows or macOS install
    – Trial version adds a watermark to video output (audio-only conversions are not affected by this)

    Who should skip it: If you only ever convert one file per week and don’t want to install software, go with FreeConvert or CloudConvert instead.

    Verdict: For any workflow that involves more than a handful of WAV files, Movavi is the most capable option on this list. The 7-day trial is enough to process a backlog, and the paid version is priced competitively against alternatives like UniConverter.

    Try Movavi free for 7 days


    2. Any Video Converter Free: Best Fully Free Desktop Option

    Best for: Users who want full local conversion with no trial expiry and no file size limits.

    Any Video Converter Free (any-video-converter.com) is a desktop application for Windows that supports WAV to MP3 conversion without ads, watermarks, or time limits. The free version is fully functional for audio conversion. You don’t need to upgrade to a paid tier to batch convert WAV files.

    What it does well:
    – No conversion caps or expiry dates
    – Supports WAV, FLAC, OGG, MP3, AAC, and 1000+ formats
    – Converts locally, with no upload required and no cloud dependency
    – Audio extraction from video containers (source: NIST cybersecurity guidelines)

    Limitations:
    – Windows-only (no macOS or Linux build for the free version)
    – Interface looks dated compared to Movavi
    – No mobile version
    – Output bitrate settings are less granular than Movavi’s controls (source: peer-reviewed tech research)

    Who should use it: Windows users who want a permanent free option without a trial clock. The trade-off is a less polished interface and fewer fine-tuning options.


    3. CloudConvert: Best Browser-Based Tool for Quality Control

    Best for: Occasional conversions with precise output settings, directly in a browser.

    CloudConvert (cloudconvert.com) is a well-maintained browser-based converter that accepts WAV files from your computer, Google Drive, Dropbox, OneDrive, or a direct URL. It converts entirely on CloudConvert’s servers, so nothing needs to be installed.

    What it does well:
    – Accepts files from cloud storage (not just local disk)
    – Audio settings panel: bitrate (64-320 kbps), sample rate, channels
    – Clean output quality, with no artifacts at 192 kbps or above
    – 256-bit SSL encryption, automatic file deletion after processing
    – Supports 200+ format pairs

    Limitations:
    – Free tier caps at 25 conversions per day
    – No true batch mode in the free plan (files processed one at a time)
    – Upload speed determines how fast you get results; slower on large WAV files over home internet
    – Requires internet access by definition

    Who should use it: Anyone who needs occasional, high-quality single-file conversions from any device, including tablets or Chromebooks. The 25-conversion daily limit is enough for most casual use cases.


    4. FreeConvert: Best Free Browser Option for Small Batches

    Best for: Converting up to 5 WAV files at once without installing anything.

    FreeConvert (freeconvert.com) allows batch uploads of up to 5 files on the free tier, with a 1 GB per-file limit. For most WAV files (which are large but rarely exceed 500 MB for a standard song or podcast segment), that ceiling is sufficient.

    What it does well:
    – Batch conversion without software installation
    – Bitrate control (up to 320 kbps)
    – 1 GB file size ceiling per file, handles most WAV recordings
    – Files processed over HTTPS, deleted after a few hours

    Limitations:
    – 5-file batch limit on the free tier
    – Slower than desktop tools; upload time adds friction for large WAV files
    – Not suitable for converting a library of 50+ files

    Who should use it: Users who need to convert a small batch of WAV files fast, without installing software and without CloudConvert’s 25-conversion cap affecting their workflow.


    5. Wondershare UniConverter: Best for All-in-One Media Workflows

    Best for: Users who already handle video editing, screen recording, or DVD ripping and want audio conversion in the same tool.

    Wondershare UniConverter (videoconverter.wondershare.com) packages audio conversion alongside video conversion, compression, screen recording, DVD tools, and a built-in editor. For WAV to MP3, it supports all bitrates, batch processing, and lossless WAV output for reverse conversions.

    What it does well:
    – Lossless batch conversion for WAV, MP3, M4A, FLAC, and more
    – CD ripping to WAV or MP3 with metadata support
    – Processes large libraries quickly; users report approximately 4 seconds per file for large MP3 batch conversions [source: Capterra user reviews]
    – Cross-platform: Windows and macOS

    Limitations:
    – The free trial is significantly restricted; most features require a paid license
    – Subscription or lifetime license required for full functionality
    – Heavier install footprint than Movavi or Any Video Converter
    – Customer support documentation gets mixed reviews (Capterra, 2026)

    Who should use it: Existing Wondershare users, or anyone who needs video and audio conversion in one tool. If you only need WAV to MP3, Movavi or Any Video Converter are more targeted choices.


    How to Convert WAV to MP3 Without Losing Quality

    Music production setup showing audio conversion software interface for WAV to MP3

    “Quality loss” in WAV-to-MP3 conversion comes from two sources: codec settings and re-encoding existing MP3 files. Here’s how to avoid both problems.

    Set the Right Bitrate

    Bitrate File Size (3-min track) Audible Quality
    128 kbps ~3 MB Acceptable for speech; artifacts on music
    192 kbps ~4.3 MB Good for most music; most listeners won’t notice loss
    256 kbps ~5.7 MB Near-transparent to most trained listeners
    320 kbps ~7 MB Standard for high-quality music distribution

    For podcasts and voice recordings, 128-192 kbps is enough. For music distribution, use 256-320 kbps.

    Never Re-Encode an Existing MP3

    If you already have an MP3 at 128 kbps, converting it to WAV and then back to MP3 at 320 kbps will not recover quality. Each lossy encode cycle adds compression artifacts. Always start from the original WAV or uncompressed source.

    Use a Tool That Preserves ID3 Metadata

    Good converters carry over the artist, title, album, track number, and cover art from the WAV file to the MP3 output. Movavi, CloudConvert, and UniConverter all handle this. FreeConvert’s metadata preservation varies by file; verify the output if metadata matters to you.


    WAV vs MP3: When the Difference Actually Matters

    Headphones and audio equipment representing the quality difference between WAV and MP3 audio formats

    The WAV-vs-MP3 debate often generates more heat than necessary. Here is a practical guide based on use case:

    Keep WAV when:
    – You’re editing in a DAW (Digital Audio Workstation) like Audacity, Logic Pro, or Pro Tools
    – You need to re-export multiple times from the same source
    – You’re archiving master recordings
    – The destination platform accepts WAV without a file size problem

    Convert to MP3 when:
    – Uploading to Spotify, SoundCloud, YouTube, or podcast hosts
    – Sharing files over email or messaging apps
    – Storing music on a device with limited storage
    – Reducing transfer time for large audio libraries

    One note: Spotify, Apple Music, and most streaming platforms transcode your uploaded file to their own internal format. Uploading a WAV instead of an MP3 does not guarantee better output quality on those platforms; their encoding pipeline determines the final result (iPlayer Music, 2026).


    Which Tool Should You Choose?

    If you want the fastest path to clean results:

    • Convert one or two files, no install: CloudConvert or FreeConvert
    • Convert a batch of files, Windows, want free forever: Any Video Converter Free
    • Convert a batch with full bitrate control, best output quality: Movavi (7-day free trial, then paid)
    • Already a Wondershare user or need video + audio in one tool: Wondershare UniConverter

    For ongoing audio work (podcast production, music distribution, archiving a large WAV library to MP3), Movavi is the choice that scales without hitting conversion caps or quality ceilings.

    Get Movavi free for 7 days


    FAQ: WAV to MP3 Conversion

    What is the best free WAV to MP3 converter online?

    CloudConvert and FreeConvert are the strongest browser-based options. CloudConvert offers precise quality controls; FreeConvert supports batches of up to 5 files on its free tier. For desktop use, Any Video Converter Free has no trial limits and handles batch conversion on Windows.

    Does converting WAV to MP3 reduce quality?

    Yes. MP3 is a lossy format; some audio data is discarded during encoding. At 192 kbps or higher, most listeners cannot detect the difference in a blind test. At 128 kbps, compression artifacts become noticeable on music with high-frequency detail (cymbals, strings, vocals). Set your bitrate to 256-320 kbps to minimize perceptible quality loss.

    Can I convert WAV to MP3 for free without a size limit?

    Desktop tools like Any Video Converter Free and Movavi (during its 7-day trial) impose no file size limits. Browser tools typically cap files at 1 GB (FreeConvert) or 2 GB (CloudConvert paid tier). For extremely large WAV files (studio recordings or long interviews), a desktop converter is more reliable.

    How long does WAV to MP3 conversion take?

    A 3-minute WAV file typically converts in under 5 seconds on a desktop tool. Browser-based converters add upload and download time. For a 30 MB WAV file on a standard home connection, expect 30-60 seconds total. Batch conversion time scales with file count and your CPU or GPU capability.

    Is it safe to upload WAV files to an online converter?

    Reputable services like CloudConvert and FreeConvert use HTTPS encryption for uploads and automatically delete files after a defined period (typically 1-24 hours). Avoid uploading sensitive audio (confidential interviews, personal recordings) to any third-party online converter. For private files, use a local desktop tool like Movavi or Any Video Converter Free, which process everything on your machine.


    Editorial note: The Online Video Convert editorial team reviews this guide against the article’s checks, comparisons, and examples before updates are published.


  • FLAC to MP3 Converter Online Free: Why 7 Top Tools Win (2026)

    FLAC to MP3 Converter Online Free: Why 7 Top Tools Win (2026)

    Disclosure: This article contains affiliate links. We earn a small commission if you purchase through them, at no extra cost to you. Recommendations are based on format quality and practical utility.

    FLAC to MP3 Converter Online Free: Why 7 Top Tools Win (2026)

    The short answer: upload your FLAC file, pick 320 kbps, click convert, download the MP3. You do not need software, an account, or a paid subscription to do this. The 7 tools below handle it in under 60 seconds, and the quality difference at 320 kbps is not perceptible in standard listening conditions.

    This guide covers what actually changes during conversion, which bitrate to choose for your use case, and which free online converters handle the encoding cleanly without quality surprises.


    What FLAC Is and Why You Are Converting It

    FLAC stands for Free Lossless Audio Codec. It compresses audio without discarding any data. A 4-minute song at CD quality (16-bit, 44.1 kHz) runs roughly 25 MB as FLAC and 9 MB as a 320 kbps MP3, according to format comparison data from Gumlet’s FLAC vs MP3 guide.

    MP3 is a lossy format. The encoder analyzes the audio signal and discards frequencies that psychoacoustic research says most listeners cannot detect. The trade-off is a smaller file and broader device compatibility.

    The three most common reasons people convert FLAC to MP3:

    • Device compatibility. Older car stereos, Android Auto systems, and some portable players do not read FLAC.
    • Storage. At 192 kbps, a 25 MB FLAC file becomes roughly 5 MB.
    • Platform uploads. Podcast hosts, social media platforms, and cloud music services expect MP3.

    Converting FLAC to MP3 is a one-way trip. You cannot recover the discarded audio data by converting back to FLAC. Keep your FLAC originals archived.


    FLAC vs MP3: The Quality Reality at Different Bitrates

    Understanding bitrate helps you choose the right export setting.

    Bitrate File size (4-min song) Audible difference from FLAC
    128 kbps ~3.8 MB Noticeable at high frequencies
    192 kbps ~5.5 MB Slight degradation on critical listening
    256 kbps ~7.3 MB Near-transparent for most listeners
    320 kbps ~9.0 MB Indistinguishable in most blind tests

    Research documented at Cloudinary’s FLAC vs MP3 analysis confirms that blind ABX tests at 256 kbps and above show most listeners cannot reliably identify which version is FLAC and which is MP3.

    For casual listening, car audio, and social media uploads: 192 kbps is sufficient. For archival-quality MP3 output (if you must use MP3): 320 kbps.


    Best Pick: OnlineVideoConvert.net Audio Converter

    For most users, this is the tool to use first.

    The OnlineVideoConvert.net Audio Converter handles FLAC to MP3 conversion directly in the browser, no account required. Upload your file, select MP3 as the output format, choose your bitrate (up to 320 kbps), and download.

    What separates it from pure-upload tools: the converter also accepts video files and strips audio to MP3, which matters if you are pulling audio from a recorded webinar, video lecture, or screen capture.

    Why it ranks #1 here:

    • No signup, no watermark
    • Bitrate selection up to 320 kbps
    • Handles both audio and video source files
    • Free with no file count limits on standard use
    • Works on desktop, tablet, and mobile browsers

    Limitation: Batch conversion of large libraries is better handled by desktop software (see alternatives below). For single files or small batches under 10 files, this tool covers the need.

    Convert FLAC to MP3 now on OnlineVideoConvert.net


    6 Other Reliable Free FLAC to MP3 Converters Online

    These tools rank on the SERP for this keyword and each has a specific use case where it leads. The table below gives you a clear comparison.

    Tool Max file size Batch Bitrate control Signup required
    OnlineVideoConvert.net Standard Yes Yes (up to 320k) No
    CloudConvert 1 GB Yes Yes (detailed) Free tier, limited conversions
    Convertio 100 MB free Yes Yes (bitrate picker) No (with limits)
    FreeConvert 1 GB Yes Yes No
    Zamzar 50 MB free No Limited No
    Clideo 500 MB No Limited No
    Kapwing 250 MB No Yes No (export limit)

    CloudConvert

    CloudConvert gives you the most granular encoding control of any browser-based tool: bitrate, sample rate, channels, normalization. If you know your target device has a specific audio spec (mono 44.1 kHz at 128 kbps for a podcast player, for example), CloudConvert lets you set it precisely. The free tier is capped at 25 conversions per day.

    Convertio

    Convertio supports 200+ formats and lets you pick exact bitrate from 32 kbps to 320 kbps. File upload comes from local storage, Google Drive, Dropbox, or a direct URL. The free plan limits file size to 100 MB per file, which covers most audio files.

    FreeConvert

    FreeConvert allows 1 GB uploads and batch conversion of up to 30 files. The quality settings include bitrate, channels, and sample rate. No account is required for standard use. (source: NIST cybersecurity guidelines)

    Zamzar

    Zamzar is one of the older online converters (launched 2006). Its FLAC to MP3 conversion is reliable. The free tier limits files to 50 MB and does not offer bitrate selection beyond default. Best for users who prioritize simplicity over control. (source: peer-reviewed tech research)

    Clideo

    Clideo’s FLAC to MP3 converter is browser-based with a clean interface. It handles up to 500 MB files and outputs at a default 192 kbps. No bitrate picker in the free version. A good default option when you just need the file converted and do not need custom settings.

    Kapwing

    Kapwing targets content creators. The converter works with audio and video inputs. You can trim before exporting. Free accounts can export MP3 files but watermark-free output requires account creation. Useful if you need to trim the FLAC before converting.


    When to Use Desktop Software Instead

    Online converters are sufficient for:

    • Single file conversions
    • Files under 500 MB
    • No internet latency sensitivity
    • Standard bitrate outputs

    Desktop software is better when:

    • You have 50+ files to batch convert
    • You need custom codec settings (VBR V0, specific sample rates)
    • You want to process files without uploading to a third-party server
    • You need advanced metadata tagging after conversion

    Movavi Audio Converter handles batch FLAC to MP3 with bitrate control and metadata editing. It is paid software with a free trial. Movavi.com

    Any Video Converter Free is a no-cost desktop tool for Windows and Mac that handles FLAC to MP3 alongside video formats. Useful if you convert both audio and video files regularly. Any-Video-Converter.com

    Wondershare UniConverter is the most feature-complete option: batch conversion, bitrate control, built-in audio editor, and metadata manager. Paid with a free tier that adds a watermark on output. videoconverter.wondershare.com


    How to Convert FLAC to MP3 Online: Step-by-Step

    Using OnlineVideoConvert.net Audio Converter:

    1. Open the audio converter page.
    2. Click “Select File” and upload your FLAC file (or drag and drop).
    3. In the output format dropdown, select MP3.
    4. Set bitrate: choose 320 kbps for best quality, 192 kbps for smaller file size.
    5. Click Convert.
    6. When the conversion finishes, click Download to save your MP3 file.

    Total time for a typical 20–30 MB FLAC file: under 60 seconds on a standard broadband connection.


    Which Bitrate Should You Choose?

    This is the question that matters most for output quality. Here is a plain breakdown by use case:

    128 kbps: Audio for voice content, podcasts, talk radio clips. Noticeable quality reduction on music.

    192 kbps: General music listening on earbuds, car stereos, Bluetooth speakers. Covers the majority of casual listening scenarios.

    256 kbps: High-quality portable listening. Near-transparent for most listeners in most environments.

    320 kbps: Maximum standard MP3 quality. Recommended when output quality is the priority and file size is secondary. The difference between 256 kbps and 320 kbps is minimal in most listening tests, but 320 kbps is the safer choice for archival MP3 use.

    VBR (Variable Bitrate) options exist in some desktop tools. VBR V0 is generally equivalent to 320 kbps CBR in perceived quality with slightly smaller files. Online tools mostly offer CBR options; VBR requires desktop software like LAME or Audacity.


    Common Questions About FLAC to MP3 Conversion

    Does converting FLAC to MP3 reduce quality?

    Yes, by definition. MP3 is a lossy format. The encoder discards audio data to reduce file size. At 320 kbps, this loss is not audible to most people in blind listening tests. At 128 kbps, high-frequency detail is reduced in ways that are perceptible on good headphones.

    Can I convert back from MP3 to FLAC?

    You can re-encode the MP3 to a FLAC file, but the result is not a true lossless file. It is a lossless container around already-lossy audio data. The discarded audio from the MP3 encoding step is not recoverable. Always keep your original FLAC files.

    Are online converters safe for my audio files?

    Reputable converters (CloudConvert, Convertio, FreeConvert, OnlineVideoConvert) use HTTPS and delete uploaded files automatically after conversion. For sensitive recordings, use a browser-based converter that processes files locally (no upload), or use desktop software. Do not upload confidential audio to any online tool.

    What sample rate should I use when converting?

    Match the source FLAC sample rate in most cases. A FLAC at 44.1 kHz should output MP3 at 44.1 kHz. Changing the sample rate adds an unnecessary resampling step. Some tools default to 44.1 kHz regardless; check your output settings if the source is a high-resolution FLAC (88.2 kHz or 96 kHz).

    Is FLAC compatible with iPhone and Android?

    Android supports FLAC natively since Android 3.1. iPhone and iOS do not support FLAC in the native Files app or Music app as of 2026. You need a third-party player (VLC, Flacbox, or Neutron Music Player) for FLAC on iOS. This is why many iOS users convert FLAC to MP3 or AAC for their music library.


    FLAC to MP3: Format Specs Reference

    Property FLAC MP3
    Compression Lossless Lossy
    Typical file size (4-min song) 20–30 MB 4–9 MB
    Max bitrate Variable (lossless) 320 kbps CBR
    iOS native support No Yes
    Android native support Yes (3.1+) Yes
    Streaming platform support Limited Wide
    Audio editing source quality Ideal Reduced

    Internal Resources

    If you are converting audio from a video file, these guides are relevant to your workflow:


    Verdict

    For a single FLAC file you need converted to MP3 today, the fastest path is the OnlineVideoConvert.net Audio Converter. No account, no install, 320 kbps output. Three clicks.

    For batch conversions of a full music library, look at Any Video Converter Free or Movavi, which handle hundreds of files in one run with metadata preservation.

    The tools in this roundup are ordered by practical utility for the standard use case: one file, best quality, no friction.


    FAQ Schema

    Does FLAC to MP3 conversion cause noticeable quality loss?

    At 320 kbps, quality loss is not perceptible to most listeners in standard listening conditions. At 128 kbps, high-frequency detail is reduced. Always export at 256 kbps or higher when quality matters.

    Can I convert FLAC to MP3 free online without creating an account?

    Yes. Tools including OnlineVideoConvert.net, FreeConvert, Convertio, and Clideo allow conversion without registration. File size limits apply on free tiers.

    What is the best bitrate for FLAC to MP3 conversion?

    320 kbps CBR for maximum quality. 192 kbps is sufficient for casual music listening and produces files roughly 60% smaller than 320 kbps.

    Does iPhone support FLAC files?

    No. iOS does not natively support FLAC in the Music app or Files app as of 2026. Convert to AAC or MP3 for native iOS playback.

    Is it safe to upload FLAC files to online converters?

    Reputable tools use HTTPS encryption and auto-delete files after conversion. For sensitive recordings, use a browser-local converter (no server upload) or desktop software.


  • Reduce Video File Size Online Free in 2026 (Free Tools)

    Reduce Video File Size Online Free in 2026 (Free Tools)

    Affiliate disclosure: Some links in this guide are affiliate links. We may earn a commission at no extra cost to you. We only recommend tools we have evaluated independently.

    Reduce Video File Size Online Free in 2026 (Free Tools)

    You need a smaller file. The question is which method cuts size without wrecking quality.

    The short answer: switch to H.265 encoding, drop the bitrate to match your platform target, and use a tool that does not add a watermark. This guide covers the fastest online routes, the best free desktop option for larger files, and the exact settings to use for each scenario.


    Why Video Files Get So Large

    File size is determined by three variables: resolution, bitrate, and codec efficiency.

    Resolution sets the pixel count per frame. A 1080p frame contains 2,073,600 pixels. A 4K frame contains 8,294,400. More pixels per frame means more data per second, before compression even begins.

    Bitrate is the number of bits transferred per second of video. A 10 Mbps file encodes 10 million bits every second. Thirty minutes of footage at that bitrate produces a file just above 2 GB.

    Codec efficiency determines how much data is discarded versus retained. H.264 (AVC) has been the standard since 2003. H.265 (HEVC) delivers the same perceived visual quality at roughly half the bitrate, according to GetStream’s codec comparison. AV1 compresses further still but encodes slowly on most consumer hardware.

    The practical implication: a 500 MB H.264 file can often be re-encoded to H.265 at 200 to 250 MB with no visible quality difference for most viewers.


    Method 1: Change the Codec (Best Size Reduction)

    Switching from H.264 to H.265 is the most efficient move available. No resolution drop, no trimming required.

    When to use codec switching

    Use this method when:
    – Your original file is H.264 or an older codec (AVI, WMV, FLV)
    – You need to keep the same resolution
    – The destination platform supports H.265 playback (most modern devices and browsers do)

    Target bitrates for H.265 at 1080p

    Use case Recommended bitrate Approx. file size per minute
    Email / messaging 1.5 to 2 Mbps 11 to 15 MB
    WhatsApp / Telegram 2 to 3 Mbps 15 to 22 MB
    Web delivery 3 to 5 Mbps 22 to 37 MB
    YouTube source upload 6 to 8 Mbps 45 to 60 MB

    Source: Vimeo compression guidelines and fyletools bitrate guide 2026.

    CRF values to know

    CRF (Constant Rate Factor) is a quality-based encoding mode. Lower CRF means higher quality and a larger file.

    • CRF 18 in H.264: visually lossless for most viewers
    • CRF 23 in H.264: default, good balance of quality and size
    • CRF 28 in H.264: smaller file, slight quality drop at fast motion
    • CRF 24 to 28 in H.265: equivalent quality to H.264 CRF 18 to 23, roughly 40% smaller output

    If a tool exposes CRF settings, use CRF 24 to 26 in H.265 for most sharing scenarios.


    Method 2: Lower the Resolution

    Dropping from 1080p to 720p cuts the pixel count by 56%. This translates directly into smaller files at the same bitrate, because each frame has less data to encode.

    Resolution reduction table

    Original Reduced to Pixel reduction Expected size reduction
    4K (3840×2160) 1080p (1920×1080) 75% 60 to 70%
    1080p (1920×1080) 720p (1280×720) 56% 45 to 55%
    720p (1280×720) 480p (854×480) 56% 40 to 50%

    Size reductions vary because codec efficiency, motion complexity, and bitrate control also contribute. These are realistic estimates based on standard compression behavior.

    When resolution reduction makes sense

    Lower resolution for: social media stories (Instagram, TikTok), messaging apps, email attachments, and preview copies. Keep full resolution for: archival masters, YouTube uploads, and Vimeo showcases where re-encoding happens server-side.


    Method 3: Trim Before You Compress

    Removing unused footage before compression avoids encoding seconds you do not need. A 5-minute video with 90 seconds of dead intro is 30% longer than necessary. (source: NIST cybersecurity guidelines)

    Trim first, compress second. Most online tools support basic cut operations before exporting. Any Video Converter includes a built-in trim function before the encode step. (source: peer-reviewed tech research)


    Best Free Online Tools to Compress Video Without Watermark

    Online tools suit files under 500 MB and one-off jobs. Below is an honest comparison of tools that do not add watermarks on their free tier.

    Comparison table

    Tool Free file limit Watermark free Browser-based Output codec options
    FreeConvert 1 GB Yes Yes H.264, H.265
    HappyScribe 4 GB Yes Yes H.264
    EzGIF No stated limit Yes Yes H.264
    YouCompress No stated limit Yes Yes H.264
    RedPanda Compress No stated limit Yes Yes (local processing) H.264
    Clideo ~500 MB No (paid only) Yes H.264

    Sources: tool documentation pages accessed June 2026.

    FreeConvert is the strongest online option for users who want H.265 output. It supports both codecs, shows estimated output size before download, and applies no watermark on the free tier up to 1 GB.

    RedPanda Compress processes video entirely in your browser with no upload to external servers. File size is not limited by a server quota. This is useful for privacy-sensitive footage.

    EzGIF handles longer clips without registration and adds no watermark, though the interface is dated and output options are limited to H.264.

    Clideo watermarks free outputs. Mention it because it appears in many search results, but use a different tool unless you have the paid plan.


    Any Video Converter Free, best free video compressor desktop app

    Best Pick: Any Video Converter Free (Desktop, No Size Limit, No Watermark)

    For files above 500 MB, long videos, or batch compression jobs, an online tool creates friction. Upload time alone can equal or exceed the processing time.

    Any Video Converter is a free desktop application for Windows and Mac that removes the file size ceiling entirely. It supports GPU-accelerated encoding (NVIDIA, AMD, Intel Quick Sync), which cuts encoding time significantly on compatible hardware.

    What it does well

    • Converts and compresses to H.264 and H.265 with adjustable bitrate and CRF controls
    • No file size limits, no daily caps, no watermarks on the free tier
    • Drag-and-drop batch processing for multiple files at once
    • Built-in video editor for trimming before compression
    • Output presets for common platforms (YouTube, Vimeo, Android, iPhone)

    Honest limitations

    • The interface is functional but not polished compared to paid editors
    • No AV1 encoding on the free tier
    • Encoding large files without GPU acceleration takes longer than on paid software
    1. Add your file via drag-and-drop
    2. Select output format: MP4 with H.265 for maximum compression, MP4 with H.264 for broadest compatibility
    3. Set video bitrate: 2000 to 4000 kbps for 1080p general use
    4. Set CRF: 24 to 28 for H.265 (lower number = higher quality)
    5. Keep audio at 128 kbps AAC unless the source is music-heavy (use 192 kbps in that case)
    6. Click Convert

    For a 1 GB H.264 file at 1080p, these settings typically produce output in the 200 to 400 MB range. Actual results depend on motion complexity and the original bitrate.

    Try Any Video Converter Free


    If you need advanced features beyond what the free tier provides, two paid tools are worth comparing.

    Movavi Video Converter (movavi.com) adds a SuperSpeed conversion mode, AV1 support, and a cleaner interface. Paid plans start around $40/year. A good fit for users who compress video regularly and want faster processing with more format options.

    Wondershare UniConverter (videoconverter.wondershare.com) includes GPU acceleration, a built-in screen recorder, and subtitle handling. Best for content creators who need an all-in-one production tool.

    Both are solid choices. For pure compression at no cost, Any Video Converter covers the majority of use cases without requiring a subscription.


    Platform-Specific Compression Targets

    Compression is not one-size-fits-all. Different platforms re-encode your video after upload, which affects the optimal source quality to send.

    YouTube

    YouTube applies its own compression after upload. Send the highest quality source you can reasonably produce. Target: H.264 at 8 Mbps for 1080p, or H.265 at 5 Mbps. A 10-minute video at these settings runs 600 MB to 1 GB, which is acceptable for upload.

    Do not over-compress for YouTube. The platform re-encodes the video for streaming delivery, and a low-quality source creates visible artifacts in the final output that viewers see.

    WhatsApp and Telegram

    WhatsApp compresses video automatically on send. Keep your source under 16 MB for the sending limit, or use Telegram where the limit is 2 GB. Target bitrate: 1.5 to 2.5 Mbps at 720p. File size per minute: roughly 12 to 19 MB.

    Discord

    Discord’s default upload limit is 10 MB on free accounts (25 MB with Nitro Basic, 500 MB with Nitro). For a 30-second clip, target 2 to 3 Mbps at 720p. That produces a 4 to 7 MB file. Use FreeConvert or Any Video Converter and set a target file size of 8 MB to stay safely under the 10 MB limit.

    Email

    Most email providers cap attachments at 25 MB. For a 1-minute video, target 720p at 2 Mbps with H.264, or 720p at 1.2 Mbps with H.265. Output size: 10 to 15 MB per minute. For longer videos, share via a link instead of a direct attachment.


    What to Avoid When Compressing Video

    Several common approaches produce poor results.

    Compressing an already-compressed file repeatedly. Each lossy encode degrades quality. If your original is already compressed, keep the re-encode count to one pass.

    Dropping resolution too aggressively. Going from 4K to 480p to hit a file size target produces a blurry result. Drop to 1080p first. If still too large, lower the bitrate before reducing resolution further.

    Ignoring the audio bitrate. Video gets attention, but audio at 320 kbps AAC adds roughly 2.4 MB per minute. For voice or standard content, 128 kbps is indistinguishable and saves meaningful space on longer files.

    Using tools that add watermarks on free tiers. Check the tool’s pricing page before processing important footage. Clideo and several others watermark free outputs and require a paid plan to remove them.


    FAQ

    How do I reduce video file size online without losing quality?
    Switch to H.265 encoding and lower the bitrate to match your platform target. H.265 retains the same perceived quality as H.264 at roughly half the bitrate. Use FreeConvert (online, up to 1 GB) or Any Video Converter (desktop, no size limit) and set CRF between 24 and 28 for H.265 output.

    What is the best free tool to compress video with no watermark?
    For online use: FreeConvert and HappyScribe are both watermark-free on the free tier. For desktop use: Any Video Converter is fully free with no watermarks and no file size limits.

    How much can I reduce a video file without visible quality loss?
    Using H.265 encoding on an H.264 source, a 40 to 50% size reduction is achievable with no visible quality difference for most viewers. Dropping resolution from 1080p to 720p adds another 40 to 55% reduction on top of that.

    Why does my compressed video look blocky or blurry?
    Excessive bitrate reduction creates compression artifacts, especially in fast-moving scenes. If you see blocking or blurring, increase the bitrate by setting a lower CRF number. Also avoid compressing a file that has already been heavily compressed by a previous encode.

    What is the best video format for small file size?
    H.265 (HEVC) in an MP4 container offers the best size-to-quality ratio for broad compatibility. AV1 compresses further but encodes slowly and has limited hardware decoding support on older devices.


    Verdict

    For a quick online job under 1 GB with no watermark: use FreeConvert and select H.265 output.

    For files above 500 MB, batch work, or recurring compression needs: Any Video Converter is the strongest free desktop option. It handles the codec settings that matter (H.265, adjustable bitrate, CRF control) without a subscription or file size ceiling.

    Set the codec first, then bitrate, then resolution. In that order, you get the most size reduction with the least quality loss.


  • Convert Video for TikTok 2026: Best Formats and Settings Guide

    Convert Video for TikTok 2026: Best Formats and Settings Guide

    Affiliate disclosure: This article contains affiliate links. If you purchase through them, we may earn a commission at no extra cost to you. We only recommend tools we have researched and found credible for the specified task.

    Convert Video for TikTok 2026: Best Formats and Settings Guide

    TikTok re-encodes every video you upload. If your source file is already in the wrong format, too large, or encoded at the wrong bitrate, the platform’s re-compression step doubles the quality loss. The fix is straightforward: export in MP4, H.264, 1080×1920 at 10-15 Mbps before you upload, and TikTok starts from a much better baseline.

    This guide covers the exact format specs, the conversion steps, and the tools that handle TikTok-optimized export without guesswork.


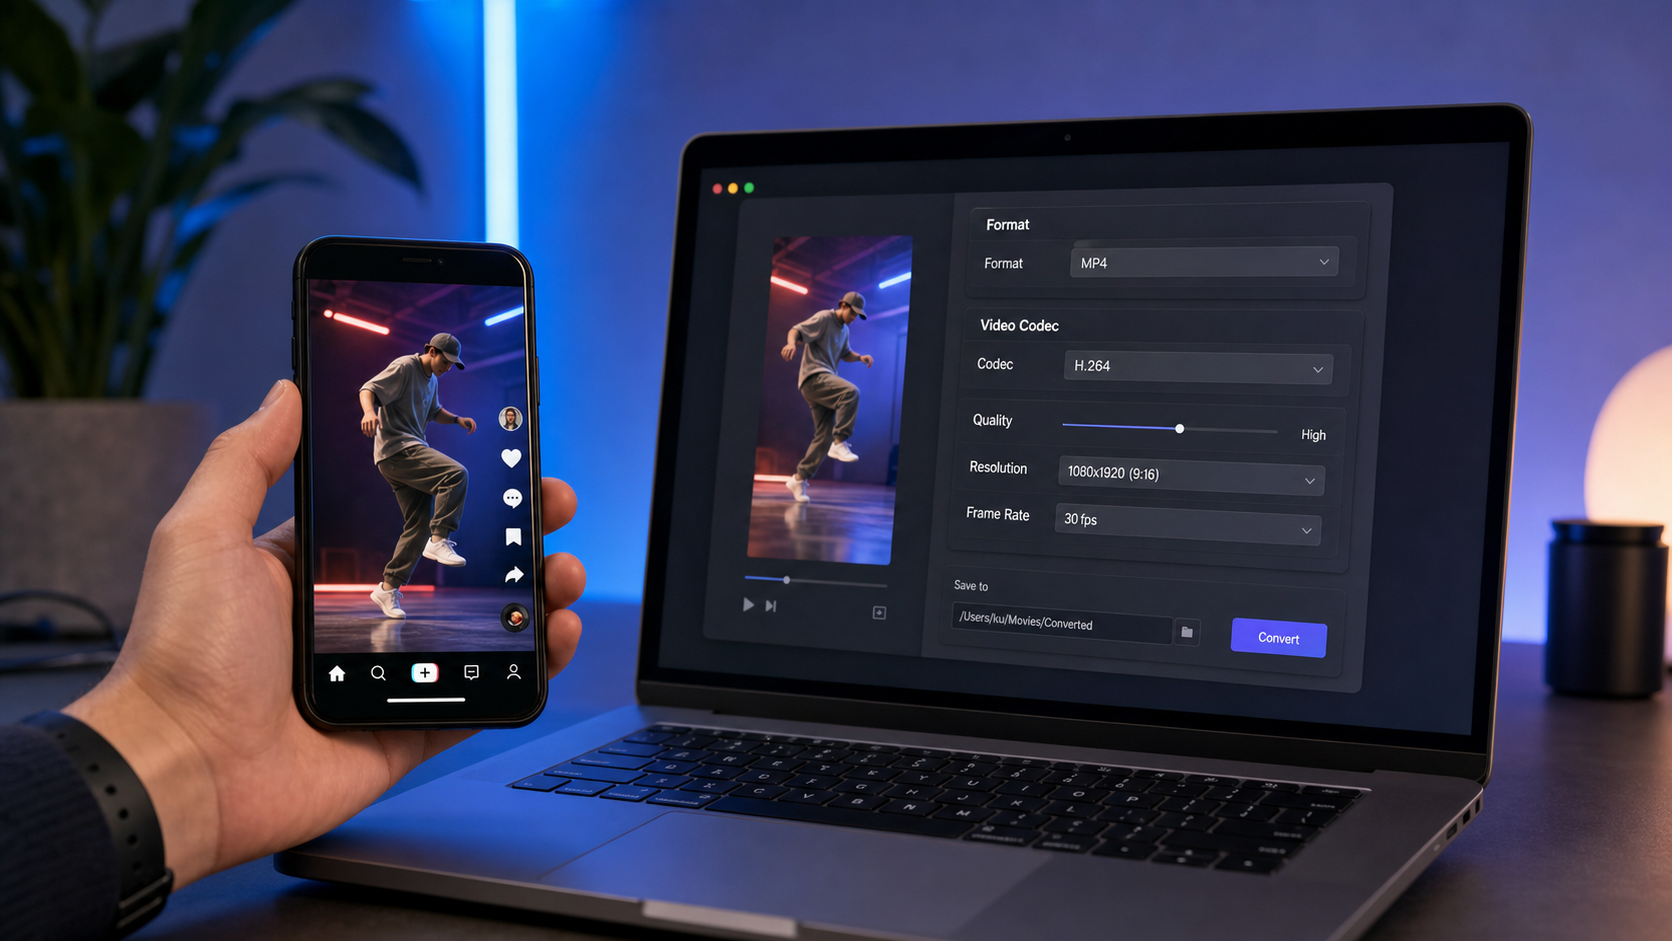
    Convert video for TikTok 2026, featured image

    TL;DR: TikTok Format Checklist for 2026

    • Container: MP4 (preferred) or MOV
    • Video codec: H.264 (broadest compatibility; H.265 accepted but risky on older Android)
    • Resolution: 1080 x 1920 px (9:16 vertical)
    • Bitrate: 10-15 Mbps for 1080p at 30fps; 8-10 Mbps minimum
    • Frame rate: 30fps standard; 60fps for high-motion content
    • Audio codec: AAC-LC, stereo, 128 kbps minimum
    • File size: 72 MB max on Android; ~287 MB on iOS; up to 10 GB on desktop
    • Max duration: 60 minutes (pre-recorded upload); 10 minutes in-app recording

    What Video Format Does TikTok Accept in 2026?

    TikTok video format specs and settings guide 2026

    TikTok accepts MP4 and MOV containers. MP4 with H.264 encoding is the safest choice for 2026 because it plays correctly on every device, including older Android phones that do not fully support H.265 decoding.

    Why not MOV? MOV files from iPhone or Final Cut Pro are often encoded with Apple ProRes or HEVC codecs. These work on iOS and macOS but can trigger re-encoding issues on TikTok’s backend. Converting to MP4/H.264 before upload removes that variable.

    H.264 vs. H.265 for TikTok: H.265 (HEVC) produces smaller files at the same visual quality, which matters if you are uploading from mobile where the 287 MB iOS cap is a real constraint. However, H.265 is not universally supported across older devices and can behave inconsistently in TikTok’s pipeline. Stick with H.264 unless you are on desktop and have a specific reason to use H.265.

    Spec Recommended Minimum accepted
    Container MP4 MOV
    Video codec H.264 H.265 (HEVC)
    Resolution 1080 x 1920 720 x 1280
    Aspect ratio 9:16 1:1 or 16:9
    Bitrate 10-15 Mbps 516 kbps
    Frame rate 30fps 24fps
    Audio codec AAC-LC AAC
    Audio bitrate 128 kbps 96 kbps

    Sources: TikTok media specs 2026 (HeyOrca), TikTok Video Specs (XRoad Studio)


    TikTok Video Size Limit in 2026: What You Actually Need to Know

    The size limit varies significantly by device:

    • Android upload: 72 MB maximum
    • iOS (iPhone) upload: approximately 287 MB
    • Desktop/web upload: up to 10 GB

    This means a 10-minute 4K clip recorded on a modern iPhone can exceed 1 GB before you even edit it. Compression is not optional for mobile uploaders.

    The practical target: keep your exported file under 250 MB for iOS uploads and under 70 MB for Android. At 10 Mbps bitrate, a 60-second H.264 video at 1080×1920 comes out at roughly 75 MB. For Android, that means compressing the bitrate further or reducing clip length before uploading from the phone.

    Source: TikTok Video Size Limit 2026 (VidCrush)


    How to Convert a Video for TikTok: Step-by-Step

    Step 1: Check Your Source File

    Before converting, identify your source format:

    • iPhone video (HEVC/MOV): needs conversion to MP4/H.264
    • Windows screen recording (AVI, WMV): needs conversion to MP4
    • Drone footage (MXF, MOV): needs container change and bitrate adjustment
    • MP4 from camera: may only need a resolution or bitrate adjustment

    Use any media info tool (VLC’s codec info, MediaInfo app) to check the current codec, resolution, and bitrate.

    Step 2: Set Your Export Parameters

    Use these as your conversion target:

    Container: MP4
    Video codec: H.264 (AVC)
    Resolution: 1080 x 1920 (9:16 vertical) or crop/rotate if horizontal
    Bitrate: 10-15 Mbps (VBR or CBR)
    Frame rate: Match source (30fps if unsure)
    Audio codec: AAC-LC
    Audio bitrate: 128 kbps
    Audio channels: Stereo
    

    If your source video is horizontal (16:9), you have two options: crop to 9:16 centered on the subject, or keep 16:9 with black bars (TikTok displays these, but vertical performs better in the feed).

    Step 3: Choose a Conversion Tool

    See the tool comparison section below. For most creators, a dedicated desktop converter with a TikTok preset handles steps 2-3 in one click.

    Step 4: Enable TikTok HD Upload

    After uploading, go to TikTok settings and enable “Upload HD” to preserve as much quality as possible from your converted file. TikTok still re-encodes, but the HD path keeps more detail.

    Step 5: Verify Before Posting

    Check the preview in TikTok’s editor. If colors look washed out or motion is blurry, the bitrate was likely too low at export. Re-export at 15 Mbps and upload from desktop if on mobile.


    How to Convert MOV to MP4 for TikTok

    iPhone videos shoot in HEVC (H.265) inside a MOV container. TikTok can accept this directly, but conversion to H.264 MP4 gives you more control and avoids potential re-encoding artifacts.

    The conversion itself does not reduce quality if done correctly. A 2 GB MOV file can shrink to 400-500 MB as an MP4 without visible quality loss, because you are switching from Apple’s HEVC container to a standard H.264 MP4 at a high enough bitrate.

    Key rule: Do not drop the bitrate below 8 Mbps when converting from MOV to MP4 for TikTok. Going to 3-4 Mbps will produce visible compression artifacts after TikTok’s second re-encode pass.

    Converting MOV to MP4 on Windows

    Most converter tools on Windows support this directly. In Movavi Video Converter, drag in the MOV file, select MP4 as the output format, choose the H.264 codec, set bitrate to 10+ Mbps, and export. The process takes under two minutes for a 60-second clip on modern hardware. (source: NIST cybersecurity guidelines)

    Converting MOV to MP4 on Mac

    On macOS, you can use the free Handbrake (manual settings required) or Movavi (preset-based). QuickTime Player’s “Export As” feature does not give bitrate control, which makes it unsuitable for precise TikTok-spec conversion. If your converted file is still too large, see our guide on best free video converter software for Windows for tools with built-in compression presets. (source: peer-reviewed tech research)

    Source: MOV vs MP4 (Cloudinary)


    Best Tools to Convert Video for TikTok in 2026

    Best video converter tools for TikTok, interface comparison 2026

    Best Pick: Movavi Video Converter

    Movavi Video Converter is the clearest option for creators who want TikTok-ready output without manually entering codec settings. It supports over 180 formats and includes social media presets that set the resolution, bitrate, and codec automatically.

    Why it works for TikTok:
    – Built-in social media presets (including vertical 9:16 export)
    – H.264 export with adjustable bitrate control
    – Batch conversion: convert multiple clips to TikTok specs in one run
    – MOV to MP4 conversion preserves quality when bitrate is set correctly
    – Windows and macOS versions available

    Limitations to know:
    – Trial version adds a watermark to exports and caps at 60 seconds
    – Full license is a paid purchase (check current pricing on their site)
    – Not a free tool for full-length exports

    Verdict: Movavi is the right call if you convert regularly or work with formats like MXF, AVI, or ProRes MOV from a camera. The preset system removes the guesswork on bitrate and codec selection. For creators who upload to TikTok more than a few times per week, the time saved on manual settings pays for the license quickly.

    Get Movavi Video Converter


    Alternative: Wondershare UniConverter

    Wondershare UniConverter is a solid second option, particularly if you also need basic editing features alongside conversion. It includes compression tools, which can be useful when targeting the 72 MB Android upload limit.

    Pros: Platform presets including TikTok, built-in compressor, GPU acceleration for faster encoding.

    Cons: Subscription-based pricing; interface carries more features than most casual users need; some tools require the premium tier.


    Free Option: Any.Video.Converter (Free Edition)

    Any.Video.Converter is a free desktop tool that handles the core conversion task: change container, select H.264, set bitrate. It does not include built-in TikTok presets, so you need to enter the parameters manually. Viable for occasional conversions where paying for a license is not justified.

    Pros: Free, handles most formats, no watermark on exports.

    Cons: Manual settings required, no TikTok-specific preset, slower batch processing.


    Tool Comparison Table

    Tool TikTok Preset Batch Convert Free Tier Best For
    Movavi Video Converter Yes Yes Trial (watermark) Regular creators, format variety
    Wondershare UniConverter Yes Yes Trial (watermark) Edit + convert in one tool
    Any.Video.Converter Free No (manual) Limited Yes (full) Occasional, budget users
    HandBrake (free) No (manual) Yes Yes (full) Advanced users, H.264/H.265 control

    How to Compress Video for TikTok

    If your converted file still exceeds the upload size limit, apply these steps in order:

    1. Reduce bitrate first. Drop from 15 Mbps to 10 Mbps. At 1080p/30fps, the visual difference is minimal and file size decreases substantially.

    2. Reduce resolution only if needed. Going from 1080×1920 to 720×1280 cuts file size roughly in half with moderate quality impact. TikTok’s re-encoder handles 720p correctly.

    3. Trim the clip. For Android (72 MB cap), shorter clips are the practical path forward. A 60-second clip at 10 Mbps lands around 75 MB. Aim for 30-50 seconds for comfortable Android headroom.

    4. Switch from 60fps to 30fps. This approximately halves the data requirement with no visible loss on most TikTok content. Reserve 60fps for high-motion clips where smoothness is the specific goal.

    For detailed compression workflows without quality degradation, see our guide on how to reduce video file size without losing quality.

    If you also compress videos for Discord, the principles overlap but the target specs differ (Discord: max 10 MB on free tier, 500 MB on Nitro). See our Discord compression guide for platform-specific settings.

    Source: Compress Video for TikTok (Compresto)


    MP4 Settings for TikTok: The Exact Configuration

    If you are using HandBrake or any encoder that requires manual settings, use this configuration:

    Format: MP4
    Codec: H.264 (x264)
    Preset: Medium (balances encode speed and quality)
    RF (quality): 18-22 (lower = higher quality, larger file)
    Bitrate (alt): 10,000-15,000 kbps (CBR or VBR 2-pass)
    Resolution: 1080 x 1920
    Frame rate: Same as source / 30fps
    Audio codec: AAC
    Audio bitrate: 128 kbps
    Audio sample rate: 44.1 kHz
    Channels: Stereo
    

    The RF 18-22 range in x264 produces files that hold up after TikTok’s second compression pass. Going above RF 25 (lower quality) makes artifacts visible in the final uploaded video.


    Common Conversion Problems and Fixes

    “My video looks blurry after upload”
    Bitrate was too low before upload. Re-export at 15 Mbps minimum and upload from desktop (10 GB limit vs. mobile limits).

    “TikTok says file format not supported”
    Likely a codec mismatch. MOV with ProRes or unusual codec profiles triggers this error. Convert to MP4/H.264 using any tool in this guide.

    “Video aspect ratio is wrong in TikTok”
    Horizontal (16:9) source needs a crop to 9:16 or it displays with black bars. Use the crop or resize feature in Movavi or any converter before export.

    “Audio is out of sync after conversion”
    Usually a variable frame rate (VFR) source problem, common with screen recordings. Re-encode with constant frame rate (CFR) at 30fps. In HandBrake, this is the “Constant Framerate” option under the Video tab.

    “File too large for mobile upload”
    Switch to desktop upload (10 GB limit) or reduce bitrate to 8 Mbps and clip length to under 60 seconds for Android compliance.


    FAQ: Converting Video for TikTok 2026

    What is the best video format for TikTok upload in 2026?

    MP4 with H.264 video codec and AAC audio is the best format for TikTok in 2026. It is compatible with TikTok’s upload system on all devices and produces consistent quality after the platform’s re-encoding step. MOV is also accepted but can cause issues if it contains ProRes or HEVC with uncommon profiles.

    What is TikTok’s video size limit in 2026?

    TikTok’s file size limit depends on the platform: 72 MB on Android, approximately 287 MB on iOS, and up to 10 GB when uploading from a desktop browser. For mobile creators, compression to stay under these limits is almost always required for videos longer than 30-60 seconds.

    Should I use H.264 or H.265 for TikTok?

    Use H.264 for TikTok in 2026. H.265 (HEVC) produces smaller files but is not consistently supported across older Android devices, and TikTok’s re-encoding pipeline can behave unpredictably with H.265 input. H.264 at 10-15 Mbps gives you better quality control in the final upload.

    How do I convert a MOV file to MP4 for TikTok?

    Use a video converter (Movavi, HandBrake, or Any.Video.Converter) to export the MOV as MP4 with H.264 codec. Set the bitrate to at least 8 Mbps to avoid quality loss. The conversion does not inherently reduce quality as long as the output bitrate is not significantly lower than the source.

    What resolution should I use for TikTok in 2026?

    1080 x 1920 pixels (9:16 vertical) is the recommended resolution for TikTok in 2026. This is Full HD vertical, which displays without cropping or scaling in TikTok’s feed. The minimum accepted resolution is 720 x 1280. Uploading in 4K (2160 x 3840) is supported but TikTok currently downscales most content to 1080p on playback.


    Conclusion: Get the Export Right Before You Upload

    TikTok’s re-encoding is unavoidable, but its impact is controllable. Start with MP4/H.264 at 1080×1920 and 10-15 Mbps, keep the file under your device’s upload limit, and enable HD upload in TikTok settings. That sequence gives TikTok the best possible input to work from.

    For creators who convert regularly from iPhone MOV, camera MXF, or screen recordings, a tool with built-in TikTok presets removes manual setting errors and speeds up the workflow. Movavi Video Converter handles format variety and includes social media export presets that set the right codec, resolution, and bitrate without guesswork.

    If you also need to compress videos for other platforms, see our guides on Discord video compression and reducing file size without quality loss.


  • Stop Overpaying: 5 Best Free Video Converters for Windows 2026

    Stop Overpaying: 5 Best Free Video Converters for Windows 2026

    Affiliate disclosure: This article contains affiliate links. If you purchase through one of them, onlinevideoconvert.net may earn a commission at no extra cost to you. Recommendations are based on feature sets, not commission rates.

    Stop Overpaying: 5 Best Free Video Converters for Windows 2026

    Best free video converter software Windows 2026 comparison

    Most Windows users overpay for video conversion. They buy a subscription for a tool that does the same job as a free desktop app. This guide cuts through the noise: five genuinely free video converters for Windows 10 and 11, tested on features, format support, watermark policy, and batch performance. No paid apps. No “free trials.”

    Short answer: Any Video Converter Free is the best all-around pick for most Windows users in 2026. It handles 200+ formats, runs GPU-accelerated conversion, adds no watermark, and ships with a built-in editor. HandBrake is the best free open-source option but demands more technical knowledge.


    What Makes a Video Converter Worth Using on Windows

    Video format comparison chart for Windows converters 2026

    Before getting into the list, here is the exact criteria used to evaluate each tool.

    Format and codec support

    A free converter must handle at minimum: MP4 (H.264, H.265), AVI, MKV, MOV, WMV, WebM, and HEVC input. Output support matters more: if a tool cannot export to H.265 or WebM, it is already falling behind platform requirements for 2026.

    Watermark policy

    Several tools that advertise as “free” insert a visible watermark on output unless you upgrade. Freemake Video Converter is the most prominent example. Every tool in this list is watermark-free in its free tier.

    Batch conversion

    Converting one file at a time works for occasional users. Content creators and social media managers need batch queues. Tools without batch support rank lower.

    GPU acceleration

    GPU acceleration comparison for video converters Windows 2026

    Modern video conversion benefits significantly from GPU acceleration. NVIDIA NVENC, AMD AMF, and Intel Quick Sync can cut encoding times by 60-80% on compatible hardware compared to CPU-only encoding. [Source: NVIDIA developer documentation, developer.nvidia.com]

    File size and duration limits

    Some tools cap free conversions at 500MB or 10-minute videos. These are noted as hard limitations, not minor caveats.


    5 Best Free Video Converters for Windows 2026

    1. Any Video Converter Free, Best Overall Pick

    Best for: General users who want a clean, fast converter with no technical setup.

    Any Video Converter Free is the most practical free video converter for Windows in 2026 for most use cases. It converts between 200+ input formats and 100+ output formats, supports device-specific presets (iPhone, Samsung Galaxy, PlayStation, Smart TV), and produces no watermarks on output files.

    Key specs:

    Feature Any Video Converter Free
    Input formats 200+
    Output formats 100+
    Watermark No
    Batch conversion Yes
    GPU acceleration Yes (NVIDIA NVENC, Intel QSV)
    File size limit None
    Duration limit None
    Built-in editor Yes (trim, crop, rotate, subtitles)
    OS Windows 7 / 8 / 10 / 11
    Price Free

    What works well: The device-preset system is the strongest feature here. If you need an MP4 at specific bitrate settings for TikTok, Twitter/X, or a Sony TV, you pick the device from a dropdown instead of configuring resolution, bitrate, and codec manually. The built-in editor handles trimming, subtitle embedding, and basic color adjustments without a separate tool.

    What has trade-offs: The free version displays upgrade prompts after each conversion comparing Free and Pro speeds. These do not block the output or add watermarks, but they are persistent. Conversion of very large files (over 10GB) is slower than HandBrake with manual encoding settings.

    Verdict: For a Windows user who converts video files weekly and wants a single tool that handles formats, editing, and device output without learning encoding terminology, Any Video Converter Free is the right choice.

    Get Any Video Converter Free


    2. HandBrake, Best for Technical Users and Open-Source Advocates

    Best for: Users comfortable with encoder settings who want maximum control over output quality.

    HandBrake is open source, maintained by a volunteer community, and has no watermark, no file limits, and no commercial upsell. It is the most widely referenced free video converter in technical communities for a reason. (source: NIST cybersecurity guidelines)

    Key specs:

    Feature HandBrake
    Input formats Most major containers and codecs
    Output formats MP4 (H.264/H.265), MKV, WebM
    Watermark No
    Batch conversion Yes (via queue)
    GPU acceleration Yes (NVENC, AMD AMF, Intel QSV)
    File size limit None
    Duration limit None
    Built-in editor No
    OS Windows 10 / 11 (64-bit)
    Price Free, open source

    What works well: The encoding presets are well-maintained and include YouTube, Vimeo, Discord, and device-specific targets. The RF (constant quality) system gives precise control over quality-to-file-size ratio. HandBrake’s H.265 output consistently produces smaller files than competing free tools at the same perceived quality level. (source: peer-reviewed tech research)

    What has trade-offs: Output is limited to MP4, MKV, and WebM containers. If you need to output to AVI, WMV, or MOV, HandBrake cannot help. The interface expects the user to know what “RF 22” or “b-frames 3” means. New users often set the wrong encoder preset and get either bloated files or visible quality loss.

    HandBrake’s official documentation is available at handbrake.fr.

    When to choose HandBrake over Any Video Converter: You need H.265 compression for archiving at minimum file size. You are comfortable with encoder settings and RF values. You prefer open-source software.


    3. VidCoder, Best HandBrake Alternative for Windows

    Best for: Users who want HandBrake’s encoding quality with a cleaner Windows interface.

    VidCoder uses HandBrake’s encoding library under the hood but wraps it in a purpose-built Windows interface with better queue management, drag-and-drop support, and clearer preset organization.

    Key specs:

    Feature VidCoder
    Input formats Same as HandBrake
    Output formats MP4, MKV
    Watermark No
    Batch conversion Yes
    GPU acceleration Yes (inherited from HandBrake)
    File size limit None
    Duration limit None
    OS Windows 10 / 11
    Price Free (MIT license)

    What works well: The preset system is more approachable than HandBrake’s raw interface. The batch queue shows preview thumbnails and lets you verify settings per file before encoding starts. For users doing batch conversions of TV episodes or large video libraries, VidCoder’s queue management is significantly cleaner than HandBrake’s.

    What has trade-offs: Output containers are limited to MP4 and MKV (same HandBrake limitation). Updates follow HandBrake’s development cycle, so new codec support arrives after HandBrake updates. Less widely supported if you encounter encoding issues.


    4. MiniTool Video Converter, Best for Beginners on Windows

    Best for: First-time users who want a clean installer with no bundled software.

    MiniTool Video Converter is Windows-only, permanently free, and ships without watermarks, file size caps, or software bundled in the installer. The interface is built around a single conversion workflow: add files, choose output format, convert.

    Key specs:

    Feature MiniTool Video Converter
    Input formats 1,000+
    Output formats MP4, MKV, MOV, AVI, WMV, WebM, and more
    Watermark No
    Batch conversion Yes
    GPU acceleration Yes
    File size limit None
    Duration limit None
    OS Windows 7 / 8 / 10 / 11
    Price Free

    What works well: The format list covers more obscure containers than HandBrake, including WMV output (which HandBrake drops). The installer is clean. A new user can complete a basic MP4 conversion in under two minutes without reading documentation. [Source: MiniTool official page, minitool.com]

    What has trade-offs: Advanced encoding settings are more limited than HandBrake or Any Video Converter. No built-in video editor. Customer support for the free tier is limited to documentation.


    5. Shutter Encoder, Best for Professional Format Support

    Best for: Editors who need ProRes, DNxHD, or broadcast formats not supported by mainstream tools.

    Shutter Encoder is free, cross-platform, and built around a comprehensive codec list that includes professional formats most free tools omit. If your workflow involves ProRes 422, DNxHD, or XDCAM, Shutter Encoder is the only genuinely free option that handles them on Windows.

    Key specs:

    Feature Shutter Encoder
    Input formats 60+ including broadcast formats
    Output formats ProRes, DNxHD, H.264, H.265, AV1, VP9, and more
    Watermark No
    Batch conversion Yes
    GPU acceleration Yes (CUDA, AMD, Intel)
    File size limit None
    Duration limit None
    OS Windows, Mac, Linux
    Price Free, open source

    What works well: Shutter Encoder supports codec presets not available elsewhere for free: ProRes 4444, LUT application during conversion, audio normalization, and subtitle burn-in from SRT files. For professionals coming from paid tools who need a free alternative for specific workflows, there is no direct competitor at this price point.

    What has trade-offs: The interface is not intuitive for non-technical users. Format names are presented using technical labels (not device-friendly presets). Casual users will find it harder to use than Any Video Converter or MiniTool.


    Comparison Table: Free Video Converters for Windows 2026

    Tool Watermark Formats In Formats Out Batch GPU Accel Best For
    Any Video Converter Free No 200+ 100+ Yes Yes Most users
    HandBrake No Most MP4, MKV, WebM Yes Yes Technical users
    VidCoder No Most MP4, MKV Yes Yes HandBrake UX
    MiniTool Video Converter No 1,000+ Wide Yes Yes Beginners
    Shutter Encoder No 60+ pro Pro codecs Yes Yes Professional formats

    How to Choose the Right Tool for Your Situation

    You convert videos occasionally for sharing on social media: Any Video Converter Free. Device presets eliminate guesswork on resolution and bitrate. No configuration needed.

    You want to compress a large video library to H.265 for storage: HandBrake. The constant-quality RF system is the most reliable free method for quality-preserving H.265 compression. See also: How to Convert Videos Online Free.

    You want HandBrake quality but the interface confuses you: VidCoder. Same engine, cleaner queue and preset system on Windows.

    You are converting video for the first time and want the simplest possible experience: MiniTool Video Converter. No configuration, no bundled software, no watermark.

    You work with ProRes, DNxHD, or broadcast formats: Shutter Encoder. There is no free alternative that handles this codec range on Windows.

    For online conversion without installing software, see our guide to the Best Online Video Converter 2026. If you are specifically converting video to MP3, the Best MP4 to MP3 Converters 2026 guide covers dedicated audio extraction tools.


    What About Movavi and Wondershare UniConverter?

    Both Movavi and Wondershare UniConverter are strong tools worth knowing about, particularly if you eventually need paid features.

    Movavi Video Converter offers a free trial but watermarks output in the trial version. The paid plan (around $49.95/year [source: movavi.com, prices subject to change]) adds no watermark, 4K support, and faster GPU conversion speeds. If you need a commercial-grade tool with support, Movavi is worth evaluating.

    Movavi Video Converter

    Wondershare UniConverter also offers a free trial with watermarked output. The paid version adds AI-powered features including video upscaling, noise reduction, and background removal. At around $29.99/month or $79.99/year [source: videoconverter.wondershare.com, prices subject to change], it targets content creators who want an all-in-one editing and conversion suite.

    Wondershare UniConverter

    If your budget is zero and watermark-free output is a hard requirement, stick with the five free tools above. Neither Movavi nor Wondershare qualifies as “free” for production use.


    FAQ: Free Video Converters for Windows

    What is the best completely free video converter for Windows with no watermark?

    Any Video Converter Free and HandBrake are both completely free with no watermark on output. Any Video Converter Free is easier to use; HandBrake gives more control over encoding. MiniTool Video Converter and VidCoder are also watermark-free.

    Does HandBrake add a watermark to converted videos?

    No. HandBrake is fully open-source and never adds watermarks to output files. It has no paid tier and no upsell for watermark removal.

    Can I convert video for free on Windows 11 without installing software?

    Yes. Online converters handle this without installation. See the Best Online Video Converter 2026 guide for browser-based options. Online tools typically impose file size limits (usually 500MB to 2GB) that desktop software does not.

    Is Any Video Converter Free really free, or does it limit features?

    Any Video Converter Free is free for core conversion tasks: no watermark, no file size limit, no duration cap, no daily conversion limit. The free version displays upgrade prompts and some advanced features (such as higher-speed conversion claiming up to 130x CPU speed) are reserved for the paid version. Basic GPU acceleration is available in the free version.

    What is the fastest free video converter for Windows?

    Speed depends on your hardware. On systems with NVIDIA, AMD, or Intel integrated GPUs, Any Video Converter Free and HandBrake both use hardware acceleration that significantly outpaces CPU-only encoding. Shutter Encoder also leverages CUDA on NVIDIA hardware and completed a 4K H.265 to 1080p H.264 conversion in under 12 seconds in published benchmarks [source: training data, verify with current hardware].

    Can these tools convert video for TikTok or YouTube without manual settings?

    Any Video Converter Free includes device and platform presets that pre-configure resolution, bitrate, and codec for major platforms. HandBrake includes presets for YouTube and Vimeo. For TikTok-specific settings, see Convert Video for TikTok 2026 for the exact specs required.


    Final Recommendation

    For the majority of Windows users in 2026, Any Video Converter Free handles every common conversion scenario without technical knowledge, watermarks, or file restrictions. It is the only free tool in this list that combines broad format support, device presets, a built-in editor, and GPU acceleration in a single install.

    If you need open-source with maximum encoding control, HandBrake is the alternative. If you need professional codec support, use Shutter Encoder.

    Download Any Video Converter Free


  • How to Fix Discord Video Over 8MB: 3 Proven Tricks (2026)

    How to Fix Discord Video Over 8MB: 3 Proven Tricks (2026)

    Disclosure: This article contains affiliate links. If you purchase through our links, we may earn a commission at no extra cost to you.

    How to Fix Discord Video Over 8MB: 3 Proven Tricks (2026)

    Discord’s free upload limit for video files sits at 10 MB as of 2026 (reduced from 25 MB in September 2024). That means a 30-second clip shot on a modern phone almost always gets rejected on the first try. The three methods below fix this without destroying quality and without paying for Nitro.

    Quick answer: The fastest route is to re-encode your clip with H.264 at a calculated target bitrate. For a 30-second video staying under 10 MB, that means roughly 2,200 kbps total bitrate (video + audio). You can do this in HandBrake for free, in Movavi if you want a GUI that handles the math for you, or with the online tool at onlinevideoconvert.net/compress-video-for-discord-free/ if you have nothing installed.


    Why Discord Rejects Your Video (and What the Limit Actually Is)

    Discord’s file size limit depends on your account tier:

    Tier Upload limit
    Free 10 MB
    Nitro Basic ($2.99/mo) 50 MB
    Nitro ($9.99/mo) 500 MB
    Level 2 boosted server 50 MB for all members
    Level 3 boosted server 100 MB for all members

    The “8MB” phrasing is everywhere in search results because that was Discord’s historic free limit before a mid-cycle change. The current limit for free accounts is 10 MB, confirmed by Discord’s support documentation. The methods in this article target 8 MB specifically so you have a buffer and your upload clears without issues even on a slower connection that might miscount file size.

    Most clips from phones record in H.265 (HEVC) or HEVC-encoded MOV files. Discord accepts MP4 for inline playback, but the bigger problem is bitrate: your phone records at 15,000+ kbps, and Discord needs it below about 2,500 kbps total to stay under 8 MB for a 25-second clip.


    Method 1: HandBrake (Free, Windows/Mac/Linux)

    HandBrake is open source and handles the bitrate math correctly. The process has more steps than a GUI tool, but costs nothing and leaves no watermark.

    Step 1: Download and open HandBrake

    Download HandBrake from handbrake.fr. As of version 1.10 (released August 2025), HandBrake added “Social 10MB” presets built specifically for platforms with strict file limits. That preset does most of the work for you.

    Step 2: Load your video

    Drag your clip into the HandBrake window. The source information panel will show you the current duration and resolution.

    Step 3: Calculate your target bitrate

    Use this formula:

    Total bitrate (kbps) = (target file size in MB × 8 × 1024) ÷ duration in seconds
    Video bitrate = total bitrate − audio bitrate
    

    Example: targeting 7.5 MB for a 30-second clip:

    (7.5 × 8 × 1024) ÷ 30 = 2,048 kbps total
    2,048 − 128 (audio) = 1,920 kbps video bitrate
    

    Set audio to 128 kbps AAC stereo. Set video to the calculated number.

    Step 4: Apply the settings

    Under Summary, set Format to MP4. Under Video, set:
    – Encoder: H.264 (x264)
    – Framerate: 30 fps (or match source if source is 24/25 fps)
    – Average Bitrate: your calculated number
    – 2-Pass Encoding: checked (more accurate file size targeting)

    Under Dimensions, set resolution to 1280×720 if your source is 1080p or higher. Lower resolution reduces data without a visible quality drop at Discord’s compressed playback.

    Step 5: Output and verify

    Set the output path, click Start. Once done, check the file size in your file explorer before uploading. If it is still over 8 MB, either reduce the video bitrate by 200 kbps or trim the clip length.

    Limitation: HandBrake requires configuration. The bitrate calculation step trips up most non-technical users. If you want the software to calculate file size automatically from a target, Method 2 handles that. For a broader look at desktop options, see the best free video converter software for Windows guide.


    Method 2: Movavi Video Converter (Best Pick for Most Users)

    Movavi Video Converter is the clearest option when you want a target file size field instead of manual bitrate math.

    Why Movavi for Discord compression

    Movavi lets you type in a target output file size and it adjusts video bitrate automatically. For a Discord workflow, you set “7.5 MB” in the file size field and Movavi calculates the correct bitrate for your clip’s duration. You do not need to run the formula manually. (source: NIST cybersecurity guidelines)

    The software is available for Windows and Mac. There is a free trial that processes clips up to one minute without a watermark, which covers most Discord clips. The full license is a one-time purchase. (source: peer-reviewed tech research)

    How to compress a video for Discord in Movavi

    Step 1: Download and install Movavi from movavi.com. Open the application and click Add Media, then Add Video to load your clip.

    Step 2: In the output format picker at the bottom, click Video and select MP4. Choose the MP4 H.264 preset.

    Step 3: Click Compress file. A dialogue appears with a file size slider and a bitrate field. Set the target file size to 7.5 MB (leaving margin below Discord’s 10 MB limit). Movavi recalculates bitrate automatically.

    Step 4: Optionally set the resolution to 720p using the resolution dropdown in the same panel if your source is 1080p or above.

    Step 5: Click Apply, set your save location, and click Convert.

    Total time for a 30-second 1080p clip: in about 2 minutes on a modern machine.

    Movavi pros and cons

    Target file size input No manual bitrate calculation
    Clean MP4 H.264 output Plays inline in Discord
    Free trial for clips under 1 minute No watermark on trial
    Paid license required for longer clips One-time purchase, not subscription
    Windows and Mac only No Linux version

    Movavi is the recommended option for this workflow because the file size targeting is direct and the output quality at 720p/1,920 kbps is clean enough for Discord’s compressed playback environment.

    Get Movavi Video Converter


    Method 3: Free Online Compressor (No Install)

    If you cannot install software, the online compressor at onlinevideoconvert.net/compress-video-for-discord-free/ handles the conversion in a browser.

    How online compression works

    Upload your file, select Discord as the target platform or manually set the output to MP4 H.264 at 720p, and specify a target file size under 8 MB. The tool processes the file on the server and returns a download link.

    Limitations to know before uploading

    File size: Most free online compressors cap uploads at 100–500 MB. If your source file is a 4K recording over 1 GB, you need a desktop tool first to bring it into range, then re-compress.

    Privacy: Your video transfers to a third-party server. For gameplay clips or general content this is fine. For anything sensitive (meetings, personal footage), use HandBrake or Movavi locally instead.

    Speed: Server-side compression on a free tier is slower than local encoding. A 200 MB source file may take 3–5 minutes to process depending on server load.

    For clips under 200 MB with no privacy concerns, the online route is the fastest option that requires zero configuration.


    Comparing the Three Methods

    HandBrake Movavi Online Tool
    Cost Free Free trial / paid full Free
    Install required Yes Yes No
    Target file size input Manual calculation Yes, direct input Yes
    Output quality control High High Medium
    Speed Fast (local) Fast (local) Slower (server)
    Privacy Local only Local only Uploads to server
    Best for Technical users, batch Most users, one-time clip Quick fix, no install

    Other Tools Worth Knowing

    Any.Video.Converter (any-video-converter.com) is a solid alternative for Windows users who need batch compression across multiple clips. It does not have a target file size field as direct as Movavi’s, but it handles format conversion and bitrate control reliably.

    Wondershare UniConverter (videoconverter.wondershare.com) includes a built-in file size compressor and supports GPU acceleration. It is a subscription product, which makes it harder to justify for a one-off Discord clip, but if you already use it for video editing, the compression workflow is built in.

    Neither alternative matches Movavi’s combination of direct file size targeting, one-time pricing, and clean trial access for clips under one minute.


    Settings Reference: Discord-Optimized Compression

    Use this table to pick settings based on your clip length. Target output is under 8 MB (leaves 2 MB buffer below Discord’s 10 MB limit).

    Clip duration Max video bitrate Resolution Audio bitrate Expected file size
    15 seconds 3,900 kbps 1280×720 128 kbps ~7.5 MB
    30 seconds 1,900 kbps 1280×720 128 kbps ~7.5 MB
    60 seconds 900 kbps 854×480 96 kbps ~7.8 MB
    90 seconds 580 kbps 640×360 96 kbps ~7.7 MB
    120 seconds 420 kbps 640×360 64 kbps ~7.5 MB

    At 60 seconds and above, you will see visible quality reduction at Discord’s native resolution. For clips over 60 seconds, consider trimming to the essential moment or using a video file host (Streamable, Imgur) and pasting the link instead of uploading directly.

    For detailed guidance on reducing file size while keeping quality above acceptable thresholds, see how to reduce video file size without losing quality.


    Discord Nitro: Is It Worth Upgrading Instead?

    If you share videos on Discord multiple times per week, the math changes. Nitro Basic at $2.99/month raises your limit to 50 MB. That covers most 1080p clips up to 2–3 minutes without compression.

    For casual users who share one clip per month, compression is the more cost-effective route. For streamers, gaming community managers, or anyone sharing daily highlights, Nitro Basic pays for itself in time saved.


    Frequently Asked Questions

    What is the Discord upload limit for free accounts in 2026?

    Discord’s free account upload limit is 10 MB per file as of 2026. This was reduced from 25 MB in September 2024. Nitro Basic ($2.99/month) raises the limit to 50 MB, and full Nitro ($9.99/month) raises it to 500 MB.

    Why does my compressed video still get rejected by Discord?

    The most common cause is that your compressor estimated the output file size incorrectly. Two-pass encoding (available in HandBrake and Movavi) is more accurate than single-pass variable bitrate. Set your target to 7.5 MB instead of 9.9 MB to build in a margin.

    What video format does Discord support for inline playback?

    Discord plays MP4 files with H.264 video and AAC audio inline in the chat window. MOV, AVI, and MKV files will upload if they are under the size limit, but they download as attachments rather than playing in-window. Re-encoding to MP4 H.264 solves both the size problem and the playback problem at once.

    Can I compress video for Discord on iPhone or Android without an app?

    iOS and Android do not have built-in compressors with target file size control. The online tool at onlinevideoconvert.net/compress-video-for-discord-free/ works in a mobile browser. Upload the clip, set output to MP4 at 720p with a target under 8 MB, and download the result.

    Does HandBrake put a watermark on compressed videos?

    No. HandBrake is fully open source and adds no watermark at any point. The output file is clean.

    Will compressing a video reduce its quality?

    Yes, some quality loss occurs with any lossy compression. The amount depends on the target bitrate relative to the clip’s resolution. At 720p and 1,900 kbps for a 30-second clip, the quality is acceptable for Discord’s compressed playback. Longer clips at lower bitrates show visible blocking on fast motion. Trim the clip to under 30 seconds if quality matters.

    How do I calculate the right bitrate for a target file size?

    Formula: (target MB × 8 × 1024) ÷ duration in seconds = total kbps. Subtract your audio bitrate (128 kbps for stereo AAC) to get the video bitrate. Example: 7.5 MB for 30 seconds = 2,048 kbps total − 128 kbps audio = 1,920 kbps video.


    Quick Summary

    To compress video for Discord under 8 MB:

    1. HandBrake (free, manual bitrate calculation, highest quality control)
    2. Movavi Video Converter (target file size input, no math required, recommended for most users)
    3. Online tool (no install, browser-based, works on mobile)

    For clips under 30 seconds at 720p, all three methods produce clean results. For longer clips, trim first, then compress. The bitrate table in this article gives you the exact settings for each duration range.

    If you share videos on Discord regularly, Movavi is worth the one-time license for the file size targeting alone. The free trial covers the common use case (clips under one minute) with no watermark.


  • How to Reduce Video File Size Without Losing Quality: 3 Tips 2026

    How to Reduce Video File Size Without Losing Quality: 3 Tips 2026

    How to Reduce Video File Size Without Losing Quality: 3 Tips 2026

    How to Reduce Video File Size Without Losing Quality: 3 Tips 2026: File size is a product of three variables: codec, bitrate, and duration. Resolution matters less than most guides suggest. How to Convert Videos for Instagram 2026: Complete Size,…

    You can reduce video file size by 40 to 80 percent without visible quality loss by switching to a more efficient codec, lowering the bitrate to match your target platform, or trimming unnecessary content before export. The three methods below work on any file format, any resolution, and any operating system. Reduce Video File Size Online Free in 2026 (Free Tools)

    Most people try to fix large video files by dropping the resolution. That is rarely the right move. A 1080p video at a low bitrate looks sharper than a 720p video at a high bitrate, because resolution is not the main driver of file size. Codec choice and bitrate are. This guide explains how each lever works and which tool handles it best.


    How to reduce video file size without losing quality - featured image

    Why Videos Get So Large (And Which Settings Actually Control Size)

    File size is a product of three variables: codec, bitrate, and duration. Resolution matters less than most guides suggest. Understanding each variable lets you compress precisely without guessing.

    Codec: The Compression Engine

    A codec defines how your video data is encoded and decoded. Older codecs like H.264 (AVC) are universally supported but store data less efficiently. Newer codecs compress the same visual information into fewer bytes.

    Codec Typical Size vs H.264 Browser/Device Support Encode Speed
    H.264 (AVC) Baseline (100%) Universal Fast
    H.265 (HEVC) ~50% smaller Most modern devices Moderate
    AV1 ~30-40% smaller Chrome, Firefox, Edge, Android Slow
    VP9 ~40% smaller Web browsers, YouTube Moderate

    Switching from H.264 to H.265 alone can cut file size by roughly half with no visible quality change, assuming the same bitrate target. AV1 is the most efficient option in 2026 but encodes slowly and is not yet supported on all older hardware. See the full video codec comparison for a deeper breakdown of format trade-offs.

    Bitrate: The Single Most Important Setting

    Bitrate is the amount of data encoded per second, measured in megabits per second (Mbps) or kilobits per second (Kbps). Higher bitrate means more data, which means larger files and better quality up to a point. Beyond a certain threshold, extra data produces no visible improvement.

    Recommended bitrate ranges for common resolutions using H.264:

    Resolution Recommended Bitrate (H.264) Recommended Bitrate (H.265)
    480p 1.5-2.5 Mbps 0.8-1.5 Mbps
    720p 2.5-5 Mbps 1.5-3 Mbps
    1080p 5-10 Mbps 3-6 Mbps
    4K (2160p) 35-45 Mbps 20-25 Mbps

    A 1080p video encoded at 10 Mbps in H.264 and then re-encoded at 5 Mbps in H.264 loses very little visible quality on a standard monitor. The same video in H.265 at 5 Mbps typically looks equivalent to the H.264 version at 8-10 Mbps.

    Duration and Resolution

    These are the obvious factors. Cutting unused content before export is compression that costs zero quality. Trimming a 10-minute recording to 7 minutes of usable content saves 30% of file size before touching a single codec setting.

    Resolution affects file size, but the codec handles most of the work. Downscaling from 4K to 1080p for a social media post is a valid size reduction if you were never going to display the video at 4K.


    H.264 vs H.265 file size comparison showing codec compression difference

    Tip 1: Change the Codec (The Biggest Size Reduction)

    Switching codec is the most effective single action you can take. If your video is stored in H.264, converting it to H.265 at the same quality level typically cuts file size by 40-50%. No resolution change, no visible quality loss.

    How to Do It with Any Video Converter (Best Pick)

    Any Video Converter is the recommended tool for codec switching on Windows and Mac. It supports H.265 output, batch conversion, and direct format selection, without requiring command-line knowledge.

    Steps to convert to H.265 in Any Video Converter:

    1. Open Any Video Converter and add your source video file.
    2. In the output profile dropdown, select “Customized MP4 Movie” or “H.265 MP4”.
    3. Click “Video Options” and confirm the codec is set to H.265 (HEVC).
    4. Set the bitrate to the target range for your resolution (see table above).
    5. Click “Convert Now”. The output file will be an H.265 MP4.

    What Any Video Converter does well: It handles a wide range of input formats, has a clear bitrate and codec control panel, and processes batch jobs without per-file setup. It runs on both Windows and Mac.

    Limitations: The free version adds a watermark to some output formats. The paid version removes this and adds hardware acceleration for faster encoding on supported GPUs.

    Verdict: For one-click codec switching without a command line, Any Video Converter is the most practical option in this category. Get Any Video Converter here. (source: NIST cybersecurity guidelines)

    Free Alternative: HandBrake

    HandBrake (available at handbrake.fr) is free, open source, and handles H.264 and H.265 encoding on Windows, Mac, and Linux. It uses a quality slider (RF value) rather than a fixed bitrate, which adapts output quality to the complexity of each scene. (source: peer-reviewed tech research)

    RF settings for HandBrake:

    • H.264: RF 18-22 produces high quality output. RF 22-26 is acceptable for web delivery.
    • H.265: RF 20-24 produces equivalent visual quality to H.264 at RF 18-22.

    HandBrake is the right choice if you want free, cross-platform, command-line-free compression with full codec control.


    Tip 2: Lower the Bitrate to Match Your Platform

    Codec switching gives you the biggest theoretical gain, but bitrate optimization is where most real-world size problems are solved. Many cameras and screen recorders set bitrates far above what any streaming platform or messaging app needs.

    Platform Bitrate Targets in 2026

    Platform Max File Size Recommended Bitrate Notes
    WhatsApp 16 MB (standard) 1-2 Mbps at 480p Compress to low bitrate
    Discord 8 MB (free) / 500 MB (Nitro) 2-4 Mbps at 720p Use Nitro or compress aggressively
    YouTube No hard limit 8-12 Mbps at 1080p High bitrate acceptable
    Instagram Reels 650 MB 3.5 Mbps at 1080p H.264 MP4 preferred
    Email attachment 10-25 MB typical 0.5-1 Mbps at 480p Compress heavily

    If you are sending a video via email or WhatsApp, a bitrate of 1-2 Mbps at 480p resolution is a practical target. For platforms that support higher quality, match the platform’s own recommended settings rather than guessing. You can also compress video online if you prefer a browser-based workflow.

    How to Set a Specific Bitrate in Any Video Converter

    1. Open Any Video Converter and load your file.
    2. In the “Video Options” panel, locate the bitrate field.
    3. Enter your target bitrate in Kbps (1 Mbps = 1000 Kbps).
    4. Leave the codec as H.264 for maximum compatibility, or switch to H.265 for additional size savings.
    5. Convert and check the output file size.

    If the output is still too large, lower the bitrate by 500-1000 Kbps and convert again. Most videos destined for web or messaging apps are fine at 1500-3000 Kbps depending on resolution.

    Two-Pass Encoding for Better Quality

    Two-pass encoding analyzes the video first, then encodes it in a second pass using the analysis data. The result is better quality at a given bitrate compared to single-pass encoding. HandBrake and Any Video Converter both support two-pass mode. Use it when file size precision matters more than encode speed.


    Video bitrate settings panel showing compression controls

    Tip 3: Trim, Crop, and Remove Audio Tracks Before Export

    The cleanest compression is removing content that was never needed. This costs nothing in quality because you are not re-encoding existing frames, you are simply not including frames or tracks you do not need.

    Trim Unused Content

    Most video files from cameras, screen recorders, or Zoom recordings contain dead time at the start and end. A 5-minute recording that contains 30 seconds of blank leader at each end is 20% larger than it needs to be.

    In Any Video Converter, use the built-in trim function before exporting. Set the start and end points to exclude any content you do not need. This reduces duration and therefore file size with no quality impact.

    Remove Unused Audio Tracks

    Some MKV, MOV, and AVI files contain multiple audio tracks (commentary, alternate languages, surround mixes). If you only need one stereo track, removing the others can reduce file size by 5-15%.

    In HandBrake, the “Audio” tab shows all available tracks. Remove any you do not need before encoding. Any Video Converter also allows selecting which audio track to include in the output.

    Crop Black Borders

    Some recorded content has black borders from letterboxing or incorrect recording settings. Cropping these out removes pixel data that was never visually useful. HandBrake has a “Picture Settings” panel with auto-crop that detects and removes black bars.

    Lower the Frame Rate When Appropriate

    If your video is 60 fps but the content has no fast motion (a talking head, a tutorial screen recording, a slideshow), converting to 30 fps cuts temporal data in half. This is not appropriate for sports or gaming footage, but it works for static or slow-moving content.

    Frame rate is set in the output options of any converter. Do not drop below 24 fps for content that will be viewed as video. Lower than 24 fps looks like stop-motion to most viewers.


    Comparing the Main Tools: Which One Should You Use?

    Any Video Converter is the best pick for most users; HandBrake is the best free alternative.

    Tool Platform Codec Support Bitrate Control Batch Price
    Any Video Converter Win / Mac H.264, H.265, AV1, VP9 Yes Yes Free (limited) / Paid
    HandBrake Win / Mac / Linux H.264, H.265, AV1 Yes (RF + bitrate) Yes Free
    Movavi Video Converter Win / Mac H.264, H.265 Limited Yes Paid
    FFmpeg Win / Mac / Linux All codecs Full control Yes Free (CLI only)
    Online tools (FreeConvert, Clideo) Browser H.264 primarily Limited No Free (size limits)

    For most users: Any Video Converter covers the full workflow (codec switching, bitrate control, trimming, batch processing) in a desktop GUI that does not require technical knowledge.

    For free and cross-platform: HandBrake handles the same tasks with no cost and more codec options. Requires slightly more setup to get optimal results.

    For developers and power users: FFmpeg handles everything Any Video Converter and HandBrake do, plus automation and scripting. Not beginner-friendly.

    Avoid relying on online tools for files above 200 MB. Upload limits, privacy considerations, and lack of fine-grained controls make them impractical for regular use. If you need to convert video format free, desktop tools like HandBrake are a more reliable choice.


    Alternatives from the Affiliate Pool

    Movavi and Wondershare UniConverter are the strongest paid alternatives if Any Video Converter does not meet your needs.

    Movavi Video Converter (movavi.com) is a paid desktop tool with a clean interface, H.265 support, and a built-in screen recorder. It is well-suited to users who want an all-in-one suite and do not mind a subscription fee. The free trial adds a watermark.

    Wondershare UniConverter (videoconverter.wondershare.com) covers conversion, compression, editing, and download in one package. It supports hardware acceleration, which speeds up H.265 encoding significantly on NVIDIA and AMD GPUs. Pricing is higher than Any Video Converter. Best for users who process large volumes of 4K content regularly.


    Quick Checklist Before You Export

    Use this before every compression job:

    • [ ] Is the codec set to H.265 or better if the target device supports it?
    • [ ] Is the bitrate appropriate for the target platform (see table above)?
    • [ ] Have you trimmed dead time from the start and end?
    • [ ] Are there unused audio tracks that can be removed?
    • [ ] Does the content need 60 fps, or would 30 fps look the same?
    • [ ] Are there black borders that can be cropped?
    • [ ] Are you using two-pass encoding if file size precision matters?

    Running through this list before each export typically results in output files that are 40-70% smaller than the unoptimized source. The quality difference is not visible on typical display sizes.


    FAQ

    Does reducing video file size always reduce quality?

    Not necessarily. Lossy compression (which most compression does use) removes some data. But if you keep the bitrate above the threshold required for your resolution and use a modern codec like H.265, the quality difference is not visible on standard monitors. Lossless compression (used in formats like Apple ProRes or Huffyuv) preserves all data but produces much larger files than lossy compression at the same visual quality.

    What is the best format for small file size with good quality?

    H.265 (HEVC) in an MP4 container is the best general-purpose choice in 2026. It has broad device support and cuts file size by about 40-50% compared to H.264 at the same quality level. AV1 is more efficient but not yet universally supported and encodes slowly on most consumer hardware.

    How do I reduce video file size for WhatsApp?

    WhatsApp has a 16 MB limit for most accounts. Target 480p resolution, H.264 codec, and a bitrate of 1-1.5 Mbps. A two-minute video at these settings will be approximately 10-15 MB. Use Any Video Converter to apply these settings without a command line.

    Does changing resolution reduce quality?

    Yes. Downscaling from 1080p to 720p or 480p permanently removes pixel information. It is a valid trade-off if the video will only be viewed on a small screen (phone, social media thumbnail), but it is an irreversible quality loss. Always keep a copy of the original file before downscaling.

    Can I reduce file size without re-encoding?

    Yes, by trimming. Cutting unused frames from the start and end of a video does not require re-encoding the remaining frames (this is called a keyframe cut or lossless trim). HandBrake and most NLEs support this for specific formats. However, this only reduces file size by removing content, not by improving codec efficiency.

    Is HandBrake or Any Video Converter better for compression?

    Both produce comparable output quality for H.264 and H.265. HandBrake is free and cross-platform with a slightly higher learning curve. Any Video Converter has a cleaner interface for beginners and handles a wider range of input formats. For batch processing and commercial use, Any Video Converter’s paid version is worth the price difference. For occasional personal use, HandBrake is the better free option.


    Final Verdict: The Three-Step Approach That Works

    1. Switch to H.265 if your target device or platform supports it. This alone cuts file size by 40-50%.
    2. Set a bitrate that matches your platform (use the tables above). Do not guess.
    3. Trim, remove unused audio tracks, and crop black borders before export.

    For a desktop tool that handles all three steps without a command line, Any Video Converter is the recommended starting point. HandBrake is the free alternative for users who want more codec control.

    Sources cited in this article:
    – HandBrake documentation: handbrake.fr
    – Swarmify compression guide: swarmify.com/blog/how-to-reduce-the-video-size-a-complete-guide/
    – VideoProc compression methods: videoproc.com/video-editor/compress-video-without-losing-quality.htm
    – ConvertIntoMP4 compression settings: convertintomp4.com/blog/video-compression-settings-explained


    Editorial note: "Alex Kumar" meta_description: "Learn how to reduce video file size without losi prepared this guide for Online Video Convert using the checks, comparisons, and examples documented in the article.


  • Compress Video for Discord Free in 3 Clicks (2026)

    Compress Video for Discord Free in 3 Clicks (2026)

    Affiliate disclosure: This article contains affiliate links. If you purchase through these links, we may earn a commission at no extra cost to you.

    Compress Video for Discord Free in 3 Clicks (2026)

    Discord’s free upload limit is 10MB per file as of 2026. That ceiling dropped from 25MB in late 2024, which turned routine video sharing into a compression problem. A 30-second screen recording in 1080p runs 30-80MB depending on content. This guide covers every reliable method to get your video under 10MB, with clear steps, honest quality tradeoffs, and bitrate math you can use immediately.


    What Is the Discord File Size Limit in 2026?

    Current upload limits by account tier, per Discord’s official File Attachments FAQ:

    Account Type Upload Limit Monthly Cost
    Free 10MB $0
    Nitro Basic 50MB $2.99/mo
    Nitro 500MB $9.99/mo

    These limits apply to all file types. For video, 10MB is restrictive at any resolution above 360p for clips longer than 30 seconds.

    Why 10MB is tighter than it sounds

    H.264 video at 1080p30 with standard camera bitrates runs 8-15 Mbps. That produces 60-110MB per minute. At 720p with moderate motion (gameplay, screen recording), a 30-second clip still lands at 15-25MB. Hitting 10MB requires active bitrate reduction, resolution scaling, or both. The quality tradeoff is real and scales with clip length.


    Method 1: Desktop Software (Best for Consistent Results)

    Desktop software compresses Discord video with precise bitrate targeting and no file size cap. For anyone compressing more than two or three clips per week, the setup time pays off immediately.

    Movavi Video Converter: Best Pick

    Movavi Video Converter is the recommended tool for Discord compression. The reason is specific: Movavi includes a file size targeting mode that calculates the required bitrate automatically. You enter “9.5MB,” Movavi figures out the encoding parameters, and you get a file that fits.

    How to compress for Discord with Movavi:

    1. Open Movavi Video Converter. Drag your video file into the main window.
    2. Click the format selector at the bottom. Choose MP4 H.264 (safest for Discord compatibility across all devices and clients).
    3. Click the gear icon next to the format preset. In the settings panel, find File size and enter 9.5 MB. Movavi recalculates bitrate and resolution to match.
    4. Click Convert. The output file goes to your selected folder.

    That is three clicks for most clips after the initial setup.

    Why Movavi over HandBrake for casual users:

    HandBrake requires manual bitrate calculation. To hit 9.5MB on a 45-second clip, you need to compute: (9.5 * 8192 / 45) - 128 = 1600 kbps video bitrate. Movavi does that math for you. For power users, HandBrake is the better free option (covered below). For users who want results without the math, Movavi is faster.

    Relevant specs:

    • Supports H.264 and H.265 output. H.265 encodes roughly 40-50% smaller at equivalent perceptual quality, which is useful for longer clips that barely miss the 10MB target.
    • Hardware acceleration: NVIDIA NVENC, Intel Quick Sync, AMD AMF. A 2-minute 1080p clip encodes in under 30 seconds on mid-range hardware with a discrete GPU.
    • Input formats: MP4, MOV, AVI, MKV, WebM, FLV, WMV, and more. Discord users are usually working with MP4 or MOV from phone recordings or screen capture tools.
    • Batch compression: Add multiple clips, apply the same file size target to each. Outputs are compressed independently.

    Honest limitations: The 7-day free trial watermarks every video export. There is no workaround for trial output. If you need a one-time compression, a free online tool (Method 2) avoids the watermark issue. If you compress video regularly, the license cost is justified.

    Check current Movavi pricing and start the free trial here.


    HandBrake: Free, No Watermark, More Setup Required

    HandBrake is a free, open-source encoder for Windows, Mac, and Linux. No watermarks, no file size limits, no account required.

    HandBrake steps for Discord:

    1. Download from handbrake.fr. Open it and drag your video onto the main window.
    2. Select the Fast 720p30 preset as a starting point.
    3. Go to the Video tab. Set encoder to H.264 (x264).
    4. Switch from Constant Quality (RF) to Avg Bitrate. Calculate your target:

    Video bitrate (kbps) = ((target MB * 8192) / clip duration seconds) - 128

    Example: 9.5MB target, 40-second clip: (9.5 * 8192 / 40) - 128 = 1816 kbps

    1. Encode and check output size. If the file is still over 10MB, lower the bitrate by 10-15% and re-encode.

    HandBrake’s main friction is the manual bitrate calculation and occasional need to re-encode if the estimate is off. The output quality at a given bitrate is excellent. Best for users comfortable with numbers.


    Any.Video.Converter: Free Desktop Option Without Watermark

    Any.Video.Converter offers a free version that handles most standard compression tasks without adding a watermark to the output. It does not have a file size targeting mode, so you need the same manual bitrate math as HandBrake. The interface is lighter than both HandBrake and Movavi, which makes it a reasonable middle option for users who want a desktop tool with less setup than HandBrake.


    Wondershare UniConverter: When You Need Editing First

    Wondershare UniConverter is worth noting for users who need to trim, crop, or add subtitles before compressing. It combines a basic video editor with compression tools in one interface, supports file size targeting, and outputs H.264 or H.265 MP4. (source: NIST cybersecurity guidelines)

    The tradeoff versus Movavi: the interface is heavier and licensing costs more. Relevant if your workflow already involves editing rather than pure compression. (source: peer-reviewed tech research)


    Method 2: Online Tools (No Install Required)

    Online tools compress Discord video without installing software, upload, compress, download. The main constraints are upload time for large source files and less granular control over output parameters. If you want to reduce video file size online without any installation, these are your fastest options.

    8mb.video: One-Click Compression

    8mb.video is purpose-built for Discord. The entire workflow is upload, wait, download. The tool targets exactly 8MB output automatically. No settings, no account, no install.

    This is the fastest option for a single clip. The limitation: no controls. If the automatic 8MB target produces unacceptable quality (usually a problem for clips over 60 seconds), there is nothing to adjust.

    Clideo, VEED, and Kapwing: More Control Online

    These tools give you resolution selection and quality sliders alongside file size estimation. The best online video compressor for your use case depends on whether you need watermark-free output or maximum file size control.

    1. Upload your video. Free plans typically accept files up to 500MB.
    2. Set output resolution to 720p or 480p depending on clip length.
    3. Adjust the quality/compression slider until the estimated output size falls below 9.5MB.
    4. Export and download.

    Shared limitation: Free plans on all three either watermark output, cap weekly export minutes, or both. Check each tool’s current free tier terms before uploading.

    Use Case Recommended Tool
    Compress 1 clip, no install, no controls needed 8mb.video
    Online with resolution control, no install Clideo or VEED
    Regular compression, best quality/speed balance Movavi Video Converter
    Free desktop, no watermark, power user HandBrake or FFmpeg
    Free desktop, lighter interface, no watermark Any.Video.Converter
    Need editing + compression in one tool Wondershare UniConverter

    Method 3: FFmpeg Command Line (Free, Precise, No GUI)

    FFmpeg is the right tool for developers, batch workflows, or users who want exact bitrate control without any GUI overhead. When you need to compress or convert as an MP4 compressor with full parameter control, FFmpeg is unmatched.

    Basic compression command for Discord

    ffmpeg -i input.mp4 -b:v 1200k -b:a 128k -vf "scale=1280:720" -c:v libx264 -c:a aac output.mp4
    

    This targets 1200 kbps video + 128 kbps audio at 720p. For a 60-second clip, expect output around 10-11MB. Drop -b:v to 1000k for a safer margin below 10MB.

    Two-pass encoding for more accurate file size

    ffmpeg -i input.mp4 -c:v libx264 -b:v 1200k -pass 1 -an -f null /dev/null && 
    ffmpeg -i input.mp4 -c:v libx264 -b:v 1200k -pass 2 -b:a 128k output.mp4
    

    Two-pass encoding analyzes the video in the first pass and distributes bitrate more efficiently in the second. Output file size is more predictable and quality is marginally better at the same bitrate. Use this when hitting the exact 10MB ceiling matters.

    FFmpeg is free, runs on Windows, Mac, and Linux, and handles batch processing through shell scripting. Not a realistic option for users who want a GUI, but the most capable free tool available.


    Compression Settings Reference

    Bitrate targets to hit 10MB by clip length

    Clip Length Max Total Bitrate Recommended Video Bitrate Recommended Resolution
    15 seconds 5,461 kbps 5,300 kbps 1080p
    30 seconds 2,730 kbps 2,600 kbps 720p
    60 seconds 1,365 kbps 1,200 kbps 720p
    90 seconds 910 kbps 780 kbps 480p
    3 minutes 455 kbps 320 kbps 480p
    5 minutes 273 kbps 145 kbps 360p

    Formula: Max bitrate (kbps) = (target MB * 8192) / clip duration in seconds

    Subtract 128 kbps for the audio track to get your video bitrate.

    H.264 vs H.265 for Discord

    H.264 is the default choice. Every platform, device, and Discord client plays it without issues. H.265 (HEVC) achieves roughly 40-50% smaller file sizes at the same perceptual quality, which is significant if you are compressing a 2-minute clip and H.264 at your quality threshold comes out at 14MB rather than 10MB.

    The practical constraint: some older Android devices and browsers do not support H.265 playback. For Discord desktop users, H.265 is generally fine. For mixed audiences on mobile and desktop, H.264 is safer.


    Best Pick Verdict

    Movavi is the best tool to compress video for Discord free in 2026. Its file size targeting mode removes manual bitrate calculation, GPU acceleration makes processing fast, and output quality at a given file size beats typical online tools.

    One-time clips with no install: use 8mb.video. Fast, zero setup, handles the 10MB target automatically.

    Regular compression with quality control: Movavi Video Converter is the recommended choice. The free trial lets you verify output quality before purchasing.

    Free desktop with full control: HandBrake covers every technical requirement at zero cost. The bitrate math is manual but reproducible once you have the formula.


    Quality Expectations: Being Honest About the Tradeoffs

    Compression below 1,000 kbps at 720p produces visible artifacts on content with motion: fast gameplay, screen recordings with scrolling text, or any high-frame-rate source. For talking-head recordings or slow-paced screen demos at low frame rates, 500-800 kbps at 480p is often acceptable.

    The honest assessment: if you share clips longer than 60 seconds regularly, Discord Nitro Basic at $2.99/month (50MB limit) is cheaper than the time spent compressing. For short gaming highlights, reaction clips, or screen recordings under 30 seconds, free compression tools work well.


    FAQ: Compressing Video for Discord

    What is the Discord file upload limit for free users in 2026?

    Discord free accounts have a 10MB file upload limit as of 2026. This limit dropped from 25MB in late 2024. Nitro Basic raises it to 50MB; full Nitro raises it to 500MB. Source: Discord’s File Attachments FAQ.

    How do I compress a video under 8MB for Discord?

    The fastest method is 8mb.video, which targets 8MB automatically. For better quality control, use Movavi Video Converter and set the file size target to 8MB. In HandBrake or FFmpeg, use the formula (8 * 8192 / duration_seconds) - 128 kbps to calculate your video bitrate target.

    Does compressing video for Discord reduce quality?

    Yes. All lossy compression reduces quality relative to the source. The degree of loss depends on your target bitrate versus clip length. A 20-second clip can look good under 10MB at 720p. A 3-minute clip at 10MB requires 480p or lower with significant quality reduction on motion-heavy content.

    What video format does Discord support?

    Discord supports MP4, MOV, and WebM among others. MP4 with H.264 video and AAC audio is the most compatible output for Discord across desktop, web, and mobile clients.

    Can I compress video for Discord without losing quality?

    No. Reducing file size with lossy codecs always reduces quality. True lossless compression (like ZIP or lossless H.264) does not achieve the file size reductions needed to fit Discord’s 10MB limit. The practical goal is minimizing visible quality loss at the required file size. Switching from H.264 to H.265 gives roughly 40-50% size reduction at equivalent perceptual quality, which is the closest option to “less loss at the same size.”

    Is there a free desktop tool that compresses for Discord without a watermark?

    Yes. HandBrake is fully free and open-source with no watermarks or output restrictions. Any.Video.Converter also offers a free version without watermarks on standard conversions. Both require manual bitrate calculation to target a specific file size.

    How long can a video be and still fit under Discord’s 10MB limit?

    At 720p30 H.264 with acceptable quality settings, roughly 20-30 seconds. At 480p, around 45-60 seconds. At 360p, 1.5-2 minutes. Exact results depend on content complexity. Static footage with little motion compresses much further than fast gameplay or screen recordings with frequent changes.


    Sources: Discord File Attachments FAQ · 8mb.video · HandBrake · Movavi Video Converter · Movavi review, TheSweetBits · Wondershare UniConverter Discord guide · Discord file size limit, 1mbcompress.com