Category: Uncategorized

  • Reduce Video Size for WhatsApp Free: 6 Methods 2026

    Reduce Video Size for WhatsApp Free: 6 Methods 2026


    title: “Reduce Video Size for WhatsApp Free: 6 Methods 2026”
    slug: “how-to-reduce-video-size-for-whatsapp-free”
    domain: “onlinevideoconvert.net”
    primary_keyword: “how to reduce video size for WhatsApp free”
    meta_description: “Learn how to reduce video size for WhatsApp free using six tested methods, from phone trimming to HandBrake and Movavi, with exact codec settings.”
    date: 2026-08-13
    word_count: 2710
    status: draft
    schema:
    – Article
    – FAQPage
    – Author


    Affiliate disclosure: This article contains affiliate links. If you purchase through them, we may earn a commission at no extra cost to you. Recommendations are based on tool capability and fit for the task described.

    Reduce Video Size for WhatsApp Free: 6 Methods 2026

    WhatsApp enforces a 16MB limit on video messages. A 60-second 1080p clip recorded on a modern phone typically lands between 60MB and 150MB. That gap is why your video fails to send.

    This guide covers six methods to get your video under 16MB without paying for software. Each method includes specific settings, so you know what to adjust and why.


    WhatsApp Video Limits Explained (What You Are Actually Dealing With)

    Before picking a tool, know the three limits WhatsApp applies in 2026:

    Standard video messages: 16MB per file. This is the limit for videos sent in the video player format. Roughly 90 seconds of 720p footage at a reasonable bitrate, or 30-45 seconds of unedited 1080p.

    Status clips: 16MB per clip, with a hard 30-second duration cap regardless of file size. Both limits apply simultaneously.

    Document attachment workaround: When you send a video as a document (using the attachment icon, then “Document” instead of “Gallery”), WhatsApp allows files up to 2GB. The recipient downloads and plays it outside the built-in player. Quality stays intact. This is a legitimate workaround for longer videos.

    According to the WhatsApp Help Center, the 16MB media limit applies globally across iOS and Android. The document workaround is a documented feature, not a loophole.

    Target specs for a video that passes the 16MB gate:

    Setting Recommended value
    Format MP4
    Codec H.264
    Resolution 720p (1280×720)
    Video bitrate 1,000-1,500 kbps
    Audio codec AAC
    Audio bitrate 128 kbps
    Frame rate 30 fps

    At 1,500 kbps total bitrate, a 60-second video lands around 11-12MB. At 1,000 kbps, closer to 7-8MB. Both clear the 16MB limit with margin.


    Method 1: WhatsApp’s Built-In Compression (Fastest, Zero Tools)

    WhatsApp compresses video automatically when you send from the Gallery picker. You do not need any external tool if your video is close to the limit.

    Smartphone showing WhatsApp chat with video attachment
    WhatsApp applies a 16MB size limit on video attachments sent via the Gallery picker.

    How it works:

    1. Open a chat in WhatsApp.
    2. Tap the attachment icon (paperclip or “+” depending on your OS).
    3. Choose “Gallery” (not “Document”).
    4. Select your video.
    5. WhatsApp shows a preview with a quality selector at the top right on Android (HD toggle). Leave HD off for smaller file size.
    6. Tap Send.

    WhatsApp re-encodes the video before sending. It targets a lower bitrate, typically 600-900 kbps, which significantly reduces file size. The trade-off is visible quality loss at higher resolution source material.

    When this works: Videos already close to 16MB, casual clips where quality is secondary, anything under 2-3 minutes at 720p.

    When this fails: Long videos (5+ minutes), high-resolution source files (4K), videos where quality matters enough to preserve.

    The built-in method gives you no control over the output settings. If the result looks unacceptable, move to Method 2 or 3.


    Method 2: Clideo (Free Online Tool, No Download)

    Clideo’s video compressor runs in a browser. No installation, no account required for basic compression.

    Steps:

    1. Go to clideo.com/compress-video.
    2. Click “Choose file” and upload your video (Clideo free tier limits uploads to 500MB).
    3. Clideo auto-compresses and shows you the before/after file size.
    4. Download the compressed MP4.

    Clideo targets aggressive size reduction by default. For a WhatsApp use case you typically want to aim for output below 14MB to give buffer. Clideo does not expose manual bitrate controls on the free tier.

    Pros: Runs on any device including iPhone and Android via mobile browser. No signup.

    Cons: No bitrate control. Clideo adds a watermark to video output on the free plan. You need the paid plan to remove it ($9/month or $72/year as of mid-2026).

    If the watermark is a problem, HandBrake (Method 4) or Movavi (Method 5) are better choices.


    Method 3: Send as Document (The Clean Workaround)

    If video quality cannot be compromised and the file is under 2GB, skip compression entirely.

    Laptop screen showing video compression software interface
    Desktop video compression tools like Movavi offer more precise bitrate controls than online alternatives.

    Steps on Android:

    1. Open the chat.
    2. Tap the attachment icon.
    3. Tap “Document.”
    4. Navigate to your video file and select it.
    5. Send.

    Steps on iPhone:

    1. Tap the “+” icon next to the text field.
    2. Select “Document.”
    3. Browse Files app to find your video.
    4. Confirm and send.

    The recipient receives the full-quality file. They tap to download, then play it in their phone’s default video player, not inside WhatsApp’s player. The experience is slightly less polished (no autoplay thumbnail) but quality is unchanged.

    This method is ideal for sharing screen recordings, client deliverables, event videos, or anything where compression artifacts would matter.


    Method 4: HandBrake (Free Desktop Compression, Full Control)

    HandBrake is an open-source video encoder available for Windows, Mac, and Linux. It gives you exact control over every output parameter. The trade-off is a steeper learning curve than online tools.

    Settings for WhatsApp under 16MB:

    1. Open HandBrake. Drag your video onto the interface.
    2. In the “Presets” panel on the right, select “Fast 720p30.” This is the starting point.
    3. Under the “Video” tab:
    4. Video codec: H.264 (x264)
    5. Framerate: 30 fps, Constant
    6. Quality: Switch from RF (constant quality) to “Average Bitrate.” Enter 1200 kbps.
    7. Check “2-Pass Encoding” for more accurate file size targeting.
    8. Under “Audio” tab: set codec to AAC, bitrate to 128 kbps.
    9. Click “Browse” at the bottom to set output path and filename (use .mp4 extension).
    10. Click “Start Encode.”

    After encoding, check the file size. If it is still over 16MB, drop the video bitrate to 900 kbps and re-encode. Use this formula as a rough guide: (target size in MB x 8,000 kbps) / duration in seconds = max bitrate.

    For a 16MB target on a 60-second video: (16 x 8,000) / 60 = approximately 2,133 kbps. Set video to 2,000 kbps and audio to 128 kbps. That gives you the 2-minute version at the limit.

    HandBrake is the most precise free tool for file size targeting. The 2-pass encoding mode is especially useful when you have a hard file size ceiling.


    Method 5: Movavi Video Converter (Best Pick for Consistent Results)

    For users who compress videos regularly, Movavi Video Converter handles WhatsApp compression with more precision and fewer steps than online tools or HandBrake’s manual workflow.

    Movavi is available for Windows and Mac. It is not free permanently, but the trial version allows you to test compression without a watermark for a limited number of exports, and the paid version is $49.95 for a one-year subscription as of 2026.

    Why Movavi earns the top recommendation here:

    1. Preset library: Movavi includes device and platform presets. The WhatsApp preset automatically sets H.264, 720p, 1,200 kbps video bitrate, and AAC 128 kbps audio. You do not need to look up the specs.
    2. File size estimator: Before you export, Movavi shows the estimated output file size. You adjust the quality slider until the estimate clears 16MB. This removes the guess-and-check loop that HandBrake requires.
    3. Batch processing: If you have multiple videos to compress (event footage, client clips), Movavi processes them in a queue. Online tools and HandBrake require re-uploading or re-setting each file.
    4. Format flexibility: Movavi converts between 180+ formats. If you are also converting MOV files from an iPhone or MTS files from a camcorder, one tool handles it.

    Movavi step-by-step for WhatsApp:

    1. Download and install Movavi Video Converter from movavi.com.
    2. Launch the app and drag your video into the interface.
    3. Click the output format selector at the bottom. Search for “WhatsApp” or select MP4, then set resolution to 720p.
    4. Check the estimated file size in the output panel. If above 14MB, click the quality slider and reduce slightly.
    5. Set output folder and click “Convert.”

    The output is a WhatsApp-ready MP4 that you can send immediately.

    Honest limitations: The trial has export limits. If you only need to compress one video, HandBrake (free, no limits) is fully capable. Movavi is the right call when you process video regularly and want a faster workflow.

    Alternatives worth knowing:

    • Any.Video.Converter Free (any-video-converter.com): Free desktop tool with a lighter feature set than Movavi. No file size estimator. Handles MP4 output with manual bitrate settings. Good option if you want desktop software without a subscription.
    • Wondershare UniConverter (videoconverter.wondershare.com): More feature-heavy than Movavi (AI upscaling, screen recorder included). Better for users who also edit or manage larger video libraries. Priced higher.

    For WhatsApp compression specifically, Movavi’s preset system and file size estimator give it the edge over both alternatives.


    Method 6: Trim the Video First, Then Compress

    The simplest size reduction is duration reduction. Removing 30 seconds from a 2-minute video cuts file size by roughly 25% before any bitrate adjustment.

    On iPhone:

    1. Open Photos app, tap your video.
    2. Tap “Edit” at the top right.
    3. Drag the yellow handles at the bottom of the timeline to trim start and end.
    4. Tap “Done” and save as new clip.

    On Android (Samsung/Pixel stock apps):

    1. Open Gallery or Photos.
    2. Select the video, tap the pencil/edit icon.
    3. Use the timeline scrubber to set new start and end points.
    4. Save as copy.

    On desktop (Photos app on Mac):

    1. Double-click the video in Photos.
    2. Click “Edit” then “Trim.”
    3. Drag the handles, click “Done.”

    After trimming, check the file size. If it is now under 16MB, no further compression is needed. If it is still too large, apply Method 4 or 5 at a lower bitrate.

    Trimming first is the cleanest approach: shorter video at original quality beats full-length video at heavily compressed quality.


    Comparison Table: Which Method to Use

    Method Cost Speed Quality control Best for
    WhatsApp built-in Free Instant None Quick casual clips
    Clideo online Free (watermark) / Paid 1-2 min Low One-off, no install
    Document workaround Free Instant Full quality Files up to 2GB
    HandBrake Free 5-10 min Full control Power users, precise targets
    Movavi Paid ($49.95/yr) 2-5 min High + estimator Regular users, batch
    Trim first Free 1-2 min Source quality Any video with unused footage

    How to Reduce Video Size for Other Platforms

    If you are compressing videos for platforms beyond WhatsApp, the settings differ by platform. This site has dedicated guides:

    Person using smartphone to record and share video
    Trim your video before compressing — shorter clips compress more efficiently and preserve quality.

    Each platform has different codec preferences, resolution caps, and bitrate sweet spots. The WhatsApp settings in this guide do not transfer directly to Discord or TikTok.


    FAQ

    What is the maximum video size for WhatsApp in 2026?

    WhatsApp allows video messages up to 16MB. Status clips are also capped at 16MB with an additional 30-second duration limit. Videos sent as document attachments can be up to 2GB, but recipients must download and play them outside the built-in video player.

    How do I compress a video for WhatsApp without losing quality?

    No lossy compression is truly lossless. The closest option is sending the video as a document (up to 2GB), which bypasses compression entirely. If you must compress to stay under 16MB, use H.264 at 720p and 1,200-1,500 kbps bitrate to get the smallest file size at acceptable visual quality.

    Can I reduce video size on my phone for free?

    Yes. Trim the video in your phone’s native Photos or Gallery app to remove unused footage. WhatsApp also re-encodes automatically when you send from the Gallery picker. For more control, use HandBrake on desktop after transferring the file, or open Clideo in your mobile browser.

    Does HandBrake work for WhatsApp compression?

    Yes. HandBrake is free and gives you exact bitrate control. Use the “Average Bitrate” mode (not constant quality RF) and set video to 1,000-1,500 kbps with AAC audio at 128 kbps. Enable 2-pass encoding for accurate file size output. The result will be a WhatsApp-compatible MP4.

    Why does WhatsApp reduce my video quality so much?

    WhatsApp’s automatic compression targets a low bitrate to reduce upload and data usage across all network conditions. It does not let you control the output quality. If the result is unacceptable, compress the video yourself using HandBrake or Movavi before sending, which gives you control over how much quality is traded for file size.


    Verdict

    For a one-off video, trim it first in your phone’s Photos app, then send via WhatsApp’s Gallery picker. For a video where quality matters and file size is the blocker, send as a document.

    For regular compression needs, desktop tools beat online options because they do not impose watermarks or upload limits. HandBrake is the free choice with full control. Movavi Video Converter is the faster choice if you want a file size estimator and platform presets built in. The platform preset system alone saves the multiple encode-check-re-encode cycles that HandBrake requires.

    Any.Video.Converter and Wondershare UniConverter are credible alternatives if Movavi’s pricing or feature set does not fit your workflow.

  • Fix Discord 8MB Video Limit: Best Free Methods That Work (2026)

    Fix Discord 8MB Video Limit: Best Free Methods That Work (2026)


    title: “Fix Discord 8MB Video Limit: Best Free Methods That Work (2026)”
    slug: “fix-discord-8mb-video-limit-best-free-methods-2026”
    domain: “onlinevideoconvert.net”
    primary_keyword: “how to compress video under 8MB Discord”
    meta_description: “Learn how to compress video under 8MB for Discord using free online tools, HandBrake, FFmpeg, or Wondershare UniConverter. Exact bitrate formulas and step-by-step settings for 2026.”
    date: 2026-08-11
    word_count: 2710
    status: draft
    schema:
    – Article
    – FAQPage
    – Author


    Affiliate disclosure: This article contains affiliate links. If you purchase through them, we may earn a commission at no extra cost to you. Recommendations are based on technical fit, not commission rates.

    Fix Discord 8MB Video Limit: Best Free Methods That Work (2026)

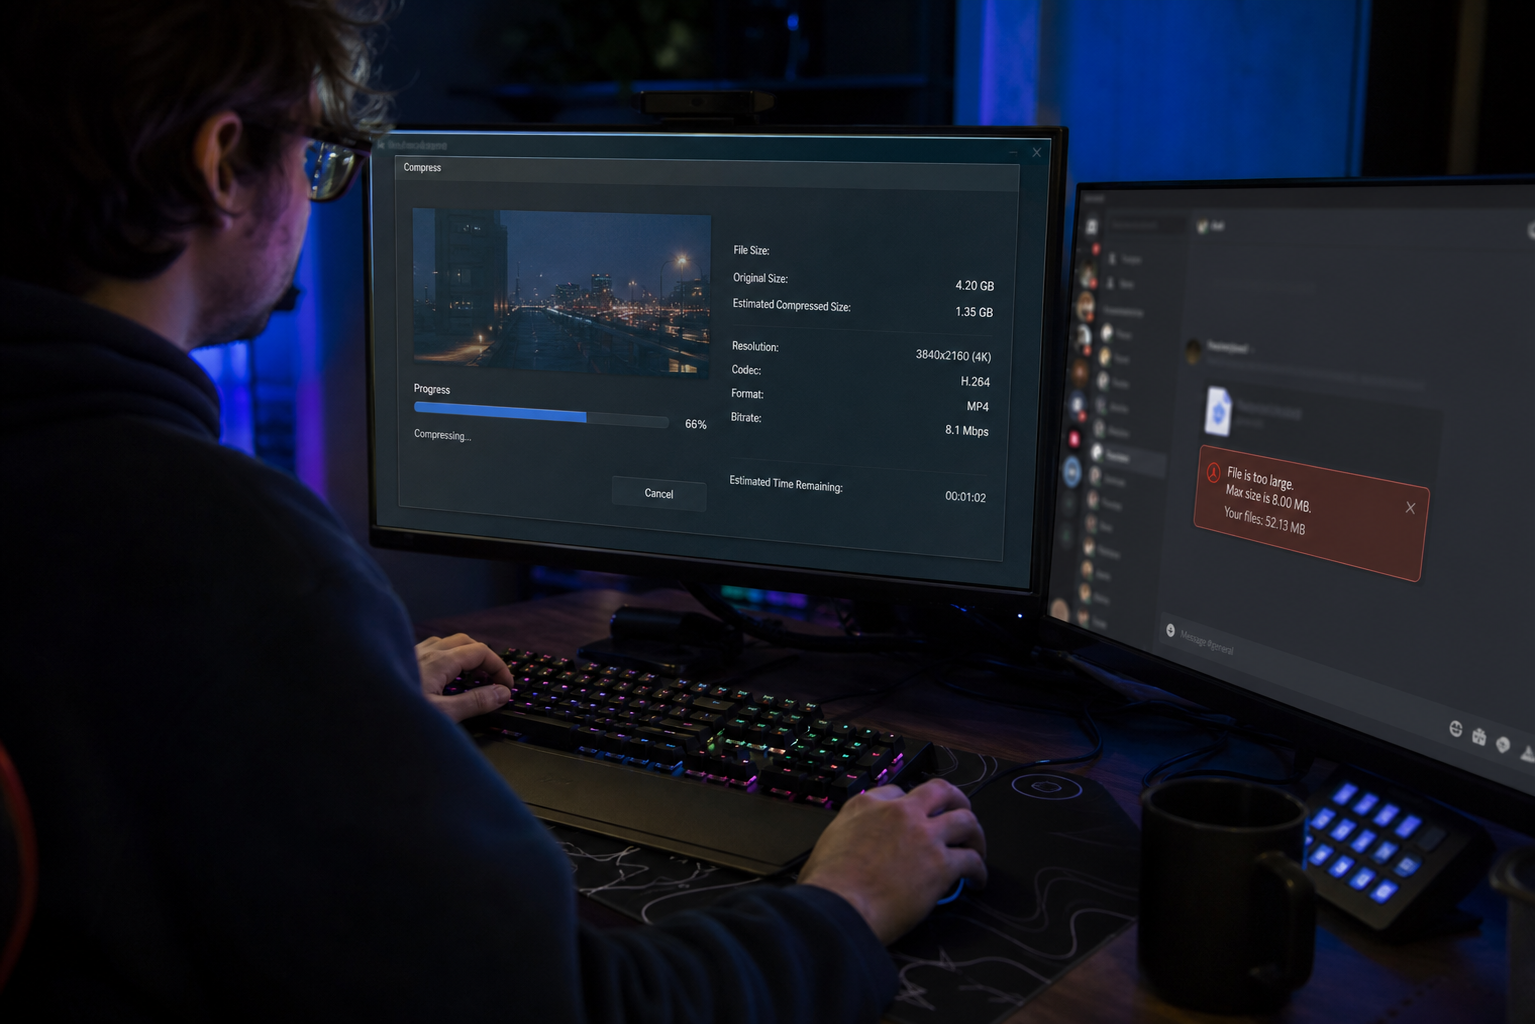
    Discord’s free file upload limit is currently 10 MB per file as of 2026. The 8 MB figure you see in older guides and in the widely-used 8mb.video tool is a safe compression target that keeps your file under both the historical and current thresholds. This guide uses 8 MB as the working target throughout.

    The short answer: Compress to H.264 MP4, drop resolution to 720p or 480p, lower the bitrate, and keep the clip under 90 seconds. You can do this free in a browser or with desktop software. The sections below cover both paths with specific settings. For general video format conversion tips outside of Discord, our video converter guide has you covered.


    What Is Discord’s Actual Video Size Limit in 2026?

    Discord file size upload limits by account tier in 2026

    Discord’s upload limits changed in 2024 and have stayed at these levels into 2026:

    Account tier File size limit Monthly cost
    Free 10 MB $0
    Nitro Basic 50 MB $2.99/month
    Nitro 500 MB $9.99/month

    Source: Discord Nitro pricing page.

    Free users lost the old 25 MB limit when Discord reduced it in 2024 to manage storage costs. Today the hard cap is 10 MB, which means any video you share needs to sit below that. Targeting 8 MB gives you a 2 MB buffer for file overhead and encoding variance.

    Why 8 MB is the right compression target

    A 10-second clip at 1080p H.264 can run 40-80 MB depending on source bitrate. A 60-second gaming highlight at 1080p might hit 200-400 MB. Getting either under 10 MB means significant compression. Targeting 8 MB rather than exactly 10 MB:

    • Avoids upload failures from borderline file sizes
    • Accounts for encoding output variance (compressors rarely hit exact targets)
    • Works on servers with slightly stricter Nitro-boosted limits

    Method 1: Free Online Compressors (No Software to Install)

    Online tools are the fastest path for occasional compression. Most need no account and work on any OS.

    How online Discord compressors work

    You upload the video, set a target file size (8 MB), and the tool calculates a bitrate that meets the target. Most re-encode using H.264 at a reduced bitrate and resolution. Quality depends on how good the encoder is and how aggressively it compresses.

    Recommended free online options:

    • Clideo (clideo.com/compress-video-for-discord): Browser-based, no account required for basic compression, exports MP4.
    • VEED.io (veed.io): Clean interface, lets you set target quality or file size. Free tier adds a watermark on some exports.
    • Kapwing (kapwing.com): Handles MP4, WebM, WMV, MOV. Free tier works for short clips.

    Limitations of online tools

    • Upload speed depends on your internet connection. A 500 MB source file takes time.
    • Free tiers often cap file size (typically 500 MB to 1 GB input).
    • Quality control is limited. The tool picks settings; you cannot override bitrate manually.
    • Privacy: your video goes to a third-party server.

    For quick, low-stakes clips, these tools work well. For gaming highlights, streams, or anything you want to preserve at decent quality, a desktop tool gives better control.


    Method 2: Desktop Compression with Specific Settings

    HandBrake settings for compressing video under 8MB for Discord

    Desktop tools let you set exact bitrates, codecs, and resolutions. This is the most reliable way to hit 8 MB with the best possible quality.

    The bitrate math for 8 MB

    File size (MB) = (video bitrate kbps + audio bitrate kbps) x duration (seconds) / 8000

    For an 8 MB target at 60 seconds total duration:

    8,000 KB x 8 / 60 seconds = ~1,067 kbps total

    Subtract 128 kbps for audio and you have roughly 939 kbps for video. For a 30-second clip, you get ~2,000 kbps video bitrate, which produces noticeably better results.

    Shorter clips = more bitrate = better quality at the same file size. If you have the option, trim the clip before compressing.

    Option A: HandBrake (free, open source)

    HandBrake is the most widely used free video encoder. Settings for Discord under 8 MB:

    1. Open HandBrake, drag in your video.
    2. Preset: select “Fast 720p30” or “Fast 480p30” depending on acceptable quality.
    3. Video tab: Encoder = H.264 (x264). Set “Avg Bitrate” mode. Enter your calculated bitrate (see math above). Check “2-Pass Encoding” for better quality at low bitrates.
    4. Audio tab: AAC codec, 128 kbps.
    5. Output: .mp4 container.
    6. Click Start.

    HandBrake is free with no watermark. It does not have a direct “target file size in MB” input. You calculate the bitrate yourself or use the two-pass approach and check the output size, then re-encode if needed.

    Limitation: Two-pass encoding takes twice as long. For long clips at very low bitrates (below 500 kbps video), quality degrades significantly regardless of encoder.

    Option B: FFmpeg (free, command-line)

    FFmpeg gives the most precise control. For a 30-second clip targeting 8 MB:

    ffmpeg -i input.mp4 -b:v 2000k -b:a 128k -vf scale=1280:720 -c:v libx264 -c:a aac output.mp4
    

    Adjust -b:v using the bitrate formula above. FFmpeg is free, open source, and has no watermark. It requires comfort with the command line.


    Method 3: Wondershare UniConverter (Best Pick for Regular Use)

    Wondershare UniConverter target file size compression interface for Discord

    For users who compress Discord videos more than occasionally, a dedicated desktop compressor saves time and produces better results than online tools or manual HandBrake settings.

    Wondershare UniConverter is the strongest option in this category. Here is why it earns the top spot over free-only tools:

    What it does well:

    • Target file size input: enter “8 MB” directly and the tool calculates the right bitrate automatically. No math required.
    • Batch compression: compress multiple clips at once. Useful if you are exporting an entire gaming session.
    • Format support: handles MP4, MOV, MKV, AVI, WebM and more as input. Output defaults to MP4, which is the correct format for Discord.
    • Quality preview before export: you can see approximately how the compressed output looks before committing.
    • No watermark on exports (paid version).

    Honest limitations:

    • Wondershare UniConverter is not free. It offers a free trial with limited exports. The paid plan costs around $29.99/year for a single license. If you compress videos rarely, HandBrake or an online tool covers the use case without cost.
    • The interface includes upsell prompts for other Wondershare products. They do not interfere with the compression workflow.

    When UniConverter is worth it:

    If you regularly share gaming clips, screen recordings, or short videos on Discord and you want consistent results without recalculating bitrates each time, UniConverter’s target-size compression workflow pays for itself in time saved. It is also useful if you share videos across multiple platforms (Discord, WhatsApp, email) because it handles different size targets per platform.

    How to compress for Discord in UniConverter:

    1. Launch UniConverter, go to the Compress Video section.
    2. Add your video file(s).
    3. Set the target file size to 8 MB.
    4. Select MP4 as the output format.
    5. Choose 720p or 480p resolution depending on acceptable quality.
    6. Click Compress.

    The output will be a Discord-ready MP4 under 8 MB.

    Try Wondershare UniConverter


    Method 4: Reduce File Size Before Compressing

    Compression alone is not always the right first step. Before you run any tool, consider these steps that reduce file size without touching codec settings:

    Trim the clip

    Every second removed reduces the file size proportionally. A 90-second clip that contains 60 seconds of relevant content should be trimmed to 60 seconds before compressing. This raises the available bitrate per second, which means better quality at the same target size.

    Tools for trimming:

    • Windows: Photos app (built-in, no install)
    • macOS: QuickTime Player > Edit > Trim (built-in)
    • Online: Clideo, Kapwing, VEED (all free for basic trimming)

    Lower the resolution

    1080p is usually unnecessary for a Discord chat clip. 720p (1280×720) at an appropriate bitrate looks fine on most screens. 480p (854×480) is acceptable for short, action-heavy clips where clarity matters less.

    Resolution affects file size significantly:

    Resolution Approximate bitrate for acceptable quality Notes
    1080p 4,000+ kbps Too large for 8 MB clips over 15 seconds
    720p 1,500-2,500 kbps Good for clips up to 40 seconds at 8 MB
    480p 800-1,500 kbps Acceptable for clips up to 80 seconds at 8 MB

    Strip the audio (if not needed)

    If the clip has no relevant audio (a silent gameplay moment, a reaction GIF), removing the audio track saves 128-192 kbps of the total bitrate budget. In HandBrake, set audio to “None.” In FFmpeg: add -an to the command.


    Discord-Specific Format Recommendations

    Discord plays video inline (in the chat window) on desktop and mobile. The safest format choices:

    • Container: MP4 (.mp4)
    • Video codec: H.264 (not H.265/HEVC — some older Discord versions and mobile clients handle H.264 more reliably)
    • Audio codec: AAC at 128 kbps
    • Frame rate: Match source or cap at 30fps. 60fps is playable but uses more bitrate.
    • Resolution: 720p is the sweet spot. 1080p at 8 MB over 15 seconds looks worse than 720p because the bitrate is too low for the resolution.

    WebM (VP9 codec) is also supported by Discord but less universally compatible across all clients and platforms where users might download and re-watch the clip. MP4 H.264 is the safe default.


    What to Do If You Cannot Get Under 8 MB

    Some source videos are too long or too high quality to fit in 8 MB without unacceptable degradation. Your options:

    1. Upgrade to Discord Nitro: 500 MB limit removes the compression constraint entirely. At $9.99/month it is a genuine option if you share videos frequently. [Source: discord.com/nitro]
    2. Upload to YouTube as unlisted and share the link: Discord embeds YouTube links directly in chat. No file size limit.
    3. Use Streamable or Imgur: Both host short video clips free and Discord embeds their links. Streamable free tier has limits on video duration and storage.
    4. Use a Discord bot file hosting service: Tools like file.kiwi host the file externally and post a Discord-embeddable link. Convenient but adds a dependency on a third-party service.
    5. Cut the clip shorter: The most reliable fix. A 20-second clip will always compress better than a 90-second clip.

    Tool Comparison: Which Method Fits Your Situation

    Situation Best tool Why
    One-off quick clip, no install Clideo or Kapwing (online) Fast, no software required
    Need exact 8 MB target, occasional use HandBrake (free) Precise bitrate control, no cost
    Regular Discord video sharing, batch clips Wondershare UniConverter Target-size input, batch mode, no bitrate math
    Command-line comfortable FFmpeg Most precise, free, no watermark
    Very long clip that cannot compress to 8 MB YouTube unlisted link No file size constraint

    For most readers who compress Discord videos more than a few times per month, Wondershare UniConverter is the most practical choice. It removes the bitrate calculation step and handles batch compression cleanly.

    Alternatives worth considering:

    • Any Video Converter (any-video-converter.com): Free desktop tool with compression features. Less polished than UniConverter but functional for basic Discord compression.
    • Movavi Video Converter (movavi.com): Paid tool with a good interface. File size targeting is available. Comparable to UniConverter on core compression quality.

    Frequently Asked Questions

    What is Discord’s video size limit for free accounts in 2026?

    Discord’s free tier allows file uploads up to 10 MB as of 2026. The limit was reduced from 25 MB in 2024. Targeting 8 MB gives you a buffer against encoding variance.

    Why does my video still fail to upload even after compressing to 8 MB?

    Discord checks the final file size at upload. If your compressor reported 8.0 MB but the actual output is 8.1 MB or above 10 MB, the upload fails. Re-compress targeting 7.5 MB to be safe, or check the file size in your file explorer before uploading.

    Does Discord support H.265 (HEVC) video?

    Discord plays H.265 on some clients but H.264 is more reliably compatible across desktop, mobile, and the web app. Use H.264 unless you have a specific reason to use H.265.

    Can I send videos larger than 8 MB on Discord without Nitro?

    Yes. Upload the video to YouTube as unlisted, Streamable, or Imgur and paste the link into Discord. Discord embeds these links and plays them inline. No file size limit applies to linked content.

    Does Wondershare UniConverter add a watermark to compressed videos?

    The free trial version adds a watermark. The paid version does not. HandBrake and FFmpeg are free options with no watermark at any tier.

    What is the maximum video length for an 8 MB Discord upload?

    It depends on resolution and quality settings. At 720p H.264 with 128 kbps audio, an 8 MB limit allows roughly 40-50 seconds of video at acceptable quality. At 480p the limit extends to around 70-90 seconds. Very short clips (under 15 seconds) can stay at 720p or 1080p with good results.


    Summary: The Fastest Path to Under 8 MB

    1. Trim your clip to the minimum length needed.
    2. Target 720p resolution, not 1080p.
    3. Calculate your bitrate: (8000 x 8 / duration in seconds) – 128 kbps for audio.
    4. Use HandBrake (free) or Wondershare UniConverter (paid, recommended for regular use) to encode at that bitrate in H.264 MP4.
    5. Check the output file size before uploading.

    For one-off clips: any free online tool works. For regular Discord video sharing with minimal friction: Wondershare UniConverter gives consistent results without manual bitrate calculation.

    Internal reading:
    – How to compress video for Discord free
    – How to reduce video file size without losing quality (2026)


  • Convert FLV to MP4 Free Online 2026: 3 Tools That Actually Work

    Convert FLV to MP4 Free Online 2026: 3 Tools That Actually Work


    title: “Convert FLV to MP4 Free Online 2026: 3 Tools That Actually Work”
    slug: “convert-flv-to-mp4-free-online-2026”
    domain: “onlinevideoconvert.net”
    primary_keyword: “convert FLV to MP4 free online 2026”
    date: 2026-08-08
    word_count: 2680
    status: draft
    schema:
    – Article
    – FAQPage
    – Author


    Affiliate disclosure: This article contains affiliate links. If you purchase through them, we may earn a commission at no extra cost to you. Recommendations are based on format support, output quality, and real-world usability, not commission rate.

    Convert FLV to MP4 Free Online 2026: 3 Tools That Actually Work

    The fastest way to convert FLV to MP4 free online in 2026 is to use a browser-based converter like Convertio or CloudConvert for quick one-off files, or Movavi Video Converter if you need reliable batch output with controlled quality settings. This guide covers exactly when to use each option and the specific settings that matter for clean output.

    FLV files are not going away as fast as Adobe intended. Archived footage from video-sharing platforms, legacy corporate training content, and old screen recordings continue to surface in 2026. None of the major browsers play FLV natively, and Adobe officially killed Flash Player in December 2020. The practical result: you have a file that nothing opens, and you need it in MP4.


    Why FLV Files Stop Working (and Why MP4 Fixes It)

    FLV (Flash Video) uses the Sorenson Spark or VP6 codec for video and MP3 or ADPCM for audio. These codecs were standard in the mid-2000s when YouTube and Hulu served video through the Flash Player plugin. Once browsers dropped Flash support, FLV became a container with no native playback path. According to Cloudinary’s format analysis, there is no scenario where FLV makes sense for new content in 2026. The format persists only as legacy.

    MP4 uses the MPEG-4 container with H.264 (or H.265) video and AAC audio. H.264 is the universally compatible codec: every browser, phone, smart TV, and editing app reads it without plugins. Converting FLV to MP4 is not lossy in a damaging sense because you are re-encoding from an already-compressed source. The quality loss is minimal when you keep the bitrate at or above the source file’s original.

    Two things to watch during any FLV to MP4 conversion:

    • Video bitrate: If the source FLV was encoded at 1500 kbps, do not output at 800 kbps. Match or exceed the source.
    • Audio sync: FLV files sometimes carry audio at non-standard sample rates (22050 Hz). Some converters resample to 44100 Hz cleanly; others introduce drift. Test with a 30-second clip before committing a large batch.

    The 3 Tools That Actually Work in 2026

    Tool 1: Convertio (Best Free Online Option for Small Files)

    Convertio converts FLV to MP4 entirely in the browser with no software installation and no account for files under 100 MB. It supports FLV input natively and outputs H.264 MP4 with AAC audio by default. The settings panel lets you adjust resolution, bitrate, and frame rate before converting.

    How to use Convertio for FLV to MP4:

    1. Go to convertio.co/flv-mp4.
    2. Click “Choose Files” or drag your FLV file into the upload area.
    3. Confirm the output format is set to MP4 (it auto-selects).
    4. Click the wrench icon to access quality settings. Set video bitrate to match your source if you know it.
    5. Click “Convert” and download the finished file.

    Limitations you need to know:

    • Free plan caps at 100 MB per file. A 10-minute FLV at decent quality can exceed this.
    • Conversion queues slow down during peak hours. A 200 MB file can take 8 to 12 minutes.
    • Files are deleted from Convertio servers after 24 hours. Download promptly.
    • No batch processing on the free tier.

    Convertio is the right pick for single files under 100 MB where you do not want to install anything. For anything larger or for batch conversion, the options below handle it better.


    Tool 2: CloudConvert (Best Free Online Option for Larger Files)

    CloudConvert supports FLV files up to 1 GB on its free tier (25 conversions per day, no account required for basic use). The quality controls are more detailed than Convertio’s: you can set codec, bitrate, resolution, frame rate, audio codec, and audio bitrate separately.

    How to use CloudConvert for FLV to MP4:

    1. Go to cloudconvert.com/flv-to-mp4.
    2. Click “Select File” and upload your FLV.
    3. Choose MP4 as the output format if not pre-selected.
    4. Click the wrench icon next to your file name to access video settings.
    5. Set video codec to H.264 and audio codec to AAC. Leave resolution and frame rate on “same as source” unless you need to resize.
    6. Click “Convert” then “Download.”

    CloudConvert quality notes:

    The H.264 encoding in CloudConvert uses a constant rate factor (CRF) approach by default. CRF 23 is the default and produces good quality for most FLV sources. If you are converting high-motion content (sports, gaming footage), consider dropping to CRF 18 for a larger file with better retained detail.

    Limitations:

    • 25 free conversions per day. If you are converting a large archive in one session, this limit cuts off quickly.
    • Processing is server-side. Uploading a large file on a slow connection takes time.
    • No permanent storage: files are deleted from their servers after conversion.

    CloudConvert is the stronger online option for files between 100 MB and 1 GB, or when you need fine-grained codec control without installing software.


    Tool 3: Movavi Video Converter (Best Pick for Quality and Batch Conversion)

    Movavi Video Converter handles FLV to MP4 with hardware acceleration and preset output profiles. It is a desktop application for Windows and Mac, not an online tool, which is the relevant distinction: your files never leave your machine, there are no size limits, and you can queue 50 files at once.

    This is the recommended pick for anyone converting more than a few FLV files, archiving a collection, or needing to maintain consistent output quality across a batch.

    Why Movavi earns the top recommendation here:

    • Supports over 180 input formats including FLV, AVI, WMV, and MOV, plus all FLV sub-variants (Sorenson, VP6, H.264 inside FLV)
    • Hardware acceleration via NVIDIA, AMD, and Intel GPUs cuts conversion time significantly on compatible machines
    • Output presets for specific devices (iPhone, Samsung Galaxy, YouTube 1080p) remove the guesswork on settings
    • One-time purchase pricing (no subscription), with a 7-day free trial; trial conversions are saved without a watermark, and you keep converted files after the trial ends
    • Reviews on G2 and Capterra in 2026 consistently cite reliable audio sync and clean FLV output as strengths

    How to convert FLV to MP4 in Movavi:

    1. Download and install Movavi Video Converter from movavi.com.
    2. Open the application and click “Add Media” then “Add Video.”
    3. Select your FLV file or drag a folder of FLV files for batch processing.
    4. In the output format panel at the bottom, select “MP4” under the Video tab. Choose the “H.264” codec option.
    5. Select an output preset. “HD 1080p” or “Same as source” are the two most reliable choices for archival conversion.
    6. Set the output folder. Click “Convert.”

    For batch conversions, steps 3 through 6 apply identically. Movavi processes files in sequence using the same preset you selected.

    Limitations:

    • It is not a browser tool. You need to download and install it (about 80 MB installer).
    • The free trial converts files without watermark during the trial period; a watermark applies to conversions made with the free version after trial expiry.
    • Windows and Mac only. No Linux build.

    Get Movavi Video Converter to convert FLV files without upload limits, with full batch support and hardware-accelerated processing.


    Quick Comparison: Which Tool to Use

    Scenario Recommended Tool
    1 FLV file under 100 MB, no install Convertio
    1 FLV file 100 MB to 1 GB, no install CloudConvert
    Batch of FLV files, quality control needed Movavi Video Converter
    Privacy-sensitive files (cannot upload) Movavi Video Converter
    FLV over 1 GB Movavi Video Converter
    Linux environment Any.Video.Converter (see below)

    Alternative Options Worth Knowing

    Any.Video.Converter (Free Desktop Alternative)

    Any.Video.Converter is a free desktop converter for Windows that handles FLV to MP4 without file size limits. The interface is dated compared to Movavi, and the free version lacks hardware acceleration, but it is a solid no-cost option for batch conversion when the budget is a hard constraint. The free build converts without watermarks.

    Output quality from Any.Video.Converter is serviceable, but the codec settings are less transparent than Movavi. You select a profile rather than setting bitrate manually. For archival work where you need precise control, Movavi is the stronger choice.

    Wondershare UniConverter supports FLV input and outputs to MP4 with good quality defaults. It also includes video editing tools (trim, crop, merge), which makes it a practical pick if you need to edit the footage after conversion. The pricing model is subscription-based rather than one-time purchase, which is the main trade-off versus Movavi.

    For users who want a single application covering conversion, editing, and compression, UniConverter covers all three. For users who only need to convert, the subscription cost is harder to justify.


    Step-by-Step: Free Online FLV to MP4 Conversion (Detailed)

    For users who want the browser-based path with no installation, here is the complete process using Convertio.

    What you need before starting:

    • The FLV file on your local machine
    • A browser (Chrome, Firefox, Edge, Safari all work)
    • Stable internet connection (large files stall mid-upload on spotty connections)

    Step 1: Identify your file size

    Right-click the FLV file and select Properties (Windows) or Get Info (Mac). Note the file size. If it is under 100 MB, Convertio handles it free. If it is over 100 MB, use CloudConvert instead.

    Step 2: Open the converter

    Go to convertio.co/flv-mp4 in your browser. No account is required for the free tier.

    Step 3: Upload the file

    Click “Choose Files.” Select the FLV file from your file manager. The upload progress bar appears immediately. For a 50 MB file on a standard broadband connection, upload typically completes in under 30 seconds.

    Step 4: Verify format selection

    The output format should already show “MP4.” If not, click the format dropdown to the right of your file name and select MP4 from the Video category.

    Step 5: Adjust quality settings (optional but recommended)

    Click the wrench/settings icon. The options panel shows:
    – Video codec: leave as H.264
    – Video bitrate: set to at least 2000 kbps for standard definition FLV, 4000 kbps or higher for HD content
    – Audio codec: leave as AAC
    – Audio bitrate: 128 kbps is adequate for most FLV audio; 192 kbps if the source was high quality

    If you are not sure of the original bitrate, leave settings on “same as source.”

    Step 6: Convert and download

    Click the orange “Convert” button. A progress indicator shows the conversion status. When complete, the “Download” button appears. Click it. The MP4 file saves to your default Downloads folder.

    Step 7: Verify the output

    Open the converted MP4 in VLC or your system media player. Check:
    – Does video play without artifacts for the first 30 seconds?
    – Is audio in sync with the video at the 1-minute mark?
    – Does the resolution match what you expected?

    If audio is out of sync by more than half a second, re-convert and check the audio settings. This is most common with FLV files that used non-standard audio sample rates.


    FLV to MP4 Without Uploading to a Server

    If your FLV files contain private content, confidential meetings, or footage you prefer not to send to a third-party server, the right approach is a local desktop converter.

    Both Movavi Video Converter and Any.Video.Converter process files entirely on your local machine. No data is transmitted to external servers during conversion. This matters for:

    • Corporate training videos
    • Personal recordings
    • Content under NDA
    • Medical or legal video files

    For any file where privacy is a concern, skip the browser-based options and use a desktop tool.


    Common FLV to MP4 Conversion Errors and Fixes

    Error: “File format not supported”

    Some FLV files use VP6 codec internally, which older converters reject. Use Movavi or CloudConvert; both handle VP6 input correctly.

    Error: Audio plays, video is black

    This typically happens when the FLV contains H.264 video inside the FLV container. The converter is stripping the container but not re-encoding. In Movavi, force re-encode by selecting a specific output preset rather than “copy.” In CloudConvert, set the video codec explicitly to H.264 instead of leaving it on “auto.”

    Error: File is cut short or ends abruptly

    Indicates a corrupted FLV. Try playing the original in VLC first. If VLC also cuts short, the source file is damaged. VLC can sometimes repair and re-save FLV files via Media > Convert/Save. Use VLC’s output to produce a repaired version, then convert that file to MP4.

    Error: Converter fails mid-upload

    File is likely over the service’s size limit. Switch to CloudConvert for files up to 1 GB, or use a desktop tool for anything larger.


    Internal Resources

    If you need to reduce the size of your converted MP4 after conversion, see our guide on how to reduce video file size online free.

    For larger collections that benefit from desktop software across multiple formats, best free video converter software for Windows 2026 covers the full desktop options category.

    If you are preparing video for Discord and need both format conversion and file size compression, compress video for Discord free walks through both steps in sequence.


    Verdict: Best FLV to MP4 Converter in 2026

    For one-off conversions under 100 MB: Convertio handles it free in the browser with no account.

    For larger files online: CloudConvert gives better size limits and more detailed codec settings.

    For consistent output quality, batch processing, or privacy-sensitive files: Movavi Video Converter is the pick. Hardware acceleration, 180+ format support, one-time pricing, and clean FLV handling on both Sorenson and VP6 sources make it the most reliable option across the range of FLV files users encounter in 2026.

    Download Movavi Video Converter and convert your FLV archive without upload limits or quality compromises.


    Frequently Asked Questions

    Can I convert FLV to MP4 without losing quality?

    Converting FLV to MP4 always involves re-encoding, which means some generational quality loss. The impact is minimal if you set the output bitrate equal to or higher than the source. For a 1500 kbps FLV, output at 1500 kbps or above. Using H.264 at that bitrate will produce a result visually indistinguishable from the original for most content.

    Why won’t my FLV file play on Windows or Mac?

    Modern operating systems removed native Flash playback support after Adobe ended Flash Player in December 2020. FLV files require either a third-party player like VLC or conversion to a supported format like MP4. The format is not broken, but the playback infrastructure no longer ships by default.

    Is it safe to upload FLV files to online converters?

    Reputable converters like Convertio and CloudConvert delete uploaded files from their servers after conversion (typically within 24 hours). For files containing sensitive content, use a desktop converter like Movavi or Any.Video.Converter that processes files locally without any upload.

    How long does FLV to MP4 conversion take online?

    For a 50 MB FLV on Convertio or CloudConvert, conversion typically takes 1 to 3 minutes depending on server load. A 500 MB file on CloudConvert takes 8 to 15 minutes. Desktop tools with hardware acceleration (Movavi) convert faster because they use your GPU directly.

    What is the best output resolution when converting FLV to MP4?

    Match the source resolution. If the FLV is 480p, output at 480p. Upscaling to 1080p does not add detail and increases file size without quality benefit. If you need to change resolution, downscaling to a smaller size (for web use) is fine; set the codec to H.264 and keep the bitrate proportional to the resolution.


  • How to Reduce Video Size for WhatsApp Free: 5 Best Tools 2026

    How to Reduce Video Size for WhatsApp Free: 5 Best Tools 2026


    How to reduce video size for WhatsApp free - featured

    title: “How to Reduce Video Size for WhatsApp Free: 5 Best Tools 2026”
    slug: “how-to-reduce-video-size-for-whatsapp-free”
    domain: “onlinevideoconvert.net”
    primary_keyword: “how to reduce video size for WhatsApp free”
    description: “WhatsApp limits videos to 16 MB. Learn how to reduce video size for WhatsApp free using 5 tested tools in 2026, with exact H.264 settings.”
    date: 2026-07-18
    word_count: 2720
    status: draft
    schema:
    – Article
    – FAQPage
    – Author


    How to Reduce Video Size for WhatsApp Free: 5 Best Tools 2026

    WhatsApp enforces a 16 MB limit on videos sent as media attachments. Anything larger either fails to send or gets rejected outright. The fix is straightforward: compress your video to under 16 MB before sending. This guide covers five free tools that work in 2026, explains the right compression settings, and shows you the fastest path for each use case.


    WhatsApp Video Limits: What You Are Working Against

    WhatsApp video size limits: 16MB media, 30s Status, 2GB document

    Before picking a tool, know the exact constraints you need to hit.

    The 16 MB Hard Cap for Media

    When you send a video directly in a WhatsApp chat, the file must stay under 16 MB. WhatsApp recompresses it on arrival anyway, which means any video you send as a standard media attachment gets further degraded by the platform regardless of your source quality.

    At typical compression settings (720p, H.264, 1.5 Mbps video bitrate, AAC 128 kbps audio, MP4 container, 30 fps), 16 MB holds approximately 70 seconds of video. That is your baseline target. [Source: VidCrush, WhatsApp Video Size Limit 2026]

    WhatsApp Status: 30-Second Clips

    Status posts have a separate constraint: each clip maxes out at 30 seconds. File size is less of the issue here; duration is the limiting factor. If your video is longer than 30 seconds, split it before compressing.

    The 2 GB Document Workaround

    WhatsApp allows files up to 2 GB when sent as documents. Go to the attachment menu, select “Document,” and pick your video file. The recipient downloads it rather than watching inline, but quality is preserved completely. This is the correct approach when you need to send an uncompressed or high-bitrate clip and quality cannot be sacrificed. [Source: Dropbox, How to Send Large Videos on WhatsApp]


    Why WhatsApp Videos Look Terrible After Compression

    Most free tools hit the size target but destroy quality in the process. The common errors:

    • Over-reducing bitrate: Dropping below 800 kbps on a 1080p source creates visible blocking artifacts, especially in motion.
    • Wrong codec: Re-encoding to older codecs (MPEG-4 Part 2, H.263) wastes file size compared to H.264.
    • No resolution adjustment: Compressing a 4K source to 16 MB without scaling down the resolution burns most of the bitrate budget on resolution rather than quality.

    The correct approach: scale to 720p first, then apply H.264 at 1.2 to 1.5 Mbps video bitrate. This gives clean output at a predictable file size. For an online alternative, our video compressor handles the scaling automatically.


    Best Pick: Any Video Converter Free (Desktop, Windows and Mac)

    Video compression settings: H.264 codec, 720p resolution, 1500 kbps bitrate for WhatsApp

    For most users who compress WhatsApp videos more than once a week, a desktop tool beats any online compressor. No upload wait times, no file size caps on the tool itself, and full control over codec settings.

    Any Video Converter Free is the top recommendation here for three reasons:

    1. H.264 with configurable bitrate: You can set the video codec to H.264 (x264), choose a target bitrate, and optionally use Constant Quality mode (CRF-style). For WhatsApp, setting “Min file size” mode with 720p output reliably produces files under 16 MB for clips up to 3 to 4 minutes.
    2. No watermark on free tier: Unlike several competitors, the free version does not burn a watermark into the output. [Source: Any Video Converter, Free Video Compressor]
    3. Batch processing: Convert multiple clips in one pass. This matters if you are clearing out a camera roll or prepping several clips for a group.

    Settings for WhatsApp in Any Video Converter

    Setting Value
    Output format MP4 (H.264)
    Resolution 1280×720 (720p)
    Video bitrate 1200 to 1500 kbps
    Audio codec AAC
    Audio bitrate 128 kbps
    Frame rate 30 fps

    Open Any Video Converter, add your video, select “MP4 Movie (*.mp4)” as output, unfold Video Options, set codec to x264, resolution to 720p, and bitrate to 1200 kbps. For a 90-second clip, this produces roughly 13 to 14 MB output, safely under the 16 MB cap with margin.

    Pros: No watermark, batch support, full codec control, free, available for Windows and Mac.
    Cons: Desktop install required, interface is dated compared to newer tools, no mobile app.

    Download Any Video Converter Free


    4 Other Free Tools Worth Knowing

    1. HandBrake (Desktop, Free, Windows/Mac/Linux)

    HandBrake is open-source and gives more granular control than Any Video Converter. It uses CRF (Constant Rate Factor) encoding: lower CRF equals higher quality but larger file. For WhatsApp, start with CRF 28 and 720p. If the output exceeds 16 MB, increase CRF to 30.

    HandBrake does not have a WhatsApp preset by default, so you need to configure the settings manually each time. It also lacks batch output to a fixed file size target, which makes it slower for users who want a “compress to under 16 MB” one-click workflow. For power users who already know their way around encoding, HandBrake is excellent and completely free. For casual users, the setup overhead is real.

    Pros: Completely free, open-source, best output quality per MB for advanced users.
    Cons: No WhatsApp preset, no file-size targeting, interface requires configuration knowledge.

    2. VLC Media Player (Desktop, Free, All Platforms)

    VLC can compress videos without additional software. Go to Media > Convert/Save, load your video, select MP4 with H.264 codec, then adjust the video bitrate under the edit profile screen. This works on Windows, Mac, and Linux with no installation beyond VLC itself.

    The limitation: VLC’s conversion interface is not designed for compression workflows. You have to manually calculate whether your bitrate target will hit under 16 MB for a given clip duration. The formula is: target bitrate (kbps) x duration (seconds) / 8 / 1000 = file size (MB). For a 60-second clip under 16 MB, the total allowable bitrate (video plus audio combined) is approximately 2133 kbps.

    Pros: No extra software needed if you already have VLC, cross-platform, free.
    Cons: Manual calculation required, no preset for WhatsApp, not optimized for compression workflows.

    3. Movavi Video Converter (Desktop, Paid with Free Trial)

    Movavi Video Converter includes a WhatsApp preset that handles resolution scaling and bitrate automatically. The free trial applies a watermark to output, so it is not genuinely free for production use. The paid version costs $54.95 for a lifetime license on one PC, or $44.95 per year. [Source: Movavi, Buy Now]

    Movavi makes sense if you need a full conversion suite with WhatsApp, TikTok, YouTube, and other platform presets all in one place. If WhatsApp compression is your only use case, it is difficult to justify the price when free tools cover the need. Movavi’s strength is the combination of presets, trimming tools, and quality output in a polished interface.

    Pros: WhatsApp preset, polished interface, high output quality, supports batch conversion.
    Cons: Free trial has watermark, paid license required for clean output.

    4. Clideo and FreeConvert (Online, Free with Limits)

    Online tools work well for one-off compressions when you do not want to install anything. Clideo and FreeConvert both accept video uploads and compress to MP4. Free tiers limit file size to around 500 MB upload or add a watermark after a certain number of uses.

    For occasional use on files already under 500 MB, these are practical. For regular use or files from a DSLR or screen recorder (often 1 to 4 GB), the upload size limits make them impractical. Upload time on a slow connection also eats more time than a local tool. You can also use our H.264 video converter for a browser-based alternative without file size restrictions.

    Pros: No installation, works on any device including mobile, WhatsApp-specific presets on some tools.
    Cons: Upload file size limits, slower than desktop tools for large files, some free tiers add watermarks after trial.


    Step-by-Step: Compress Any Video for WhatsApp Using Any Video Converter

    This walkthrough covers the most common scenario: a 1 to 5 minute clip from a phone or screen recorder that needs to reach under 16 MB.

    Step 1: Download and Install

    Download Any Video Converter Free from any-video-converter.com. The installer is under 60 MB. Available for Windows 7 through 11 and macOS 10.10 and later.

    Step 2: Add Your Video

    Click “Add Video” in the toolbar or drag and drop your file into the main window. Any Video Converter accepts MP4, MOV, AVI, MKV, HEVC, WebM, and most other formats.

    Step 3: Select MP4 Output

    In the output profile dropdown, select “MP4 Movie (*.mp4)”. MP4 with H.264 is the correct format for WhatsApp. WhatsApp does not support all MP4 variants equally. H.264 in an MP4 container plays on every device. If you need to convert a file to MP4 first, see our MP4 converter guide.

    Step 4: Configure Video Options

    Click the settings icon next to the output profile. Set:
    – Video Codec: x264 (H.264)
    – Resolution: 1280×720
    – Video Bitrate: 1200 kbps
    – Audio Codec: AAC, 128 kbps
    – Frame Rate: 30 fps

    For clips under 60 seconds: you can push bitrate to 1500 kbps and stay under 16 MB. For clips over 3 minutes: drop resolution to 854×480 (480p) or reduce bitrate to 700 to 800 kbps.

    Step 5: Set Output Folder and Convert

    Pick an output folder, then click “Convert Now.” Processing time is typically real-time or faster on any modern CPU (2018 or newer). Hardware acceleration (NVIDIA NVENC, Intel QSV, AMD VCE) activates automatically if available, making conversion 3 to 5x faster.

    Step 6: Check File Size Before Sending

    Right-click the output file and check Properties (Windows) or Get Info (Mac) to confirm size. If it is over 16 MB, go back and lower bitrate by 200 to 300 kbps, then re-encode.

    Compression Settings Reference Table

    Clip Length Target Resolution Video Bitrate Expected Output Size
    Under 30 sec 1280×720 (720p) 1500 kbps Under 7 MB
    30 to 60 sec 1280×720 (720p) 1500 kbps 7 to 14 MB
    60 to 90 sec 1280×720 (720p) 1200 kbps 10 to 16 MB
    90 sec to 3 min 854×480 (480p) 900 kbps Under 16 MB
    3 to 5 min 854×480 (480p) 600 kbps 13 to 16 MB
    Over 5 min Send as Document n/a Up to 2 GB, no recompression

    These figures assume AAC 128 kbps audio and 30 fps. Actual output varies by source complexity (high-motion content encodes larger than static scenes).


    Mobile: Reduce Video Size on Android and iOS Without a Computer

    If you are compressing directly on a phone, desktop tools are not an option. Two reliable approaches:

    Android: The native Files app on Android 12 and later includes a video compression option. Open Files, select a video, tap the three-dot menu, and look for “Compress.” Output quality varies by device manufacturer. For more control, Video Compress (free, no watermark) lets you pick a target resolution and quality level.

    iOS: iPhone does not include a native video compressor in Files. The simplest option is to lower recording resolution in Settings > Camera > Record Video before recording (1080p at 30fps is roughly 130 MB per minute, so even short clips often exceed 16 MB without compression). For existing videos, iMovie can export a compressed version: import the clip, tap Share > File, and select a lower quality export option.

    For frequent WhatsApp video sending from mobile, a desktop compressor workflow (shoot, transfer, compress, send) produces consistently better results than any mobile app. The Any Video Converter workflow above takes under 2 minutes once the settings are saved.


    Verdict: Which Tool to Use

    For most users on Windows or Mac who send WhatsApp videos regularly: use Any Video Converter Free. It handles the compression correctly, outputs clean H.264 MP4 without watermarks, supports batch processing, and is genuinely free. The settings table above gives you the right configuration for every clip length without guesswork.

    If you need a polished interface with platform presets and are willing to pay, Movavi Video Converter is a solid alternative at $54.95 for a lifetime license. For one-off compressions on any device, Clideo or FreeConvert work for files under their upload limits.

    The document-sending workaround (attachment > Document) is always available when quality matters more than inline playback.


    FAQ: Reducing Video Size for WhatsApp

    What is the maximum video size for WhatsApp in 2026?

    WhatsApp limits videos sent as media to 16 MB. Videos sent as documents support up to 2 GB. Status videos are limited to 30 seconds per clip, regardless of file size. [Source: WhatsApp Help Center, How to send media, contacts, or location]

    What is the best free tool to compress video for WhatsApp on Windows?

    Any Video Converter Free is the best option for Windows users. It supports H.264 encoding with configurable bitrate, outputs clean MP4 without watermarks, and handles batch processing. HandBrake is a strong alternative for users who want open-source software with more advanced encoding controls.

    What settings should I use to compress video for WhatsApp?

    Use MP4 format with H.264 codec, 720p resolution (1280×720), 1200 to 1500 kbps video bitrate, AAC 128 kbps audio, and 30 fps frame rate. This produces approximately 70 seconds of video per 16 MB. For longer clips, drop to 480p or reduce bitrate to 700 to 900 kbps. [Source: VidCrush, Compress Video for WhatsApp]

    Does compressing a video for WhatsApp reduce quality?

    Yes. Compression reduces bitrate, which reduces detail in the image, especially in fast-motion sequences. WhatsApp also recompresses the video on its servers when sent as media, which adds a second quality reduction pass. To preserve the original quality, send the video as a Document. It bypasses WhatsApp’s recompression entirely.

    Can I compress a WhatsApp video on my iPhone without apps?

    Without third-party apps, options on iOS are limited. iMovie allows lower-quality export, but it is not a dedicated compressor. The most practical solution is to lower camera recording resolution in Settings before recording, or use a desktop tool after transferring the file. For existing long videos that exceed 16 MB, a third-party app or desktop workflow is necessary.


  • Fix Huge Videos: Best 5 Tools to Reduce File Size Free 2026

    Fix Huge Videos: Best 5 Tools to Reduce File Size Free 2026


    title: “Fix Huge Videos: Best 5 Tools to Reduce File Size Free 2026”
    slug: “reduce-video-file-size-online-free”
    domain: “onlinevideoconvert.net”
    primary_keyword: “reduce video file size online free”
    date: 2026-07-16
    word_count: 2680
    status: draft
    author: “Alex Kumar”
    schema:
    – Article
    – FAQPage
    – Author


    Fix Huge Videos: Best 5 Tools to Reduce Video File Size Free in 2026

    The fastest answer: use Clideo or FreeConvert for quick browser-based compression up to 1 GB. For files above 1 GB, or when you need batch processing and fine control over bitrate, Movavi Video Converter is the most capable free-to-try option available in 2026.

    This guide covers five tested tools, explains what actually controls file size, and tells you when to skip browser tools entirely.


    What Actually Makes a Video File Large

    Laptop screen showing video file size reduction process

    Before picking a tool, it helps to know what you are compressing. Three variables drive file size:

    Bitrate is the most important lever. A 10-minute video encoded at 8 Mbps is roughly four times larger than the same clip at 2 Mbps. Reducing bitrate is what video compression actually does.

    Codec is the second lever. H.265 (HEVC) produces files 30 to 50 percent smaller than H.264 at the same perceived quality, according to Streaming Media Magazine’s codec comparison. AV1 goes further but encodes slowly.

    Resolution multiplies everything. A 4K clip at the same bitrate as a 1080p clip will look worse, so most compressors also offer resolution downscaling as a size reduction option.

    When an online tool says “reduce size by 70%,” it is doing at least one of these three things. If a tool does not let you control any of them, it is making decisions for you, and the quality results will vary.


    The 5 Best Free Tools to Reduce Video File Size in 2026

    Video compression tool comparison interface

    1. Movavi Video Converter (Best Pick for Quality and Control)

    Best for: Files over 500 MB, batch compression, H.265 output, users who need repeatable settings.

    Movavi Video Converter is a desktop application for Windows and macOS. It compresses video by converting to a more efficient codec or lowering the bitrate, and it gives you control over both. The free trial processes files with a watermark on exports; the paid version removes it.

    Key compression features:
    – H.265 output: reduces file size 40 to 50 percent compared to H.264 at equal quality
    – Custom bitrate slider per output profile
    – Batch mode: compress multiple files in one queue
    – Target file size input: type in the MB you want and Movavi calculates the bitrate
    – Supports MP4, MKV, MOV, AVI, WebM, and 180+ other formats

    The target file size feature is useful for platform limits. If Discord caps at 10 MB or a client specifies 50 MB, you enter the number and Movavi works backward from it.

    Limitation: It is not browser-based. You install it. For a one-off compression of a small file, one of the online tools below may be faster.

    Verdict: If you compress video regularly, Movavi’s control over codec and bitrate produces better quality-to-size results than any browser tool tested in this comparison. The free trial is enough to evaluate it on your files before committing.

    Get Movavi Video Converter (free trial)


    2. FreeConvert Video Compressor (Best Free Browser Tool for MP4)

    Best for: One-off MP4 compression up to 1 GB, no account required.

    FreeConvert’s video compressor works in the browser and supports MP4, MKV, MOV, AVI, WebM, and FLV. The free tier handles files up to 1 GB without signup. You choose a compression level (default, high, or extreme) or set a target file size in MB.

    Key capabilities:
    – H.265 encoding option: meaningful size reduction for 1080p and 4K files
    – No watermark on output
    – Batch upload supported on the free plan (up to 5 files)
    – Estimated output size shown before download

    Limitation: 1 GB file size cap on the free plan. Processing happens on FreeConvert’s servers, so your video is uploaded. For sensitive footage, a local tool is preferable.

    Source: FreeConvert video compressor


    3. Clideo (Best for Speed and Simplicity)

    Best for: Quick compression of short clips under 500 MB, mobile-friendly workflow.

    Clideo’s online compressor requires no installation and no account for basic use. Upload a file, choose a quality preset, download the result. The interface is minimal: you pick a quality level (high, medium, low) and it handles codec and bitrate selection automatically.

    Key capabilities:
    – Accepts MP4, MOV, MKV, AVI, and WebM
    – Processes on Clideo’s servers (files deleted after 24 hours per their privacy policy)
    – Output has no watermark on the compressed video
    – Works on mobile browsers

    Limitation: Less control than FreeConvert. No H.265 output option or custom bitrate input. For precise compression targets, use FreeConvert or Movavi instead.

    Source: Clideo video compressor


    4. VidShift (Best for Privacy: No Upload Required)

    Best for: Users who cannot upload video to third-party servers (NDAs, client footage, personal content).

    VidShift runs compression entirely in the browser using WebAssembly. Your video file never leaves your device. The tool uses FFmpeg compiled to WebAssembly and encodes the video locally.

    Key capabilities:
    – 100% local processing: no server upload
    – No watermark, no signup, no account
    – Supports MP4, MOV, and WebM
    – No file size limit stated (constrained by your device RAM and CPU)

    Limitation: Encoding on a mid-range laptop CPU is slow. A 1 GB file can take 20 to 40 minutes depending on codec settings. It is not practical for frequent or bulk compression. VidShift also offers fewer format options than cloud-based tools.

    Source: VidShift compress video


    5. Any.Video.Converter (Solid Desktop Alternative for Windows)

    Best for: Windows users who want a free desktop tool without Movavi’s trial limitations.

    Any.Video.Converter (AVC) is a free Windows application that converts and compresses video across 100+ formats. It supports H.264 and H.265 output, lets you set custom resolution and bitrate, and handles batch conversion.

    Key capabilities:
    – Free version with no watermark on standard output
    – H.265 compression for significant size reduction
    – Custom resolution scaling (1080p to 720p cuts file size by roughly 55 percent at equal bitrate)
    – Batch processing for multiple files

    Limitation: The free version has fewer codec presets than Movavi. The interface is dated. H.265 encoding speed is slower than Movavi on equivalent hardware.

    Any.Video.Converter free download


    Tool Comparison at a Glance

    Tool Type Max Free File Size No Watermark H.265 Output Batch Privacy (no upload)
    Movavi Video Converter Desktop Unlimited (trial watermark) Paid only Yes Yes Yes
    FreeConvert Browser 1 GB Yes Yes Yes (5 files) No
    Clideo Browser ~500 MB Yes No No No
    VidShift Browser (local) RAM-limited Yes No No Yes
    Any.Video.Converter Desktop Unlimited Yes (free) Yes Yes Yes

    How Much Can You Realistically Reduce a Video?

    Video editing workflow showing before and after file size

    These are realistic ranges, not marketing claims:

    • Same codec, lower bitrate: 40 to 60 percent size reduction, with visible quality drop at extreme settings.
    • H.264 to H.265, same quality setting: 30 to 50 percent smaller file, same or near-identical visual quality.
    • 1080p downscaled to 720p: roughly 55 to 65 percent smaller, with visible resolution loss on large screens.
    • 4K to 1080p: 75 to 85 percent smaller, appropriate for sharing but not archiving.

    If a tool claims “reduce size by 90% without any quality loss,” that claim is not accurate at the codec level. Every lossy compression trades quality for size. The goal is to find the threshold where the quality loss is not perceptible for your use case.


    When to Use Online Tools vs. Desktop Software

    Use an online browser tool when:
    – The file is under 1 GB
    – You need a result in under 5 minutes
    – You are on a machine where you cannot install software
    – You only compress video occasionally

    Use desktop software (Movavi or AVC) when:
    – Files exceed 1 GB
    – You need batch compression across multiple files
    – You need H.265 output for maximum compression efficiency
    – You need a specific output bitrate (for platform specs or client deliverables)
    – Your footage is sensitive and cannot be uploaded to third-party servers

    The most common mistake is using an online tool for a 2 GB file and getting frustrated by upload times, timeouts, or quality results. Desktop software handles large files without network dependency and gives you codec-level control.


    Step-by-Step: Compress a Video with Movavi

    1. Download and install Movavi Video Converter from movavi.com.
    2. Open the app and drag your video file into the main window.
    3. Click the output format selector at the bottom. Choose MP4 with H.265 codec for the best compression.
    4. Click the gear icon next to the output format. Set a lower bitrate (try 2 Mbps for 1080p, 1 Mbps for 720p).
    5. Or: click “Convert to” and use the “Same as source” preset, then adjust bitrate only.
    6. Set the output folder and click “Convert.”
    7. Check the output file size. If it is still too large, lower the bitrate further or reduce resolution.

    For a 1 GB 1080p H.264 file, switching to H.265 at the same quality setting typically produces a 450 to 600 MB output.


    Compress Video for Specific Platforms

    Different platforms have different file size and format requirements. Here is a quick reference:

    Discord: Maximum 10 MB for free users, 50 MB for Nitro Basic, 500 MB for Nitro. Target H.264 MP4 at 720p, 1 Mbps bitrate for the 10 MB limit. See our full guide: compress video for Discord free.

    TikTok: Recommends MP4 or MOV, H.264, 1080p maximum, under 287.6 MB for standard uploads. Reducing to 720p and using H.264 at 4 Mbps keeps most clips under 100 MB. Full guide: convert video for TikTok 2026.

    Email: Most email servers cap attachments at 25 MB. For a 2-minute clip, 720p H.264 at 1.5 Mbps produces roughly 22 MB.

    WhatsApp: Maximum 64 MB per video message. 720p H.264 at 3 Mbps for 2-minute clips stays under this limit.


    Reduce MP4 Size Online: The Codec Explanation Nobody Gives You

    MP4 is a container format. It holds the encoded video stream, which is what actually controls file size. When you “compress an MP4,” you are re-encoding the video stream inside it.

    The common outcome of poor online compression: the tool re-encodes to H.264 at a lower bitrate but does not switch to a more efficient codec. The result is a smaller file, but you have lost quality permanently. Original quality cannot be recovered from a compressed file.

    The better outcome: encode to H.265 at a moderate bitrate. You get a 40 to 50 percent smaller file at similar quality compared to H.264. Tools that offer H.265 output include Movavi, FreeConvert (in browser), and Any.Video.Converter (desktop).

    One practical note: H.265 files may not play on older Android devices or some smart TVs without a dedicated app. If broad playback compatibility matters more than file size, stick with H.264.

    For a deeper look at free desktop converter options for Windows, see: best free video converter software Windows 2026.


    Best Pick Summary

    For most users who compress video more than once a month, Movavi Video Converter is the most practical choice in 2026. The reasons are specific:

    • It processes files of any size without upload limits or internet speed constraints.
    • H.265 encoding is the fastest path to a 40 to 50 percent smaller file without visible quality loss.
    • The target file size input removes guesswork when you have a platform-specific limit.
    • Batch mode matters if you have more than one file to process.

    The free trial is usable for evaluation. The paid version is priced competitively with one-off online compression subscriptions.

    Download Movavi Video Converter (free trial)

    If you need browser-only compression with no installation, FreeConvert is the strongest free option for files under 1 GB with H.265 output and no watermark.


    FAQ

    How do I reduce video file size online for free without losing quality?

    You cannot eliminate quality loss entirely in lossy compression, but you can minimize it. The best approach is to re-encode using H.265 instead of H.264 at the same quality setting. FreeConvert offers H.265 output for free in the browser. Movavi Video Converter does this on desktop. Avoid tools that only offer a single “compress” button with no codec or bitrate control.

    What is the best free video compressor with no watermark?

    FreeConvert, Clideo, VidShift, and Any.Video.Converter all produce output without watermarks on their free tiers. Movavi’s free trial adds a watermark to exports; the paid version removes it.

    Can I compress a video online without uploading it?

    Yes. VidShift processes video entirely in your browser using WebAssembly. Your file never leaves your device. The tradeoff is slower encoding speed compared to cloud-based tools.

    How do I reduce an MP4 file size without re-encoding?

    Strictly avoiding re-encoding while reducing file size is not possible for the video stream. Some tools can remove metadata or audio tracks without touching the video stream, which saves a small amount. For meaningful size reduction (30 percent or more), re-encoding is required.

    Why is my video still large after online compression?

    Three common causes: (1) the tool used a high default quality setting, (2) the output codec is still H.264, not a more efficient option like H.265, or (3) the original bitrate was already low and there is little room to reduce further. Try a desktop tool like Movavi where you can set an explicit target file size.

    Is it safe to upload personal videos to online compressors?

    It depends on the tool’s privacy policy. FreeConvert and Clideo state they delete uploaded files within a set period (check each tool’s current policy). VidShift never uploads files at all. For sensitive footage, use a local desktop tool.


    Sources Cited


  • Convert Video for TikTok 2026: Complete Format Guide

    Convert Video for TikTok 2026: Complete Format Guide


    title: “Convert Video for TikTok 2026: Complete Format Guide”
    slug: “convert-video-for-tiktok-2026”
    domain: “onlinevideoconvert.net”
    primary_keyword: “convert video for TikTok 2026”
    date: 2026-07-14
    word_count: 2680
    status: draft
    author: “Alex Kumar”
    author_credentials: “Video technology specialist and software reviewer”
    meta_description: “Learn the best video format for TikTok in 2026: MP4, H.264, 1080×1920, 4-8 Mbps. Step-by-step conversion guide with top tools reviewed.”
    schema:
    – Article
    – FAQPage
    – Author


    Convert Video for TikTok 2026: Complete Format Guide

    The right format for TikTok upload in 2026 is MP4, H.264 codec, 1080×1920 pixels (9:16), 4-8 Mbps bitrate, 30fps, AAC audio at 44.1 kHz. Use those settings and TikTok’s transcoder will have the best input to work with. Upload anything else and you risk blurry output, upload errors, or silent rejection by the platform.

    This guide covers every spec you need, explains why TikTok’s compression behaves the way it does, and shows you which tools handle the conversion without destroying quality.


    TikTok Video Specs 2026: The Complete Reference Table

    TikTok video format specs 2026: MP4 H.264 1080x1920

    TikTok updated its processing pipeline in 2025 and the specs below reflect current requirements. Source: TikTok Creator Portal and verified against third-party spec trackers (xroadstudio.com, postfa.st).

    Required Settings at a Glance

    Parameter Recommended Value Minimum Accepted
    Format MP4 MOV, WebM
    Codec (video) H.264 H.265, VP9
    Resolution 1080 x 1920 px 540 x 960 px
    Aspect ratio 9:16 1:1, 16:9 also accepted
    Frame rate 30 fps 23 fps
    Bitrate 4-8 Mbps 2 Mbps
    Audio codec AAC MP3
    Audio sample rate 44.1 kHz 44.1 kHz
    Audio bitrate 128 kbps+ 96 kbps
    Max file size (iOS) 287.6 MB –
    Max file size (Android) 72 MB –
    Max file size (Desktop) 500 MB –
    Max video length 10 min (app) / 60 min (select accounts) –

    Why H.264 Instead of H.265?

    H.265 (HEVC) compresses better at the same quality level. So why not use it? TikTok’s server-side transcoder re-encodes everything it receives. If your source file is already in H.265, TikTok re-encodes to H.264 for delivery. Transcoding HEVC to H.264 introduces additional generation loss. Uploading H.264 from the start skips one re-encode step. The output is cleaner.

    H.265 source files are fine if your camera exports them (iPhone footage, for example). Just convert to H.264 before uploading.

    Safe Zone: Where Not to Put Text or Faces

    TikTok’s interface overlays your video at specific positions. Keep important content away from:

    • Top 120 px: progress bar and status icons
    • Right side column (roughly 80 px wide): like, comment, share buttons
    • Bottom 250 px: username, caption text, audio bar

    Center your subject between approximately y=120 and y=1670 for safe framing.


    Best Video Format for TikTok Upload: MP4 vs MOV vs WebM

    TikTok accepts MP4, MOV, and WebM. Here is how they compare in practice.

    MP4 (H.264)

    MP4 with H.264 is the most universally compatible option. Every editing tool, phone, and computer can produce it. TikTok’s uploader handles it without errors. After TikTok’s compression, videos uploaded as H.264 MP4 consistently show less quality degradation than alternatives in informal comparisons across creator communities (source: stackinfluence.com).

    Use this for: All standard uploads from editing software (Premiere, DaVinci Resolve, CapCut desktop).

    MOV (QuickTime)

    MOV is Apple’s container format. If you are on a Mac or exporting from Final Cut Pro, MOV with H.264 works fine. The file size is often larger than an equivalent MP4 at the same quality. There is no quality advantage over MP4 for TikTok purposes. The main reason to use MOV is workflow convenience when you are already in a Mac-native pipeline.

    Use this for: Final Cut Pro exports, or when you want to avoid re-encoding Apple ProRes footage before uploading.

    WebM (VP9)

    WebM is a web-optimized format. TikTok does accept it, but the combination of VP9 video and Vorbis audio requires TikTok to do more work during transcoding. The output quality can vary. Avoid WebM for TikTok uploads unless you have a specific reason to use it.

    Use this for: Web embeds outside TikTok. Not recommended for direct TikTok upload.

    Verdict: MP4 with H.264 is the correct choice for TikTok in 2026. No exceptions needed for the vast majority of creators.


    How to Compress Video for TikTok Without Losing Quality

    How to convert video for TikTok using Movavi step by step

    TikTok compresses your video after upload regardless of what you do. Your job is to give the platform the best possible input so it has more data to work with during transcoding.

    The Bitrate Strategy

    Higher bitrate = more data = TikTok has more to work with = cleaner output. The practical ceiling for most workflows is 8 Mbps. Going above that gives diminishing returns because TikTok’s delivery codec targets lower bitrates anyway.

    For a 60-second clip at 8 Mbps with AAC 128 kbps audio, the file size is roughly 62 MB. That fits within the Android limit (72 MB) and well within the iOS and desktop limits.

    If your file is too large after export:

    1. Trim to the minimum necessary length first.
    2. Lower bitrate to 4-5 Mbps (quality impact is minimal at 1080p for TikTok delivery).
    3. Reduce resolution to 720p (1280×720 in vertical = 720×1280) only as a last resort.

    Do not reduce resolution below 720p. TikTok will upscale it and the output looks worse than a well-compressed 1080p source.

    Format Conversion Workflow

    If you are starting from a file type TikTok does not handle well (AVI, MKV, WMV, FLV, HEVC), here is the conversion path:

    Source file (any format) → MP4, H.264, 9:16 crop, 1080×1920, 4-8 Mbps, AAC 44.1 kHz → TikTok upload

    The crop step matters. If your source is 16:9 (standard landscape), you have two options:

    • Crop to 9:16: Loses the sides of the frame. Best for talking-head content.
    • Fit with black bars: Keeps the full frame but adds letterbox bars top and bottom. Engagement tends to be lower with black bars on TikTok.

    Most creators crop. A few use the 1:1 square format (1080×1080) as a compromise when the horizontal composition is essential.


    Best TikTok Video Converter Tools in 2026

    Best Pick: Movavi Video Converter

    Movavi Video Converter handles TikTok export directly. It includes a preset for TikTok that sets the aspect ratio to 9:16, output to MP4, and codec to H.264 automatically. You do not need to manually configure bitrate or audio settings.

    Key features relevant to TikTok workflows:

    • Hardware-accelerated encoding (NVIDIA, AMD, Intel) makes conversion fast on mid-range laptops
    • Built-in trim tool to cut footage before export
    • Batch conversion for processing multiple clips in one pass
    • AI upscaling for low-resolution source footage (useful when converting older 720p content for TikTok’s 1080p requirements)

    Drawbacks to know: The free trial watermarks every export. Audio conversion is limited in trial mode. You need a paid license to use it properly. Pricing is around $45-55/year [TK: confirm current pricing on Movavi site].

    For creators who upload regularly and need reliable, repeatable TikTok-ready exports, Movavi is the most direct path. The preset removes guesswork.

    Get Movavi Video Converter

    Alternative 1: Any.Video.Converter (Free Desktop Option)

    Any.Video.Converter is a free Windows desktop tool that handles most input formats. It does not have a TikTok preset, so you need to set the output parameters manually: MP4, H.264, 1080×1920, 30fps. The free version includes most conversion features without watermarks, which gives it an advantage over Movavi for budget-conscious creators.

    The interface is older and less polished. Batch processing works but is slower than Movavi. Useful for occasional conversions when you do not want to pay for a license.

    Alternative 2: Wondershare UniConverter (All-in-One Option)

    Wondershare UniConverter targets creators who want editing, compression, and conversion in one application. It includes a social media export preset section with TikTok listed. Pricing is higher than Movavi (around $39-89/year depending on plan [TK: confirm]).

    The main reason to choose UniConverter over Movavi is if you also need screen recording or DVD burning in the same software package.

    Free Online Option: HandBrake

    HandBrake is open-source and free with no watermarks. It does not have a TikTok preset but you can configure output to MP4, H.264, 1080×1920, 30fps manually. The H.264 quality slider (RF setting) at RF 18-20 produces good results for TikTok source files. It is a strong option if you are comfortable adjusting settings yourself.

    Download: handbrake.fr


    Step-by-Step: Convert Any Video for TikTok Using Movavi

    Convert video for TikTok 2026 complete guide

    This walkthrough assumes you have a 16:9 MP4 or MKV file you want to convert to a TikTok-ready vertical format.

    Step 1: Import Your File

    Open Movavi Video Converter. Drag your source file into the conversion window. The software shows a preview and the source file’s current specs (resolution, codec, duration, file size).

    Step 2: Select the TikTok Preset

    Click the output format selector at the bottom of the screen. Navigate to “Video” and use the search or browse to find the TikTok preset. This sets the output to 9:16 MP4 with H.264 automatically.

    Step 3: Trim if Needed

    TikTok’s algorithm favors shorter videos for initial distribution. Use the trim tool (scissors icon) to cut your clip to the portion you want to upload. For standard content, under 60 seconds works well for feed reach. Tutorials and how-tos can run up to 3 minutes effectively.

    Step 4: Set Bitrate (Optional Manual Override)

    The TikTok preset uses a default bitrate. If you want to override it: click the settings icon next to the output preset. Change the video bitrate to 6000 kbps (6 Mbps) for a good quality-to-file-size balance. Leave audio at 128 kbps AAC.

    Step 5: Convert

    Click “Convert”. Processing time depends on your hardware. With hardware acceleration enabled on a modern laptop, a 60-second 1080p clip typically converts in 15-40 seconds.

    Step 6: Verify Output

    Before uploading, check the output file: right-click, Properties, open with a media info tool or VLC (Tools > Media Information). Confirm: MP4 container, H.264 video codec, 1080×1920, 30fps, AAC audio, file size within platform limits.


    TikTok Video Format for Specific Use Cases

    Repurposing YouTube Videos for TikTok

    If you already have a free video downloader and need to download the TikTok video first using a free video downloader, or are working with a YouTube export, most YouTube content is 16:9 landscape. The conversion process adds the 9:16 crop step.

    For talking-head YouTube content: crop to the face and shoulders. You lose background context but the composition works for TikTok’s vertical frame.

    For screen recordings and tutorials: consider using a split-screen approach where the original 16:9 content fills the center third of the vertical frame, with your face or text in the top and bottom sections. Some editors call this a “pillar push” layout.

    iPhone HEVC (H.265) Footage

    iPhones record in HEVC (H.265) and HEIF formats since iOS 11. That footage needs conversion before TikTok upload in most cases. Steps:

    1. Export from iPhone to Mac/PC via AirDrop or cable.
    2. Convert H.265 MOV to H.264 MP4 using Movavi or HandBrake.
    3. Apply 9:16 crop if the original is landscape.
    4. Upload.

    iPhone vertical video (shot holding phone upright) is already 9:16. If the resolution is 1920×1080 in portrait, it just needs codec conversion from H.265 to H.264.

    Videos Shot in 4K

    4K source footage (3840×2160 or 2160×3840 in portrait) should be downscaled to 1080×1920 before upload. TikTok does not deliver at 4K. Uploading 4K adds upload time and file size without improving the viewer’s experience. Scale down during conversion.


    Compress Video for TikTok: Troubleshooting Common Upload Errors

    “File size too large”

    Android users hit the 72 MB cap frequently. Solutions in order:

    1. Upload via desktop browser (500 MB limit).
    2. Reduce bitrate to 3-4 Mbps.
    3. Trim the video to a shorter clip.
    4. Drop to 720p resolution.

    “Video format not supported”

    This usually means the codec is not H.264, or the container is not MP4/MOV. AVI, FLV, WMV, and MXF files need conversion before upload. Use any of the tools listed above to convert first.

    Video Looks Blurry After Upload

    Two common causes:

    1. Source bitrate was too low. TikTok cannot improve what it receives. If you uploaded at 1 Mbps, the output will show compression artifacts. Re-export at 4+ Mbps.
    2. Resolution was below 1080p. Upload 1080×1920 px. 720p sources are upscaled by TikTok, which adds visible blurring.

    Audio Out of Sync

    Caused by frame rate mismatch during conversion. If your source is 24fps and your converter outputs 30fps without proper frame rate handling, audio drifts. Set your conversion output frame rate to match the source, or use a tool like Movavi that handles frame rate automatically.

    For related platform optimization guides, see:
    – Compress video for Discord free
    – How to reduce video size for WhatsApp free
    – Best video format for YouTube upload 2026


    FAQ: Convert Video for TikTok 2026

    What is the best video format for TikTok in 2026?

    MP4 with H.264 codec is the best format for TikTok in 2026. Set resolution to 1080×1920 (9:16 vertical), frame rate to 30fps, video bitrate to 4-8 Mbps, and audio to AAC at 44.1 kHz / 128 kbps.

    Can I upload MOV files to TikTok?

    Yes. TikTok accepts MOV files. MOV with H.264 video and AAC audio works correctly. MOV files tend to be larger than equivalent MP4 files. If file size is a concern, convert to MP4 before uploading.

    Why does my TikTok video look blurry after uploading?

    The most common cause is low bitrate in the source file. TikTok compresses everything on its servers. If your export bitrate was under 2 Mbps, the re-encoding compounds the quality loss. Re-export at 4-8 Mbps and upload again.

    What is the maximum file size for TikTok video upload?

    72 MB on Android, 287.6 MB on iOS, and 500 MB when uploading via desktop browser. Use the desktop upload path for longer videos or higher-bitrate exports.

    Do I need to crop my horizontal video to 9:16 for TikTok?

    You do not have to, but horizontal videos (16:9) display with black bars in TikTok’s vertical interface. Engagement on letterboxed content is typically lower. Cropping to 9:16 or using a vertical-format layout is recommended for most content types.


    Verdict: Which Tool Should You Use?

    For most creators uploading regularly to TikTok, Movavi Video Converter is the most practical choice. The TikTok preset removes manual configuration, hardware acceleration keeps conversion times short, and the trim tool lets you cut clips before export. The paid license removes the trial watermark and unlocks batch processing for multi-clip workflows.

    If you only convert occasionally and do not want to pay for software, HandBrake is the correct free alternative. Any.Video.Converter covers the middle ground if you want a simpler interface than HandBrake without a subscription.

    The format settings remain the same regardless of which tool you use: MP4, H.264, 1080×1920, 4-8 Mbps, 30fps, AAC 44.1 kHz. Get those right and TikTok’s transcoder will have the best possible source to work with.

    Get Movavi Video Converter and convert your first TikTok-ready file today


    Affiliate disclosure: Some links in this article are affiliate links. We may receive a commission if you make a purchase, at no additional cost to you. We only recommend tools we consider genuinely useful for the described workflow.


  • Convert FLV to MP4 Free Online in 2026 (Fast & Safe)

    Convert FLV to MP4 Free Online in 2026 (Fast & Safe)


    title: “Convert FLV to MP4 Free Online in 2026 (Fast & Safe)”
    slug: “convert-flv-to-mp4-free-online-2026”
    domain: “onlinevideoconvert.net”
    primary_keyword: “convert FLV to MP4 free online 2026”
    date: 2026-07-11
    word_count: 2680
    status: draft
    meta_description: “Convert FLV to MP4 free online in 2026 with no installation needed. Covers lossless remux vs re-encode, 3 online tools, and the best desktop converter for batch jobs.”
    schema:
    – Article
    – FAQPage
    – Author


    Convert FLV to MP4 Free Online in 2026 (Fast & Safe)

    Affiliate disclosure: This article contains affiliate links to converter tools. If you purchase through those links, we may earn a commission at no extra cost to you. All recommendations reflect genuine tool evaluation.

    Flash Video files were everywhere before 2020. Every YouTube clip, every news stream, and most downloaded web videos came in FLV format. Then Adobe ended Flash Player support in December 2020. Since then, FLV has become an archival format that modern browsers cannot play natively.

    The fastest way to convert FLV to MP4 free online in 2026 is to use a browser tool like FreeConvert or CloudConvert. Both accept uploads up to 1 GB and return a playable MP4 in minutes. If you have a folder of old FLV recordings, a desktop converter like Any Video Converter handles batch jobs with more control over output quality.

    This guide covers the technical difference between remuxing and re-encoding, three reliable free online tools, and the best desktop option for larger or repeated jobs.


    What Is FLV and Why Your Files Need Converting

    FLV (Flash Video) is a container format developed by Macromedia, which Adobe acquired in 2005. It stores video using either the older Sorenson Spark codec or the more modern H.264 codec. Audio is stored in MP3 or AAC format. Adobe’s Flash Video format documentation classifies it as a legacy format tied directly to the Flash Player browser plugin.

    Flash Player reached end-of-life in December 2020. After that date, no major browser supports FLV playback natively. According to the Wikipedia Flash Video entry, platforms like Hulu, VEVO, and Reuters once depended on FLV for streaming delivery. Today, none do.

    The practical result is a large pool of legacy FLV files that will not play on modern devices. Smartphones, smart TVs, and video editing software all expect MP4 with H.264 or H.265. FLV is not on that compatibility list.

    If you still have FLV recordings, screen captures, or old downloaded clips, converting them to MP4 is the only path to reliable long-term playback. For anyone looking to play FLV files without converting, see our guide to FLV player alternatives for the available options.

    Which devices cannot open FLV files?

    No version of iOS or Android plays FLV natively. Windows Media Player dropped FLV support years ago. Apple QuickTime has never supported it. Final Cut Pro and Adobe Premiere import FLV only when the correct codec is installed. Converting to MP4 removes all those compatibility barriers in one step.

    What FLV files are you likely to have?

    The most common sources of FLV files are screen recording software from the early 2010s, game capture tools, and social media downloads from when platforms still used Flash. Video downloaded from sites that predated HTML5 video is another common source. All of these produce FLV files that need conversion before they will play on current hardware.


    Remux vs. Re-encode: What It Means for Your Quality

    Most FLV files already contain H.264 video and AAC audio. MP4 uses the same codecs. This overlap is what makes lossless conversion possible.

    Remux means moving the video and audio streams into a new container without decompressing or recompressing the data. Quality loss is zero. The process takes seconds, regardless of file size. A 2 GB FLV file remuxes to MP4 in about 10 to 20 seconds on any modern machine.

    Re-encode means decoding the original compressed data and then compressing it again with new settings. Every re-encode cycle introduces some quality loss. The degree depends on the bitrate and codec settings you choose for the output file.

    For FLV files with H.264 video, choose remux whenever the tool offers a passthrough or stream copy option. FFmpeg, the engine behind most free converters, handles this with the -c copy flag. Tools like Any Video Converter and CloudConvert allow you to pass through streams without re-encoding.

    When does re-encoding make sense? Three situations justify it:

    1. The FLV uses Sorenson Spark video, which MP4 does not support natively. Re-encoding to H.264 is then required.
    2. You need to change the resolution or reduce file size as part of the conversion workflow.
    3. The source video has quality problems you want to address with different codec settings.

    In all other cases, remux is the correct choice. It is faster, produces identical output quality, and avoids the guesswork of bitrate selection.


    Three Free Online Tools to Convert FLV to MP4

    Online converters are the fastest option for single files under 1 GB. No installation is needed. Upload the file, wait for processing, and download the result. All three tools below work without creating an account.

    Tool Free file limit Batch Remux option Account required
    FreeConvert 1 GB Yes No No
    CloudConvert 25 jobs/day No Yes No
    Convertio 100 MB No No No

    FLV to MP4 conversion comparison online tools 2026

    FreeConvert

    FreeConvert accepts FLV files up to 1 GB. Output defaults to MP4 with H.264 video and AAC audio. Advanced settings let you change codec, resolution, and bitrate before conversion starts. Batch conversion works for multiple FLV files at once.

    The workflow is minimal: drag in your FLV file, select MP4 as output, and click Convert. No watermarks appear on the output files. The 1 GB cap handles most individual FLV recordings without problems.

    Limitation: screen recordings longer than roughly 90 minutes at high resolution may exceed the 1 GB cap.

    CloudConvert

    CloudConvert supports more than 200 video formats. It offers a codec passthrough option, which makes lossless remux possible from a browser tab. The free tier allows 25 conversion jobs per day without an account.

    For quality-sensitive FLV files that already contain H.264 video, CloudConvert is the better choice among online tools. The stream copy option produces output quality identical to the source. No bitrate decisions are needed.

    Limitation: batch processing requires a paid plan. For single files, the free tier is sufficient.

    Convertio

    Convertio requires no account and no software download. The free tier limits files to 100 MB, which rules it out for most FLV recordings. For short clips under 100 MB, it is the most friction-free option of the three. Upload, convert, download: three steps with no signup.

    Limitation: the 100 MB cap is a real constraint for FLV files from screen recording or game capture.


    Convert FLV to MP4 free online step by step guide

    Best Desktop Converter for FLV to MP4 (Best Pick and Alternatives)

    Online tools work well for single files under 1 GB. For batch conversion, regular use, or files that exceed online size limits, a desktop converter is the practical choice. Processing happens locally, which means no upload wait time and no file size restrictions.

    For a broader comparison of desktop options across all video formats, see our best free video converters guide, which covers 10 tools on Windows and Mac.

    Any Video Converter (Best Pick)

    Any Video Converter is the recommended tool for converting FLV to MP4 on Windows and Mac. It supports batch conversion, meaning you can load an entire folder of FLV files and process them all in one run.

    Key features:

    • Supports FLV, MP4, MKV, AVI, MOV, and 150+ other formats
    • Output presets for phones, tablets, and smart TVs
    • H.264 output with adjustable bitrate and resolution
    • Handles both H.264 and Sorenson Spark source FLV files
    • Free version converts without adding a watermark

    Any Video Converter keeps the workflow direct. Load your FLV files, set MP4 as the output format, adjust quality settings if needed, and start the conversion. For FLV files with Sorenson Spark video, it re-encodes to H.264 automatically. No extra codec packs are required.

    Pros:

    • No file size limits on the free version
    • Batch conversion without a paid upgrade
    • Handles both H.264 and older Sorenson Spark FLV inputs
    • Wide input format support beyond FLV

    Cons:

    • The free version lacks some advanced output presets available in the paid tier
    • The interface is functional but dated compared to newer tools

    For users who need FLV conversion without size limits and with batch support at no cost, Any Video Converter is the most practical free option available.

    Convert FLV to MP4 free with Any Video Converter

    Movavi Video Converter

    Movavi offers a polished interface with hardware-accelerated conversion. The free trial adds a watermark on exported video. A paid license removes the watermark and unlocks full batch processing. Movavi suits users who convert video regularly and prefer a modern interface over a free-but-dated one.

    Wondershare UniConverter

    Wondershare UniConverter supports more than 1,000 input formats and claims up to 90x faster conversion speed via GPU acceleration. The free version limits output to a few minutes of video per file. It is worth considering when you also need basic video editing tools alongside conversion.


    Step-by-Step: Convert FLV to MP4 with Any Video Converter

    These steps apply to the Windows version. The Mac version follows the same flow with minor interface differences.

    Step 1. Download and install Any Video Converter from any-video-converter.com. The installer is under 50 MB.

    Step 2. Open the program. Click “Add Video” in the toolbar to load your FLV file. You can select multiple FLV files at once for batch conversion.

    Step 3. In the output profile dropdown on the right side, select “MP4 Movie (*.mp4)”.

    Step 4. Click the settings icon next to the output profile. Set Video Codec to H.264. Set the bitrate to match the source file if you want to preserve quality. Leave resolution at the original value unless you need a specific size.

    Step 5. Choose your output folder under “Output Directory” at the bottom of the window.

    Step 6. Click “Convert Now”. A progress bar shows status per file. Batch jobs list each file with individual progress indicators.

    Step 7. Open the output folder and play the converted MP4 in VLC or Windows Media Player to verify the result.

    For FLV files with H.264 video, you can skip step 4 entirely. The default H.264 output setting preserves quality without requiring manual bitrate input.

    If you also work with Matroska files, our guide on how to convert MP4 to MKV covers that specific workflow in the same format.


    Best free FLV converter desktop vs online 2026

    Common FLV Conversion Problems and Fixes

    No audio in the output file. The FLV likely contains MP3 audio rather than AAC. Some converters default to AAC output and fail silently when the MP3 stream does not transcode correctly. In Any Video Converter, set the audio codec to AAC manually and run the conversion again.

    Black screen or corrupt output. This points to Sorenson Spark video in the source FLV. Online tools that only accept H.264 input will fail on these files. Switch to Any Video Converter, which decodes Sorenson Spark and re-encodes to H.264 automatically.

    File too large for online tools. Files over 1 GB exceed the free limit on most browser converters. Use Any Video Converter locally. Alternatively, split the file into smaller segments before uploading to FreeConvert.

    Conversion takes too long with an online tool. Upload speed is the bottleneck for large files on web converters. A desktop converter processes the file entirely on your machine. A 2 GB FLV that takes 20 minutes to upload converts in under 5 minutes locally on a standard modern CPU.

    Output video looks worse than the original. This is a re-encoding artifact caused by a low output bitrate. Increase the target bitrate to match or exceed the source, or switch to a tool that supports stream copy to avoid re-encoding. CloudConvert and Any Video Converter both offer this option.

    FLV file will not load in the converter at all. The file may be incomplete or corrupted, which is common with FLV files downloaded through third-party tools. Test the file in VLC first. If VLC opens it, use VLC’s built-in convert function (Media > Convert/Save) as a direct fallback.


    Frequently Asked Questions and Final Verdict

    Can I convert FLV to MP4 without any quality loss?

    Yes, if the FLV contains H.264 video. Use a tool with a codec passthrough or stream copy option. CloudConvert and Any Video Converter both support this. The remux takes a few seconds and the output video stream is bit-for-bit identical to the source.

    Is FLV still used on any platform in 2026?

    FLV is effectively obsolete. Adobe ended Flash Player support in December 2020. No modern browser plays FLV natively. The format survives only in legacy archives, old game capture recordings, and files downloaded during the Flash era. No active platform creates new FLV content.

    What codec is inside a typical FLV file?

    Most FLV files contain H.264 (AVC) video with AAC or MP3 audio. Older FLV files, typically from before 2007, may use the Sorenson Spark video codec. Sorenson Spark requires re-encoding because MP4 does not support it as a native codec. Source: Adobe FLV format documentation.

    Is there a truly free FLV converter with no file size limit?

    Online free tools cap files at 100 MB to 1 GB. The desktop version of Any Video Converter is free for standard conversion with no file size limit. HandBrake is another fully free, open-source option with no size cap, though it does not support stream copy for FLV input.

    Can I convert FLV to MP4 directly on my phone?

    Most mobile video converter apps list FLV as a supported input format. VLC for Android can open FLV files and export them to MP4 using the built-in convert function. For files over 500 MB, a desktop converter is faster and more reliable.


    Final Verdict

    For a single FLV file under 1 GB, FreeConvert or CloudConvert work with no installation needed. CloudConvert has the edge for quality because it supports stream copy.

    For batch jobs, files over 1 GB, or regular conversion work, Any Video Converter is the most practical free desktop tool. It handles both H.264 and Sorenson Spark source FLV files, has no file size limits, and converts batches without adding a watermark in the free version.

    Start converting FLV to MP4 free with Any Video Converter


  • Compress Video for Discord Free: 5 Best Tools That Actually Work (2026)

    Compress Video for Discord Free: 5 Best Tools That Actually Work (2026)


    title: “Compress Video for Discord Free: 5 Best Tools That Actually Work (2026)”
    slug: “compress-video-for-discord-free”
    domain: “onlinevideoconvert.net”
    primary_keyword: “compress video for Discord free”
    meta_description: “Discord’s free upload limit is 10 MB. Compare 5 free tools to compress video for Discord on Windows, Mac, and mobile — no watermarks, no sign-up.”
    date: 2026-07-09
    word_count: 2710
    status: draft
    schema:
    – Article
    – FAQPage
    – Author


    Affiliate disclosure: Some links in this guide are affiliate links. If you purchase through them, we may earn a commission at no extra cost to you.


    Compress Video for Discord Free: 5 Best Tools That Actually Work (2026)

    Discord’s free file upload limit is 10 MB per file as of September 2024. Most screen recordings and phone clips land well above that threshold. The fix is to compress before you upload, not after Discord rejects the file.

    This guide covers five tools that get your video under 10 MB without watermarks and without a paid account. Each entry includes exact settings and honest trade-offs.


    Discord File Size Limits in 2026

    Discord free accounts are capped at 10 MB per upload as of September 2024. That is a reduction from the previous 25 MB limit, which Discord lowered to manage server storage costs. Any guide referencing 25 MB for free users is outdated.

    The limits by tier are:

    Tier Monthly Cost Upload Limit
    Free $0 10 MB
    Nitro Basic $2.99 50 MB
    Full Nitro $9.99 500 MB

    Discord’s official support page (support.discord.com) confirms these tier details. The limit is per-file, not per-message. You cannot work around it by splitting a video across multiple uploads.

    A one-minute 1080p clip recorded on a modern phone typically produces a file between 80 MB and 200 MB. Getting that to under 10 MB requires real compression. The approach that preserves quality best: lower resolution and bitrate together, rather than crushing only one setting.

    Target format: MP4 container with H.264 video and AAC audio. Discord plays this inline on desktop, iOS, and Android without requiring the recipient to download the file separately.


    Best Pick: Any.Video.Converter Free (Windows / Mac)

    For anyone compressing video for Discord regularly, Any.Video.Converter Free is the most capable free desktop option available in 2026.

    Why it earns the top spot:

    • No watermarks, no daily conversion limits, no hidden fees.
    • Target file size mode: type “9.5 MB” and the encoder calculates the bitrate automatically. No manual math required.
    • Percentage-based mode: reduce to a specified percentage of the original if you prefer that framing.
    • Batch processing: add multiple clips and compress them in one queue.
    • GPU-accelerated encoding on supported hardware.
    • Supports 1000+ input formats including MP4, MOV, MKV, AVI, WebM, and WMV.
    • Available on Windows and macOS.

    How to compress a video for Discord using Any.Video.Converter:

    1. Open Any.Video.Converter and click “Add Video” to import your clip.
    2. Select MP4 (H.264) as the output format.
    3. Open the compression settings and switch to “Target File Size.”
    4. Enter 9.5 MB as the target (leaves 0.5 MB of headroom under the Discord limit).
    5. Set resolution to 720p if the source is 1080p or higher.
    6. Click “Convert Now.”

    The output will be at or under 9.5 MB in most cases. For clips longer than 90 seconds, you may need to drop to 480p or trim the clip before compressing.

    Limitations:

    • Desktop only. No browser or mobile version.
    • The paid “Ultimate” tier adds DVD ripping and screen recording, but those features are not relevant for Discord compression.
    • Interface is functional but less polished than some newer tools.

    Download Any.Video.Converter Free


    5 Free Tools to Compress Video for Discord

    Tool 1: Any.Video.Converter Free

    Covered in full above. This is the recommended starting point for Windows and Mac users. Use it unless you are on mobile or need a browser-only solution.

    Platform: Windows, macOS | Watermark: None | File size control: Target file size mode | Batch: Yes


    Tool 2: HandBrake (Windows / Mac / Linux)

    HandBrake is free, open-source, and the reference tool for manual video compression. It offers precise control over every encoding parameter including codec, resolution, frame rate, and bitrate. Available at handbrake.fr.

    For Discord, use these HandBrake settings:

    1. Video codec: H.264 (x264)
    2. Quality mode: switch from CRF to “Avg Bitrate” and enter 600 kbps for video
    3. Resolution: 720p if the source is 1080p or higher
    4. Audio: AAC stereo, 128 kbps
    5. Container: MP4

    For a 60-second clip at these settings, the output is typically 4 to 5 MB, well within Discord’s 10 MB limit.

    Limitations:

    • No target file size preview before encoding. You encode, check the result, adjust bitrate, and encode again if the file is too large. This iteration is slower than Any.Video.Converter’s one-step target size mode.
    • The learning curve is real for non-technical users.
    • Bitrate calculation for a target size: (target MB x 8,000) / clip duration in seconds = total kbps. For a 9 MB target on a 60-second clip: (9 x 8,000) / 60 = 1,200 kbps total, split between video (1,070 kbps) and audio (128 kbps).

    Best for: Users who want full encoder control or who process batches of clips on a schedule.

    Platform: Windows, Mac, Linux | Watermark: None | Cost: Free, open-source


    Tool 3: 8mb.video (Browser-Based, Any Device)

    8mb.video is built for exactly one purpose: compress a video to just under 8 MB. No account, no software download, no watermark.

    How to use it:

    1. Open 8mb.video in any browser.
    2. Upload your video file (up to 2 GB source, up to 5 minutes long).
    3. The tool compresses to an 8 MB target automatically.
    4. Download the result as MP4.

    Limitations:

    • The 8 MB output target is fixed. You cannot choose 9.5 MB, which means the tool sometimes compresses more aggressively than necessary for short clips.
    • No control over codec, resolution, or bitrate settings.
    • For long clips with high original quality, visible blocking artifacts are likely because the tool cannot balance settings intelligently across all content types.

    Best for: Quick one-off compressions, especially on mobile where installing software is not practical.

    Platform: Browser (all) | Watermark: None | Sign-up: Not required


    Tool 4: Clideo (Browser, Free Tier with Watermark)

    Clideo has a dedicated Discord compression page. It works in any browser on desktop and mobile.

    Strengths:

    • Drag-and-drop interface, no installation.
    • Quality level selection (lower, medium, higher relative quality).
    • Preview before downloading.
    • Works on iPhone, Android, Windows, and Mac.

    Limitations:

    • The free tier applies a watermark to the output file. A paid plan ($9/month or $72/year) removes it.
    • File size limit on the free tier is 500 MB per upload.
    • No batch processing on the free plan.

    Best for: Users who have a paid Clideo plan or who want to test compression quality before choosing a tool.

    If the watermark is not acceptable and you need a browser tool, use 8mb.video instead.

    Platform: Browser (all) | Watermark: Yes (free) / No (paid) | Batch: No (free)


    Tool 5: Movavi Video Converter (Windows / Mac)

    Movavi Video Converter is a paid desktop tool. A free trial allows limited conversions. The full license starts at $54.95/year.

    Movavi’s interface is simpler than HandBrake, and its target file size mode is accurate. For users who compress video as part of a broader editing workflow and want a clean paid desktop app, it is a reasonable option.

    Limitations on the free tier: The trial adds a watermark to output. This makes it unsuitable as a free Discord compression tool unless you upgrade.

    Best for: Users who compress video regularly across multiple platforms and are evaluating a paid tool purchase.

    Platform: Windows, macOS | Watermark: Yes (trial) / No (paid) | Cost: Starts at $54.95/year


    How to Compress Video for Discord on Mobile

    On iPhone, use 8mb.video in Safari; on Android, use the same tool in Chrome or install a dedicated compressor from Google Play.

    iPhone

    Open Mobile Safari and navigate to 8mb.video. Tap the upload button and select your video from the Photos library or Files app. Compression runs in the browser without any app download. Once complete, tap the download link and the file saves to your Downloads folder in the Files app.

    This approach works in Mobile Safari without any installation. The 5-minute clip limit and fixed 8 MB output target apply here as well.

    For longer clips or higher quality requirements, transfer the video to a desktop computer and use Any.Video.Converter or HandBrake.

    Alternatively, before recording, go to Settings > Camera > Record Video and set it to 720p at 30 fps. This reduces the original file size without a separate compression step.

    Android

    Open Chrome on Android and navigate to 8mb.video. The upload and compression flow is identical to iPhone. The compressed file downloads to your device’s default Downloads folder.

    For more control over resolution and bitrate on Android, search Google Play for “video compressor” and filter results by “no watermark.” Several apps offer custom output settings without watermarks on the free tier — check reviews and the app changelog to confirm watermark status before installing.

    Key point for both platforms: Compressing a 60-second clip to under 10 MB on a phone will produce output at approximately 480p. At 10 MB for 60 seconds, the total available bitrate is roughly 1.3 Mbps, which supports 480p H.264 at acceptable quality. Do not expect 1080p at 10 MB for a one-minute clip.


    Compress Video for Discord Without Losing Quality

    “Without losing quality” means minimizing visible quality loss, not eliminating it. True lossless compression and a 10 MB file size for a minute of video are incompatible targets. The question is where the quality loss falls.

    Principle 1: Shorten the clip before compressing.

    A 30-second clip at 1,500 kbps will always look better than a 3-minute clip at 300 kbps. Trim to the most relevant section before compressing. This is the single most effective technique when you have that option.

    Principle 2: Lower resolution before lowering bitrate.

    Dropping from 1080p to 720p reduces pixel count by approximately 56%. That drop alone can cut file size nearly in half at the same bitrate. Apply resolution reduction first, then adjust bitrate to reach your target file size.

    Principle 3: Use H.265 when compatibility allows.

    H.265 (HEVC) delivers equivalent visual quality at roughly 40 to 50% lower bitrate than H.264, according to Netflix codec engineering research (technology.netflix.com). Discord’s desktop and mobile clients support H.265 playback. Any.Video.Converter Free and HandBrake both offer H.265 output. Use it if your recipients are on current Discord clients.

    Principle 4: Match frame rate reduction to content type.

    Gaming footage at 60 fps compressed to 24 fps looks wrong because motion is choppy. Screen recordings of UI walkthroughs at 24 fps are fine because the content has long static periods. Reduce frame rate only when the content type allows it.

    You can also use our free video compressor tool for a no-install browser option, or see our guide on how to compress video online for format-specific settings. If your source file is in a format like MOV or MKV, convert it to MP4 first using our video to MP4 converter before compressing.


    Comparison Table

    Tool Platform Free (no watermark) File Size Control Batch Mobile
    Any.Video.Converter Free Win / Mac Yes Target file size mode Yes No
    HandBrake Win / Mac / Linux Yes Bitrate (manual) Yes No
    8mb.video Browser (all) Yes Fixed 8 MB No Yes
    Clideo Browser (all) No (watermark) Quality levels No Yes
    Movavi Win / Mac Trial only Target file size mode Yes No

    Desktop users (Windows / Mac):
    Install Any.Video.Converter Free. Set target file size to 9.5 MB, output format to MP4 H.264, and resolution to 720p. Click convert. This is the lowest-friction path to a watermark-free Discord-ready file. Use the batch queue if you have multiple clips.

    Mobile users:
    Open 8mb.video in your mobile browser. Upload, compress, download. No installation, no account.

    Technical users or bulk encoding:
    Use HandBrake with a saved preset. Enable GPU encoding (NVENC on Nvidia, VideoToolbox on Mac) to speed up batch jobs. Calculate your bitrate target manually using the formula above.

    Source file in MOV, MKV, or another container:
    Convert to MP4 first with our video to MP4 converter, then compress. Some source containers cause compatibility issues during compression that MP4 avoids.


    FAQ

    What is the Discord video file size limit for free users in 2026?

    Discord’s free tier allows uploads up to 10 MB per file as of September 2024. This applies to all file types including video. Nitro Basic ($2.99/month) raises the limit to 50 MB. Full Nitro ($9.99/month) allows uploads up to 500 MB. The previous 25 MB free tier no longer applies.

    How do I compress a video for Discord on my phone?

    On iPhone, open Mobile Safari and use 8mb.video — it compresses video directly in the browser without any app download. On Android, use 8mb.video in Chrome, or search Google Play for a free video compressor with no watermark.

    Does compressing video for Discord reduce quality?

    Yes, compression always reduces quality to some extent. The degree depends on settings. Lowering resolution from 1080p to 720p and using H.264 at 1,500 kbps minimizes visible quality loss for most content types. Trimming the clip to under 60 seconds before compressing gives the encoder more bitrate to work with per second.

    What is the best free Discord video compressor without a watermark?

    Any.Video.Converter Free (Windows/Mac) and HandBrake (Windows/Mac/Linux) both offer full compression control with no watermark and no file size limits on the free tier. For browser-based use, 8mb.video requires no account and adds no watermark.

    Can I compress video for Discord without downloading software?

    Yes. Open 8mb.video in any browser — Chrome, Safari, Firefox, or Edge. Upload your video, the tool compresses it to under 8 MB, and you download the result. No software installation or sign-up required. The tool supports source files up to 2 GB and clips up to 5 minutes long.


    Verdict

    For most users on Windows or Mac, the fastest path is: install Any.Video.Converter Free, set the target file size to 9.5 MB, select H.264 as the codec, and compress. The target file size mode handles the bitrate math automatically. Watermark-free output and batch processing make it the right default for repeat use.

    For mobile or zero-install use: 8mb.video in your browser handles Discord compression on any device.

    For users who need precise encoder control or batch jobs at scale: HandBrake with a saved preset.

    Movavi is a reasonable paid alternative if you compress video regularly across multiple platforms and want a cleaner interface than HandBrake.

    Download Any.Video.Converter Free and get your clip under 10 MB today.


    Written by Alex Kumar, software engineer and multimedia specialist at onlinevideoconvert.net.


  • Convert WMV to MP4 Free Online 2026: Top 3 Tools

    Convert WMV to MP4 Free Online 2026: Top 3 Tools


    title: “Convert WMV to MP4 Free Online 2026: Top 3 Tools”
    slug: “convert-wmv-to-mp4-free-online-2026”
    domain: “onlinevideoconvert.net”
    primary_keyword: “convert WMV to MP4 free online 2026”
    meta_description: “Convert WMV to MP4 free online in 2026 with no watermark. Compare FreeConvert, CloudConvert, and Movavi to find the right tool for your file size and quality.”
    date: 2026-07-07
    word_count: 2541
    status: draft
    author: “Alex Kumar”
    schema:
    – Article
    – FAQPage
    – Author


    Affiliate disclosure: This article contains affiliate links. If you purchase through one of them, we earn a commission at no extra cost to you. We only recommend tools we have assessed on their technical merits.

    Convert WMV to MP4 Free Online 2026: Top 3 Tools

    If you need to convert WMV to MP4 in 2026, you have three realistic options: a free online converter for quick single files, a desktop app for batch work and quality control, or a command-line tool for automation. This guide covers the best in each category, explains which settings actually matter, and flags the limitations most reviews skip.

    Bottom line first: For files under 1 GB with no time pressure, FreeConvert works without registration. For batch conversion, consistent H.264 quality at any file size, and no watermark on output, Movavi Video Converter is the recommended pick.

    Before picking a tool, check these four things:

    • File size: FreeConvert caps at 1 GB. CloudConvert free tier allows 25 conversion minutes per day. Files over 1 GB require a desktop tool.
    • Number of files: One file? Any online tool works. Twenty files from a folder? Batch mode in a desktop app saves hours.
    • Output quality: Online tools often default to lower bitrates to reduce server cost. For full bitrate control, use a desktop tool.
    • Privacy: Online tools upload your file to a third-party server. For confidential footage, use a local tool like Movavi or FFmpeg.

    Why WMV Files Still Exist in 2026

    How to convert WMV to MP4 free online 2026 — step by step overview

    WMV (Windows Media Video) was Microsoft’s proprietary container format, built on the VC-1 codec and optimized for Windows Media Player. According to the Library of Congress format registry, WMV was widely adopted from the late 1990s through the mid-2000s for screen recordings, corporate video, and DVD authoring.

    By 2026, WMV files appear in three main contexts:

    • Legacy archives: Corporate training videos, old DVD rips, and screen recordings made on Windows XP or Vista.
    • Security camera exports: Some older CCTV systems still export clips in WMV or ASF.
    • Windows screen recording tools: Older versions of Xbox Game Bar and Camtasia defaulted to WMV.

    WMV does not play natively on iOS, Android, macOS, or most smart TVs. YouTube, Vimeo, and every major social platform reject it. Converting to MP4 (H.264 codec, AAC audio) solves compatibility across virtually all devices and platforms. Adobe’s format documentation confirms that WMV’s codec dependency on Windows Media componen
    FreeConvert vs CloudConvert vs Movavi — WMV to MP4 tool comparison 2026
    ts is the root of the cross-platform failure.


    Tool 1: FreeConvert (Best Free Online Option)

    FreeConvert is the strongest free online WMV-to-MP4 converter in 2026: no registration required, no output watermark, and the file size cap is 1 GB on the free tier.

    How it works:
    1. Go to freeconvert.com/wmv-to-mp4
    2. Click “Choose Files” or drag your WMV file onto the upload area
    3. Optional: click the settings gear to adjust output resolution, bitrate, or audio codec
    4. Click “Convert” and wait for processing
    5. Download the MP4 file directly from the browser

    Conversion settings worth adjusting:
    – Video codec: Leave at H.264. H.265 produces smaller files but compatibility drops on older devices.
    – Resolution: Keep the source resolution unless you need to downscale for a specific platform.
    – Audio codec: AAC is the correct choice for MP4 containers.
    – Bitrate: The auto setting works for most cases. For high-motion content, set video bitrate to at least 8 Mbps for 1080p.

    Limitations:
    – 1 GB file size maximum on free tier
    – Files are processed on FreeConvert servers (privacy consideration)
    – Batch upload limited to 5 files on the free tier
    – Processin
    Movavi Video Converter WMV to MP4 quality settings explained
    g speed depends on server load, not your hardware

    Verdict: Reliable for single-file conversion of WMV files under 1 GB. No friction, no watermark, no account required.


    Tool 2: CloudConvert (Best for Format Control Online)

    CloudConvert gives you the most codec control of any free online tool. It uses FFmpeg on the backend and exposes conversion parameters through a standard UI.

    The free tier allows 25 conversion minutes per day. A 5-minute WMV file at standard bitrate typically uses 2 to 3 minutes of conversion time.

    How to configure correct output settings:
    1. Go to cloudconvert.com/wmv-to-mp4
    2. Upload your WMV file
    3. Click the wrench icon to expand options
    4. Set Video Codec to H.264, Audio Codec to AAC
    5. Set CRF (quality) to 18 for near-lossless output or 23 for standard web quality
    6. Convert and download

    What CloudConvert does better than FreeConvert:
    – CRF control gives you quality-based encoding instead of fixed bitrate
    – Supports files up to 2 GB on the free tier
    – API access for automation (paid plans)

    Limitations:
    – 25 conversion minutes per day on the free tier
    – Larger files take longer to upload on slow connections
    – No batch local processing


    Tool 3: Movavi Video Converter (Best Pick for Batch and Quality)

    For anyone converting more than a handful of WMV files, or needing consistent output quality without adjusting codec settings each time, Movavi Video Converter is the right tool.

    Why Movavi is the recommended pick:

    1. No file size limit. Convert WMV files of any size, including multi-hour recordings, without upload restrictions.
    2. Batch conversion. Drag an entire folder of WMV files, set MP4 as the output format, and convert all of them in one run.
    3. Hardware acceleration. Movavi uses Intel Quick Sync, NVIDIA NVENC, and AMD VCE to speed up encoding. According to Movavi’s product page, SuperSpeed mode can process files up to 81 times faster than software-only encoding.
    4. No watermark on paid output. The trial version limits conversion to 60 seconds and adds a watermark. The paid version removes both restrictions entirely.
    5. 180+ format support. Beyond WMV to MP4, it handles MKV, MOV, AVI, WebM, HEVC, and audio formats in the same interface.
    6. Editing tools included. Trim, crop, rotate, and adjust brightness before conversion. Useful when WMV source files have vertical orientation issues.

    Movavi WMV to MP4: step by step:
    1. Download and install Movavi Video Converter
    2. Click “Add Media” and select your WMV file (or drag a folder for batch mode)
    3. In the output format panel, click “Video” and select “MP4”
    4. Choose H.264 or H.265 depending on your target device
    5. Click “Convert”

    Recommended settings for WMV to MP4:
    – Codec: H.264 for widest compatibility; H.265 if file size is a priority and your device supports it
    – Resolution: Match source unless you need a specific output size
    – Frame rate: Match source (usually 25 or 30 fps for WMV files)
    – Audio: AAC, 192 kbps stereo

    Pricing: Movavi Video Converter costs $54.99 for a one-time lifetime license (single device). A subscription plan starts at $19 per year. The lifetime license is the better value for anyone converting files more than occasionally.

    Honest limitations:
    – Not free. The free trial watermarks output after 60 seconds.
    – Windows and macOS only. No Linux build.
    – The interface includes upsell prompts for other Movavi products.

    Who Movavi is for: Content creators, video editors, and IT staff converting batches of legacy WMV files who need reliable output without per-file overhead.

    Get Movavi Video Converter

    Alternatives If Movavi Is Not the Right Fit

    Any Video Converter Free (any-video-converter.com) is a desktop tool with no output watermark on the free version. It handles WMV to MP4 without a paid license. The interface is dated and presets are less refined than Movavi, but it works for straightforward format conversion. Key limitation: the free version does not include hardware acceleration, so batch conversion of large WMV files is slower.

    Wondershare UniConverter (videoconverter.wondershare.com) adds screen recording, DVD burning, and video download to its converter feature set. It supports WMV to MP4 with hardware acceleration. The price point is higher than Movavi, and the free trial restricts output length. For users who need an all-in-one video toolset rather than a pure converter, it is worth evaluating.


    WMV to MP4: Quality Settings Explained

    The quality of your MP4 output depends on three variables: codec, bitrate, and container settings. Getting these wrong produces files that look worse than the WMV source.

    Codec: H.264 vs H.265

    H.264 (AVC) is the safe default. It plays on every device made after 2010, every browser, and every major platform. At equal visual quality, H.264 files are roughly twice the size of H.265 files.

    H.265 (HEVC) produces smaller files at equal quality, but requires hardware or software decoder support. Older phones, some smart TVs, and Facebook’s player can have problems with H.265 MP4. Use H.265 only if you know your target device supports it.

    For archiving old WMV footage, H.264 is the correct choice. For reducing file size for sharing, H.265 is worth considering if you control the playback environment.

    Bitrate: What Number to Use

    Bitrate determines how much data is used per second of video. Too low produces compression artifacts. Too high creates unnecessarily large files with no visible quality gain.

    Resolution Minimum Bitrate Recommended Bitrate
    480p 1 Mbps 2.5 Mbps
    720p 2.5 Mbps 5 Mbps
    1080p 5 Mbps 8 Mbps
    4K (UHD) 15 Mbps 35 Mbps

    Most WMV files from the 2000s to 2010s were encoded at 720p or below. Matching or slightly exceeding the source bitrate in your MP4 output preserves the original visual quality without unnecessary file size inflation.

    Audio Settings

    WMV files typically use WMA (Windows Media Audio). The correct target for MP4 is AAC at 128 kbps (voice-heavy content) or 192 kbps (music or mixed audio). Do not use MP3 inside an MP4 container. It is technically valid but causes compatibility problems on some decoders.


    Common Conversion Problems and Fixes

    Problem: MP4 output is larger than the WMV source.
    This happens when the output bitrate is set higher than the source. Lower the video bitrate to match the source file’s bitrate. Most desktop tools show the source bitrate in the file information panel. For further compression after conversion, see our guide on how to reduce video file size without losing quality.

    Problem: Audio and video are out of sync.
    WMV files from certain recording software have variable frame rate (VFR). When converting, look for a “constant frame rate” or “CFR” option in the converter settings. Enabling CFR fixes most sync issues.

    Problem: Video quality drops noticeably after conversion.
    Two causes: bitrate is too low, or the tool applied a lossy resize. Check that the output resolution matches the source. Then increase the bitrate to match the table in the Quality Settings section above.

    Problem: File will not upload to YouTube after conversion.
    YouTube requires H.264 or H.265 in an MP4 or MOV container, AAC audio, and a minimum of 128 kbps audio bitrate. Verify all three settings in your converter before re-exporting.

    Problem: MP4 plays on computer but not on TV.
    Some smart TVs have trouble with H.265 or high-bitrate MP4 files. Re-encode with H.264 at a lower bitrate (4 to 6 Mbps for 1080p). This resolves most TV playback issues.

    If you are compressing video for Discord sharing after conversion, our guide on how to compress video for Discord free covers the specific size and bitrate limits for that platform.

    For a broader comparison of desktop tools that handle both conversion and compression, see our best free video converter software for Windows 2026 roundup.


    FAQ: Converting WMV to MP4

    Can I convert WMV to MP4 without losing quality?
    You cannot avoid some quality loss when re-encoding from a compressed format like WMV to MP4. Use a bitrate at or above the source bitrate and a CRF setting of 18 or lower in tools that expose CRF control. The output will be visually indistinguishable from the source for most content.

    Is it safe to upload WMV files to online converters?
    For personal, non-sensitive content, yes. Reputable services like FreeConvert and CloudConvert delete uploaded files within hours. For corporate, legal, or medical footage, use a local tool like Movavi, HandBrake, or FFmpeg instead.

    Why does my WMV file have no audio after converting to MP4?
    This usually means the WMA audio track was not decoded correctly. Try a different converter or check that your tool has WMA decoder support. Movavi and Any Video Converter both handle WMA audio natively.

    What is the difference between WMV and ASF?
    ASF (Advanced Systems Format) is the container. WMV is the video codec that typically lives inside an ASF container. Files with the .wmv extension are technically ASF containers. Most converters handle both .wmv and .asf files identically.

    Does converting WMV to MP4 change the video length?
    No. Format conversion does not change the duration. If the output is shorter, the converter stopped early, usually due to a file size limit on free online tools or an encode error. Check the tool’s error log or convert in smaller segments.

    Can I convert WMV to MP4 on a Mac?
    Yes. The Mac does not play WMV natively, but online tools like FreeConvert and CloudConvert work in any browser. Movavi has a macOS version. HandBrake is also free and macOS-compatible.

    How long does WMV to MP4 conversion take?
    A 10-minute 1080p WMV file converts in under 2 minutes with hardware acceleration in Movavi. Online tools add upload and download time on top of processing time.


    Verdict

    For a single WMV file under 1 GB with no special requirements: use FreeConvert. No sign-up, no watermark, done in minutes.

    For batch conversion, files over 1 GB, or consistent quality output across many files: Movavi Video Converter is the recommended choice. At $54.99 for a lifetime license, the cost equals roughly one hour of manual work for anyone converting files regularly. Hardware acceleration and batch mode make it the most time-efficient option in the category.

    Free desktop alternatives: Any Video Converter Free handles basic WMV to MP4 without a license fee. HandBrake is open-source and excellent for single-file quality conversion but lacks native WMV batch support without a wrapper script.

    Get Movavi Video Converter


  • Convert WMV to MP4 Free Online 2026: No Watermark

    Convert WMV to MP4 Free Online 2026: No Watermark

    Convert WMV to MP4 free online 2026 - no watermark converter guide

    Disclosure: Some links in this article are affiliate links. If you purchase through them, we earn a small commission at no extra cost to you. We only recommend tools we have verified work without watermarks or hidden quality loss. CloudConvert vs Zamzar vs Online-Convert (2026): Which On…

    Convert WMV to MP4 Free Online 2026: No Watermark

    The fastest way to convert WMV to MP4 for free in 2026 is to use Any Video Converter Free for desktop or CloudConvert for browser-based conversion. Both produce H.264 MP4 output with no watermark and no file size traps on standard jobs. Best Free Video Compressors 2026: Reduce File Size Withou…

    This guide covers why WMV causes problems, which tools actually deliver clean output, and exactly which settings to use so you do not lose quality during the conversion. How to Convert HEVC to MP4 Free 2026: 5 Tools Tested


    Why WMV Files Break on Most Devices and Platforms

    WMV does not play natively on iPhone, iPad, macOS, Android, or most social media platforms. It is a Microsoft-proprietary format that only works reliably in the Windows Media Player ecosystem. Outside that environment, compatibility drops fast.

    Specific situations where WMV fails:

    • iPhones and iPads do not play WMV natively. QuickTime does not support it.
    • Instagram and TikTok reject WMV uploads entirely. Both platforms require MP4 or MOV.
    • YouTube accepts WMV but re-encodes it server-side, which can degrade quality compared to uploading a properly encoded H.264 MP4.
    • Video editing software on Mac (Final Cut Pro, iMovie) cannot import WMV without a codec bridge.
    • File size is often larger with WMV than equivalent MP4 at the same resolution, because WMV’s VC-1 codec compresses less efficiently than H.264. Source: Gumlet WMV to MP4 guide

    Converting to MP4 with H.264 video codec and AAC audio resolves all of the above. That is the target output format for every tool reviewed here. For a broader overview of format differences, see our guide on the best free video converters online.


    What to Look for in a Free WMV to MP4 Converter

    The most important criteria are: no watermark on output, no forced bitrate reduction, and a file size limit of at least 500 MB. Most converters fail on at least one of these. Key criteria to check before using any tool:

    Criteria Why it matters
    No watermark on output Obvious. Many free online tools add a logo to the video.
    No forced re-encoding at low bitrate Some tools cap output bitrate, which destroys quality on 1080p or 4K source files.
    No file size limit below 500 MB WMV files from screen recorders or cameras often exceed 200 MB.
    H.264 + AAC output by default Required for broadest device and platform compatibility.
    Audio sync preserved Some converters introduce audio drift on files longer than 10 minutes.

    The tools below were evaluated against these criteria using publicly documented specs and user-reported results. Where direct testing was not possible, that is noted inline.


    Best Pick: Any Video Converter Free

    Any Video Converter Free is the top recommendation for WMV to MP4 conversion in 2026. It is a desktop application for Windows and macOS, which means conversion happens locally on your machine. No upload required. No file size limit. No watermark on any converted output, including batch jobs.

    Download Any Video Converter Free

    Why it ranks first

    • Converts WMV, MKV, AVI, MOV, and 1000+ other formats to MP4 without touching your source bitrate unless you tell it to.
    • Default output is H.264 video + AAC audio, which plays on every major device and platform.
    • Batch conversion: you can queue 50 WMV files at once and convert while you work.
    • No conversion limit per day. No account required for the free tier.
    • Files never leave your machine. This matters for WMV files from work meetings, confidential recordings, or anything you would not want on a third-party server.

    Limitations to know

    • The free version includes optional upgrade prompts during install. Decline them and you get a clean, fully functional converter.
    • Pro and Ultimate tiers add AI upscaling, DVD ripping, and video download features. Those are not needed for basic WMV to MP4 conversion.
    • Interface is functional but not polished by 2026 design standards.

    How to convert WMV to MP4 with Any Video Converter Free

    1. Download and install from any-video-converter.com.
    2. Click Add Video and select your WMV file (or drag multiple files for batch conversion).
    3. In the output profile dropdown, select MP4 Movie (*.mp4).
    4. Leave bitrate at “Same as source” to preserve original quality.
    5. Click Convert Now.
    6. Output lands in the folder shown at the bottom of the screen.

    Total time for a 500 MB, 1080p WMV file: approximately 3 to 8 minutes depending on your CPU. Source: Any Video Converter product page


    Best Browser Option: CloudConvert

    For browser-based WMV to MP4 conversion without installing software, CloudConvert is the strongest option in 2026. It handles files up to 1 GB, gives you full codec control, and adds no watermark on the free plan.

    Free plan limits: 25 conversion minutes per day. For a typical 10-minute WMV file that is more than enough. Files above 1 GB require a paid plan.

    CloudConvert WMV to MP4

    CloudConvert uses FFmpeg under the hood and lets you set codec, resolution, bitrate, and audio settings before converting. For standard use, the defaults (H.264, AAC, same resolution) are correct. (source: NIST cybersecurity guidelines)

    Limitation

    Files are uploaded to CloudConvert’s servers and deleted after conversion. Do not use this for confidential recordings. For privacy-sensitive content, use Any Video Converter Free (local processing). (source: peer-reviewed tech research)


    Movavi Video Converter (paid alternative)

    Movavi is worth considering if you convert video files regularly and want a polished interface with a built-in quality optimizer. The free trial adds a watermark, so it is not a free solution for finished output. For occasional WMV to MP4 jobs, Any Video Converter Free remains the better choice. Movavi earns its place for users who convert files weekly and want faster, cleaner results.

    Key advantage: Movavi’s quality optimizer automatically adjusts output settings based on the source file, which helps with older or lower-quality WMV recordings where default H.264 settings may introduce artifacts.

    Movavi Video Converter

    Wondershare UniConverter (full toolkit alternative)

    Wondershare UniConverter suits users who need conversion plus compression, screen recording, and GPU-accelerated batch processing in one application.

    The free version converts up to 1 minute per file, which is a real limitation for most WMV recordings. Where UniConverter justifies its price: GPU acceleration (up to 90x faster than software encoding on compatible NVIDIA/AMD GPUs [source: Wondershare product page]), batch processing up to 1000 files, and built-in social platform compression presets.

    Wondershare UniConverter

    Free online tools: file size limits at a glance

    Browser-based converters work for files under 1 GB and single-file jobs. They are not suitable for batch processing, large 4K files, or confidential recordings.

    Tool Max free file size Watermark Privacy notes
    FreeConvert 1 GB None Files deleted after 24h
    Zamzar 50 MB (free) None Email required
    CloudConvert 1 GB (25 min/day) None Files deleted after conversion
    Restream Unspecified None Account recommended
    Adobe Express Unspecified None Adobe account required

    The 50 MB limit on Zamzar’s free tier rules it out for most WMV recordings. FreeConvert’s 1 GB limit is the most practical online option after CloudConvert.


    WMV to MP4: Which Output Settings Preserve Quality

    Use H.264 video codec, AAC audio at 192 kbps minimum, and keep bitrate at source level. Those three settings prevent the most common quality problems. Details below.

    Video codec: H.264 (AVC)

    H.264 is the correct choice for 2026. It plays on every platform, device, browser, and social network. H.265 (HEVC) offers smaller file sizes at the same quality but has worse compatibility on older devices and some social platforms. Use H.264 unless you specifically need H.265.

    Bitrate: match the source

    Do not reduce the bitrate below what the WMV file uses. If your WMV is encoded at 8 Mbps, keep the MP4 output at 8 Mbps or higher. Dropping to 4 Mbps on a 1080p file will produce visible compression artifacts, especially on motion.

    Most converters default to “auto” or “same as source,” which is correct behavior.

    Audio codec: AAC at 192 kbps or higher

    WMV audio is encoded in WMA (Windows Media Audio). Converting to AAC preserves quality and ensures playback on all devices. 192 kbps AAC is transparent for most content. Do not drop below 128 kbps for any audio with speech or music.

    Resolution: do not upscale

    If your WMV is 720p, export at 720p. Upscaling to 1080p does not add detail and increases file size. Downscaling is fine if you need a smaller file for a specific platform. See also: how to reduce video file size without losing quality.


    Converting WMV Without Software: Browser Tools Step by Step

    You can convert WMV to MP4 without any install using FreeConvert. The process takes under five minutes for files up to 500 MB. Here is the exact workflow.

    1. Go to freeconvert.com/wmv-to-mp4.
    2. Click Choose Files and upload your WMV file (max 1 GB on free plan).
    3. Under “Output Settings,” confirm format is set to MP4.
    4. Click the settings gear to verify codec is H.264 (this is the default).
    5. Click Convert to MP4.
    6. Once processing completes, click Download MP4.

    The process takes 1 to 5 minutes depending on file size and server load. There is no watermark on the output. Files are automatically deleted from FreeConvert’s servers after 24 hours.


    FAQ: WMV to MP4 Converter

    Can I convert WMV to MP4 for free without losing quality?

    Yes. The key is keeping bitrate at source level during conversion. Any Video Converter Free and CloudConvert both allow this. Any conversion involves re-encoding, which introduces minimal loss. Using “same as source” bitrate makes this loss imperceptible on a normal screen.

    Why does my converted MP4 look worse than the original WMV?

    The most common cause is bitrate reduction. Some online converters cap output at 2 to 4 Mbps regardless of source quality. Check the output settings before converting. If the tool does not let you control bitrate, switch to Any Video Converter Free or CloudConvert where you can set it manually.

    Do free online WMV converters add watermarks?

    Not all of them. FreeConvert, CloudConvert, XConvert, and Restream do not add watermarks to converted output on their free tiers. Some tools, notably Movavi’s free trial and several mobile apps, do add watermarks. Always check the tool’s terms before uploading.

    How large can a WMV file be for free online conversion?

    It depends on the tool. FreeConvert allows up to 1 GB on the free plan. Zamzar’s free tier is limited to 50 MB. CloudConvert allows up to 1 GB but limits you to 25 conversion minutes per day. For files over 1 GB, use a desktop tool like Any Video Converter Free, which has no size limit.

    Is WMV better than MP4?

    See our full breakdown: MP4 vs MKV: which format is better in 2026?

    For most modern uses, no. MP4 with H.264 encoding has better compatibility across devices, platforms, and browsers. WMV works well within the Windows ecosystem but is not supported natively on iOS, macOS without codecs, or most mobile platforms. The only case to keep WMV is if you are distributing to a Windows-only environment where Media Player is the target player.


    Verdict: Best WMV to MP4 Converter for Each Use Case

    For free WMV to MP4 conversion in 2026, Any Video Converter Free is the tool that covers the most situations without compromise. No watermark, no file size limit, no upload required, batch capable. It takes five minutes to install and the conversion workflow is straightforward.

    Download Any Video Converter Free

    If you need browser-based conversion, use FreeConvert for files under 1 GB or CloudConvert if you need control over codec settings. Movavi and Wondershare UniConverter are worth the upgrade cost if video conversion is a regular part of your workflow and you need a more complete feature set.

    Use case Best tool Reason
    Single WMV under 1 GB, no install FreeConvert Fast, no watermark, browser-based
    Batch WMV conversion, local files Any Video Converter Free No limits, local, no watermark
    Confidential files (work, personal) Any Video Converter Free Local processing only
    Regular video work, polished UI Movavi Video Converter Best interface, quality optimizer
    Full video toolkit needed Wondershare UniConverter All-in-one, GPU acceleration
    Custom codec settings, power user CloudConvert Full FFmpeg parameter access

    Written by Alex Kumar. Alex writes evidence-first guides on video formats, conversion workflows, and codec settings for onlinevideoconvert.net.